メインコンテンツにスキップ

HP 15-ac121dx Motherboard Replacement

必要な工具と部品

  1. HP 15-ac121dx Motherboard Replacement, Battery: 手順 1、 1の画像 1
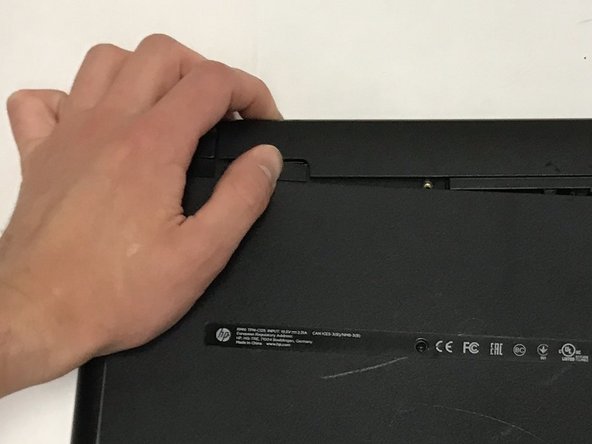
    • Remove all external devices from the computer.

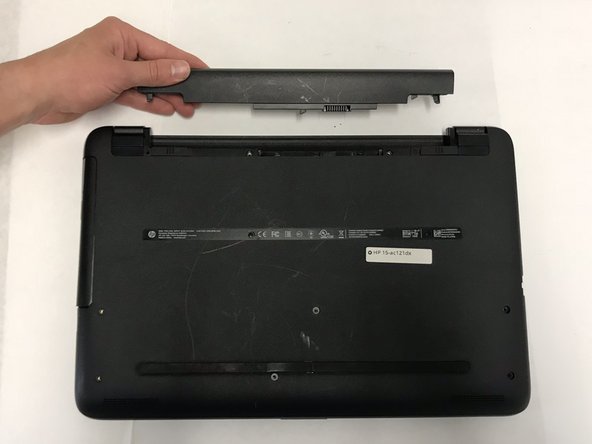
    • Remove the charging cord from the computer.

  2. HP 15-ac121dx Motherboard Replacement: 手順 2、 1の画像 1
    • Turn off the computer by holding the power button.

  3. HP 15-ac121dx Motherboard Replacement: 手順 3、 2の画像 1 HP 15-ac121dx Motherboard Replacement: 手順 3、 2の画像 2
    • To remove the battery, slide the left slider on the back to the unlocked position.

  4. HP 15-ac121dx Motherboard Replacement: 手順 4、 2の画像 1 HP 15-ac121dx Motherboard Replacement: 手順 4、 2の画像 2
    • Push the right slider inwards.

    • Remove the battery out by pulling straight out and to the right.

  5. HP 15-ac121dx Motherboard Replacement, Back Panel: 手順 5、 3の画像 1 HP 15-ac121dx Motherboard Replacement, Back Panel: 手順 5、 3の画像 2 HP 15-ac121dx Motherboard Replacement, Back Panel: 手順 5、 3の画像 3
    • Locate the CD Compartment panel and gently slide it out.

  6. HP 15-ac121dx Motherboard Replacement: 手順 6、 1の画像 1
    • Remove the back of the laptop by unscrewing the screws shown.

    • Also remove the other 5 Phillips screws lining the back cover.

  7. HP 15-ac121dx Motherboard Replacement: 手順 7、 3の画像 1 HP 15-ac121dx Motherboard Replacement: 手順 7、 3の画像 2 HP 15-ac121dx Motherboard Replacement: 手順 7、 3の画像 3
    • Using the prying tool, wedge it underneath the back of the laptop and do the same all around until the back comes off.

    • Dont forget to unscrew 2 screws under 2 plastic tabs (one on each hing). The lid will not come off without them being removed!

  8. HP 15-ac121dx Motherboard Replacement, Fan: 手順 8、 3の画像 1 HP 15-ac121dx Motherboard Replacement, Fan: 手順 8、 3の画像 2 HP 15-ac121dx Motherboard Replacement, Fan: 手順 8、 3の画像 3
    • Locate the Fan as shown.

    • Pull out the black cable, with four wires attached from its port.

  9. HP 15-ac121dx Motherboard Replacement: 手順 9、 2の画像 1 HP 15-ac121dx Motherboard Replacement: 手順 9、 2の画像 2
    • Pull out the white cable wire from its port.

    • Unscrew the two black Phillips screws holding in the fan.

  10. HP 15-ac121dx Motherboard Replacement: 手順 10、 2の画像 1 HP 15-ac121dx Motherboard Replacement: 手順 10、 2の画像 2
    • Remove fan.

    • Unscrew the two screws holding in the fan.

  11. HP 15-ac121dx Motherboard Replacement, CD Compartment: 手順 11、 3の画像 1 HP 15-ac121dx Motherboard Replacement, CD Compartment: 手順 11、 3の画像 2 HP 15-ac121dx Motherboard Replacement, CD Compartment: 手順 11、 3の画像 3
    • Locate the CD Compartment as shown and gently slide it out.

  12. HP 15-ac121dx Motherboard Replacement, Motherboard: 手順 12、 1の画像 1
    • Remove the TEN 3mm screws.

    • Remove the ONE 9mm screw.

  13. HP 15-ac121dx Motherboard Replacement: 手順 13、 2の画像 1 HP 15-ac121dx Motherboard Replacement: 手順 13、 2の画像 2
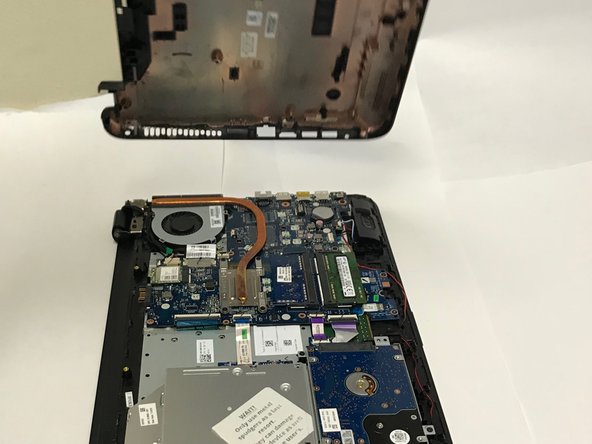
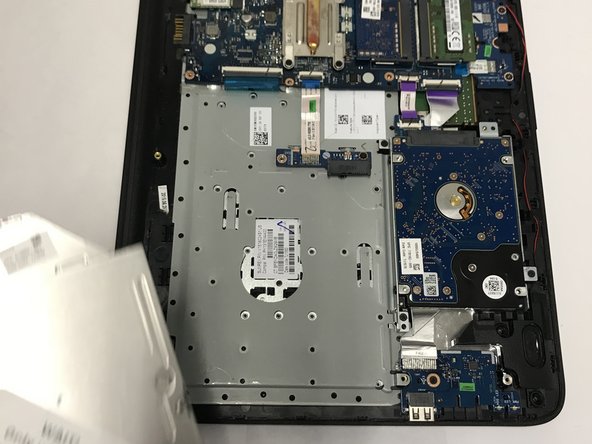
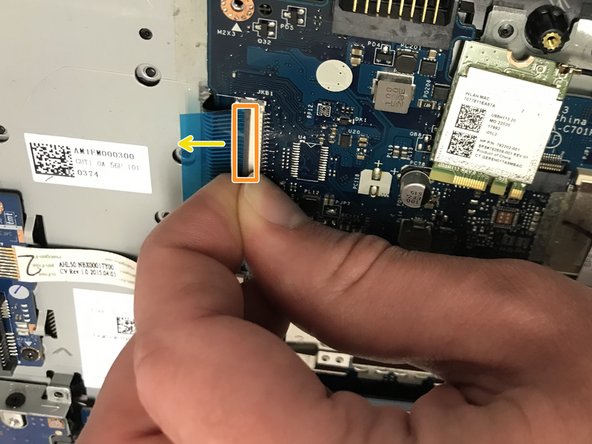
    • Locate the four ribbon clips.

    • Lift the grey part of the ribbon clips.

    • Pull the ribbon cable out and repeat this step for all four ribbon cables.

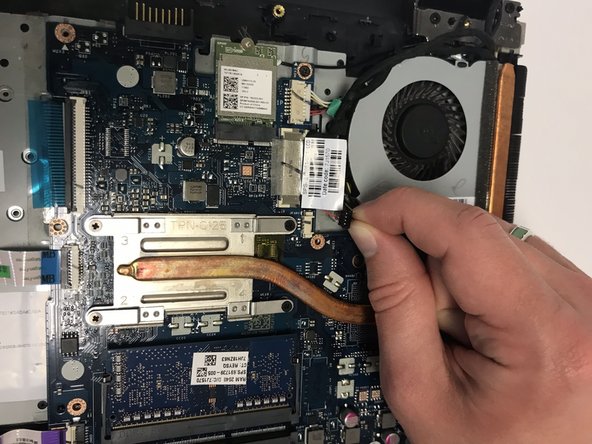
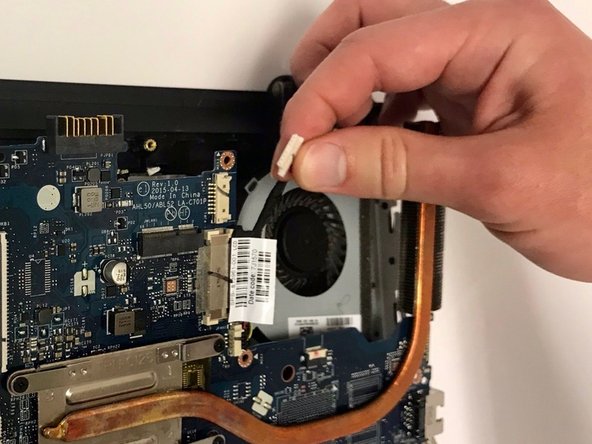
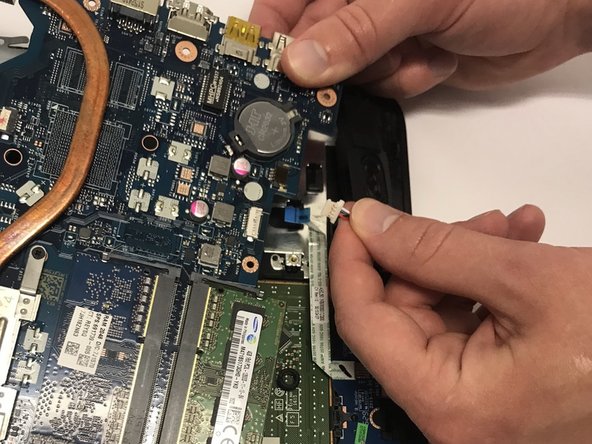
    • Also use a spudger and release the TWO cables attaching the hard drive to the motherboard. Another ribbon cable is located where the fan was sitting.

  14. HP 15-ac121dx Motherboard Replacement: 手順 14、 2の画像 1 HP 15-ac121dx Motherboard Replacement: 手順 14、 2の画像 2
    • Pull out the white cable (contains red and white cable attached to a black support) with wires from its port.

  15. HP 15-ac121dx Motherboard Replacement: 手順 15、 1の画像 1
    • Remove the motherboard.

終わりに

To reassemble your device, follow these instructions in reverse order.

ある他の人がこのガイドを完成しました。

作成者

4人の作成者と共同で作成されました。

Onose Aigbe

メンバー登録日: 01/30/18

390 ポイント

3のガイドは作成済み

チーム

Baylor, Team S1-G2, Johnson Spring 2018 Baylor, Team S1-G2, Johnson Spring 2018人のメンバー

BU-JOHNSON-S18S1G2

3 メンバー

6のガイドは作成済み

コメント 1 件

Pls can the motherboard of HP - 15 ac-250g5 replacethe board of HP 15 ac-121dx since they have the same body structure.

Emeka Jeffrey - 返信

コメントを追加

統計データ:

過去 24時間: 0

過去 7 日: 1

過去 30 日: 8

今までの合計 1,350