メインコンテンツにスキップ

HKC P774A Digitizer Replacement

必要な工具と部品

  1. HKC P774A Digitizer Replacement, Digitizer: 手順 1、 3の画像 1 HKC P774A Digitizer Replacement, Digitizer: 手順 1、 3の画像 2 HKC P774A Digitizer Replacement, Digitizer: 手順 1、 3の画像 3
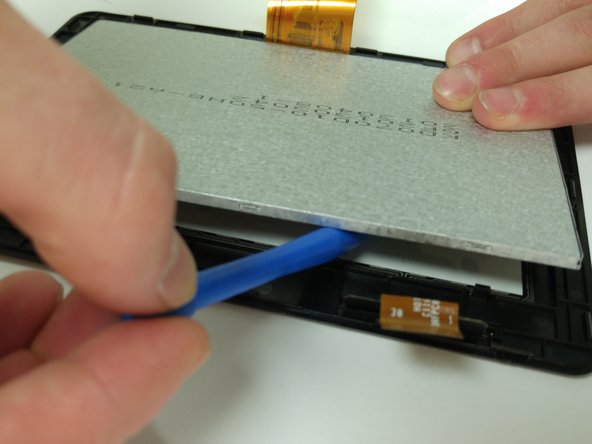
    • Insert the flat end of the spudger into the side of the device

    • This will create a gap between the device and screen housing.

    • Insert the plastic opening tool into this gap and move it along this gap.

    • Make sure not to bent the digitizer during this step.

    • The screen housing and device will now be separated.

  2. HKC P774A Digitizer Replacement: 手順 2、 3の画像 1 HKC P774A Digitizer Replacement: 手順 2、 3の画像 2 HKC P774A Digitizer Replacement: 手順 2、 3の画像 3
    この手順で使用する道具:
    Tweezers
    $4.99
    購入する
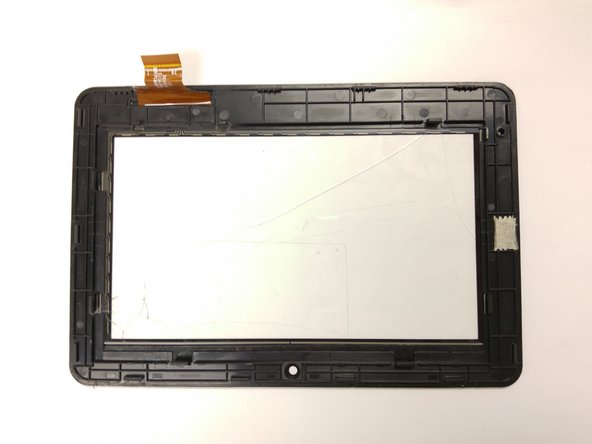
    • Once the digitizer has been been removed from the body, disconnect the digitizer band from the motherboard.

    • Two small black pins (circled in red) will need to be unlocked.

    • Unlock the pins by pulling them outward with the tweezers.

    • Make sure the pins are released entirely before attempting to remove the band.

    • Remove the band using the tweezers.

  3. HKC P774A Digitizer Replacement: 手順 3、 3の画像 1 HKC P774A Digitizer Replacement: 手順 3、 3の画像 2 HKC P774A Digitizer Replacement: 手順 3、 3の画像 3
    • Once the digitizer has been disconnected from the motherboard, the LCD screen must be removed from the digitizer.

    • Push open the tabs (circled in red) using the flat end of the plastic spudger.

    • Be sure not to bend the digitizer while prying.

    • Continue to release all tabs while continuing to pry the LCD away from the digitizer.

終わりに

To reassemble your device, follow these instructions in reverse order.

ある他の人がこのガイドを完成しました。

作成者

4人の作成者と共同で作成されました。

Sean McCauley

メンバー登録日: 10/26/15

512 ポイント

4のガイドは作成済み

チーム

Montana Tech, Team 10-1, Shirk Fall 2015 Montana Tech, Team 10-1, Shirk Fall 2015人のメンバー

MTUM-SHIRK-F15S10G1

4 メンバー

8のガイドは作成済み

0 件のコメント

コメントを追加

統計データ:

過去 24時間: 0

過去 7 日: 1

過去 30 日: 3

今までの合計 158