メインコンテンツにスキップ

Graco Literider Classic Connect Seat Replacement

必要な工具と部品

  1. Graco Literider Classic Connect Seat Replacement, Seat: 手順 1、 2の画像 1 Graco Literider Classic Connect Seat Replacement, Seat: 手順 1、 2の画像 2
    • Flip the stroller over so the back of the seat points upward.

    • Locate the twelve 12 mm Phillips screws holding the fabric to the frame of the stroller. Six are found along the back of the seat, and the other six are along the bottom of the seat.

  2. Graco Literider Classic Connect Seat Replacement: 手順 2、 2の画像 1 Graco Literider Classic Connect Seat Replacement: 手順 2、 2の画像 2
    • Using a Phillips #1 screwdriver, remove the twelve 12 mm screws and set them aside.

  3. Graco Literider Classic Connect Seat Replacement: 手順 3、 2の画像 1 Graco Literider Classic Connect Seat Replacement: 手順 3、 2の画像 2
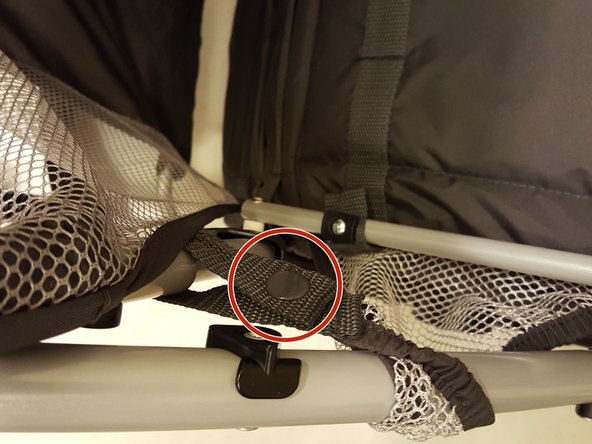
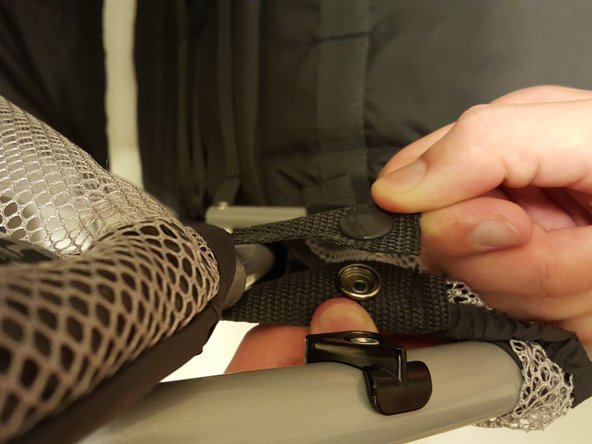
    • Locate the two buttons holding the fabric basket frame on either side of the stroller.

    • Unbutton the two buttons.

  4. Graco Literider Classic Connect Seat Replacement: 手順 4、 2の画像 1 Graco Literider Classic Connect Seat Replacement: 手順 4、 2の画像 2
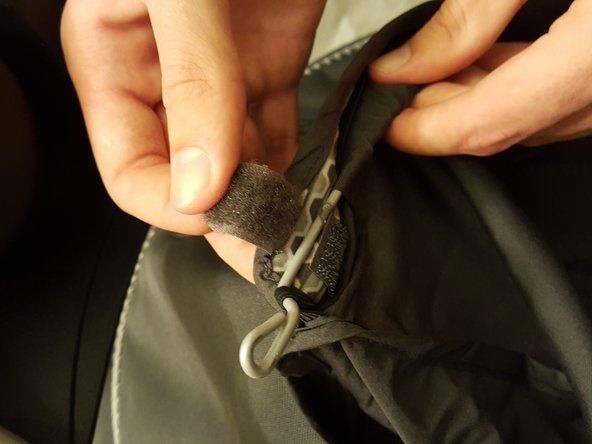
    • Locate the three velcro straps holding the seat to the canopy.

    • Undo the three straps.

  5. Graco Literider Classic Connect Seat Replacement: 手順 5、 1の画像 1
    • Remove the seat from the frame.

    • When replacing the seat on the frame, some additional force may be required to insert the screws into their proper places.

終わりに

To reassemble your device, follow these instructions in reverse order.

ある他の人がこのガイドを完成しました。

作成者

2人の作成者と共同で作成されました。

Tyler Laird

メンバー登録日: 09/29/15

540 ポイント

3のガイドは作成済み

チーム

Cal Poly, Team 11-4, Forte Fall 2015 Cal Poly, Team 11-4, Forte Fall 2015人のメンバー

CPSU-FORTE-F15S11G4

5 メンバー

3のガイドは作成済み

0 件のコメント

コメントを追加

統計データ:

過去 24時間: 4

過去 7 日: 10

過去 30 日: 20

今までの合計 1,069