メインコンテンツにスキップ

Gourmia GAF536 Screen Circuit Board Replacement

必要な工具と部品

  1. Gourmia GAF536 Screen Circuit Board Replacement, Grey Top: 手順 1、 1の画像 1
    • Use blue opening tool to pry open one side of grey top

    • If there is a loud pop, it is not broken.

  2. Gourmia GAF536 Screen Circuit Board Replacement: 手順 2、 1の画像 1
    • Pry open all four sides.

  3. Gourmia GAF536 Screen Circuit Board Replacement: 手順 3、 1の画像 1
    • Remove grey top.

  4. Gourmia GAF536 Screen Circuit Board Replacement, Screen Circuit Board: 手順 4、 1の画像 1
    • Make sure hat that your air-fryer is turned-off and unplugged to prevent electrical shock.

    • Locate the internal tabs that hold the screen in place. (There should be 2 tabs on top, 2 tabs on the bottom, and 1 on each side.)

    • Focus on the side tabs.

  5. Gourmia GAF536 Screen Circuit Board Replacement: 手順 5、 3の画像 1 Gourmia GAF536 Screen Circuit Board Replacement: 手順 5、 3の画像 2 Gourmia GAF536 Screen Circuit Board Replacement: 手順 5、 3の画像 3
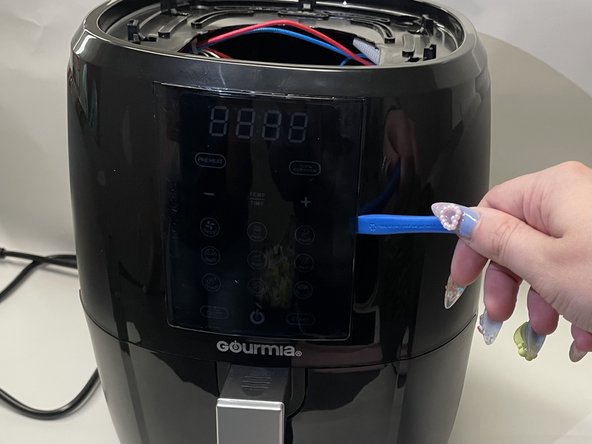
    • Using your finger or the metal sludger, release the tab on the side.

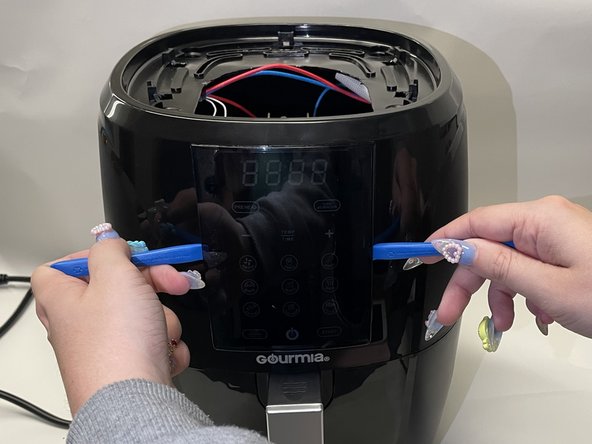
    • Gently push the open side forward and place the blue opener into the gap from the front.

    • Repeat this on the other side.

  6. Gourmia GAF536 Screen Circuit Board Replacement: 手順 6、 2の画像 1 Gourmia GAF536 Screen Circuit Board Replacement: 手順 6、 2の画像 2
    • Once both sides of the screen have a blue opener, the screen can be safely popped out.

  7. Gourmia GAF536 Screen Circuit Board Replacement: 手順 7、 3の画像 1 Gourmia GAF536 Screen Circuit Board Replacement: 手順 7、 3の画像 2 Gourmia GAF536 Screen Circuit Board Replacement: 手順 7、 3の画像 3
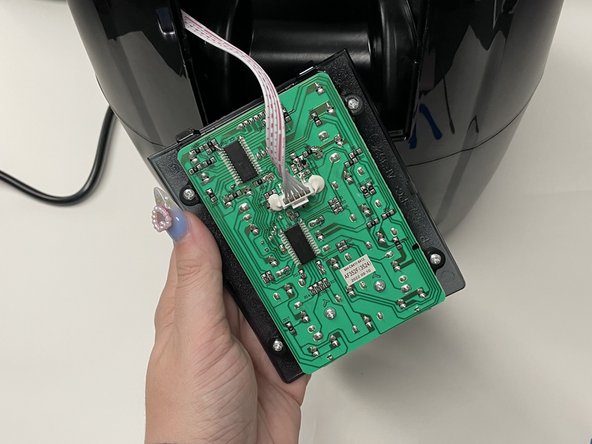
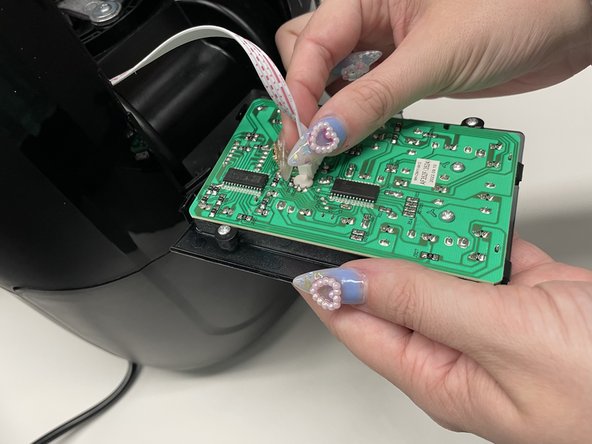
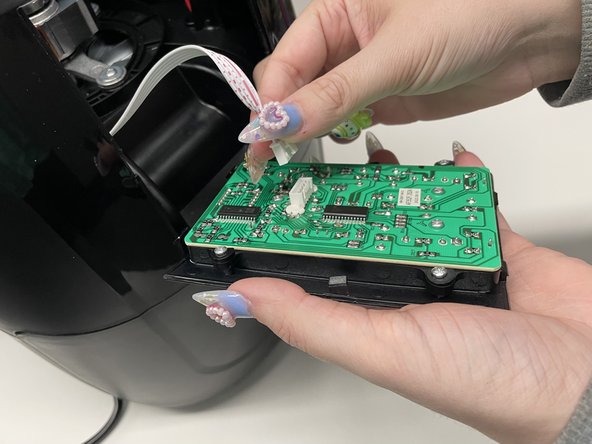
    • Remove the cable connecting the circuit board to the air-fryer’s motherboard by gently pinching the tab on the side connected to the screen.

  8. Gourmia GAF536 Screen Circuit Board Replacement: 手順 8、 2の画像 1 Gourmia GAF536 Screen Circuit Board Replacement: 手順 8、 2の画像 2
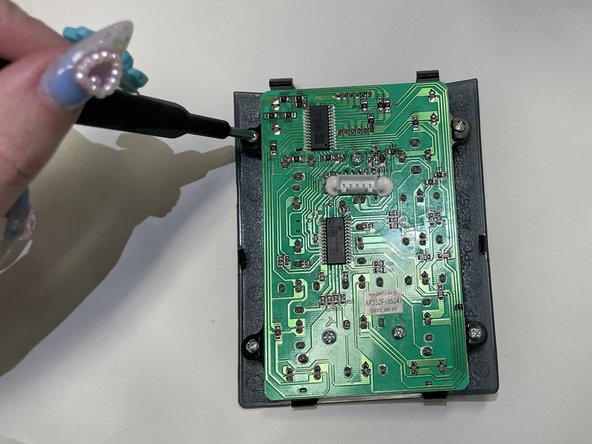
    • Remove all of the screws that attach the circuit board to the display screen and casing.

    • 7x PH 02 Screws: 5mm x 10 mm.

  9. Gourmia GAF536 Screen Circuit Board Replacement: 手順 9、 2の画像 1 Gourmia GAF536 Screen Circuit Board Replacement: 手順 9、 2の画像 2
    • The circuit board can now be detached from the display screen, removed from the plastic casing, and replaced.

終わりに

To reassemble your device, follow these instructions in reverse order.

ある他の人がこのガイドを完成しました。

作成者

1人の作成者と共同作成されました。

Hannah Fisher

メンバー登録日: 09/08/23

309 ポイント

2のガイドは作成済み

チーム

University of New Orleans, Team 3-5, McDonald Fall 2023 University of New Orleans, Team 3-5, McDonald Fall 2023人のメンバー

UNO-MCDONALD-F23S3G5

3 メンバー

6のガイドは作成済み

0 件のコメント

コメントを追加

統計データ:

過去 24時間: 0

過去 7 日: 9

過去 30 日: 75

今までの合計 336