メインコンテンツにスキップ

Google Pixelbook Sound Card Replacement

必要な工具と部品

  1. Google Pixelbook Sound Card Replacement, Battery (Back Panel): 手順 1、 3の画像 1 Google Pixelbook Sound Card Replacement, Battery (Back Panel): 手順 1、 3の画像 2 Google Pixelbook Sound Card Replacement, Battery (Back Panel): 手順 1、 3の画像 3
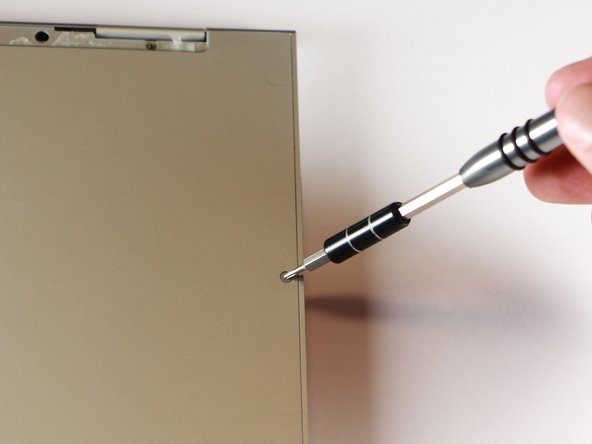
    • Use the iFixit opening tools or a metal spudger to pry the rubber covers off the back of your Pixelbook.

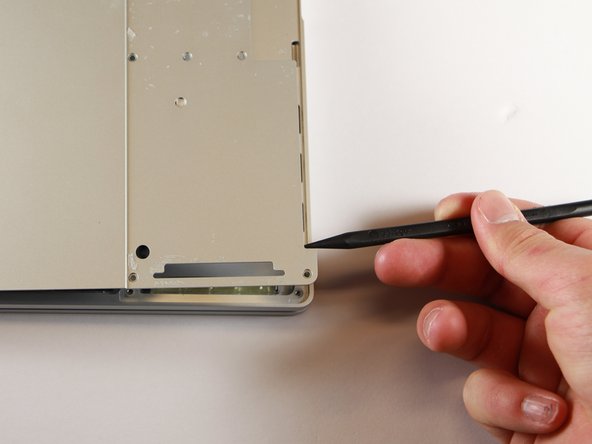
    • Peel the linings off completely until the back of the Pixelbook looks bare.

  2. Google Pixelbook Sound Card Replacement: 手順 2、 2の画像 1 Google Pixelbook Sound Card Replacement: 手順 2、 2の画像 2
    • Remove the two yellow 2.0mm screws by using a T3 Torx screwdriver.

  3. Google Pixelbook Sound Card Replacement: 手順 3、 3の画像 1 Google Pixelbook Sound Card Replacement: 手順 3、 3の画像 2 Google Pixelbook Sound Card Replacement: 手順 3、 3の画像 3
    • Remove the seventeen 3.0mm T5 Torx screws from the bottom panel.

  4. Google Pixelbook Sound Card Replacement: 手順 4、 3の画像 1 Google Pixelbook Sound Card Replacement: 手順 4、 3の画像 2 Google Pixelbook Sound Card Replacement: 手順 4、 3の画像 3
    • Use the nylon spudger to pry the edge of the Pixelbook up until you can grab the edge with your fingers.

    • Open the back panel completely and lay it flat so you see the whole inside of the computer.

  5. Google Pixelbook Sound Card Replacement: 手順 5、 2の画像 1 Google Pixelbook Sound Card Replacement: 手順 5、 2の画像 2
    • Remove the yellow 2.0mm screw from the middle of the panel by using the T3 Torx screwdriver to turn the screw counterclockwise.

  6. Google Pixelbook Sound Card Replacement: 手順 6、 2の画像 1 Google Pixelbook Sound Card Replacement: 手順 6、 2の画像 2
    • Remove the small, black casing by using the spudger to lift it up from its place.

  7. Google Pixelbook Sound Card Replacement: 手順 7、 1の画像 1
    • Disconnect the flat, black cord from the main component by using a spudger to push it out of the slot, or by using your hand to carefully pull it out.

    • Your back panel is now free from the main component.

  8. Google Pixelbook Sound Card Replacement, Right Charging Port: 手順 8、 2の画像 1 Google Pixelbook Sound Card Replacement, Right Charging Port: 手順 8、 2の画像 2
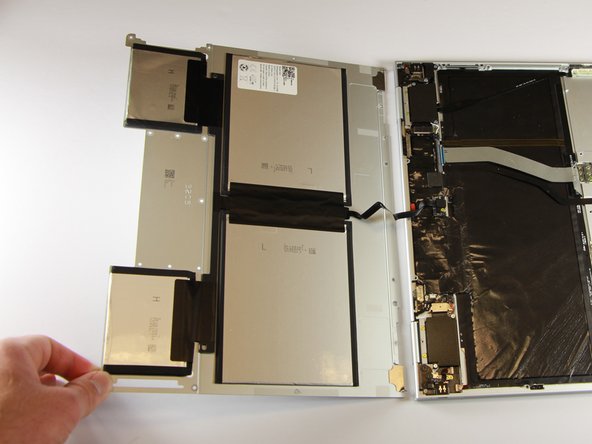
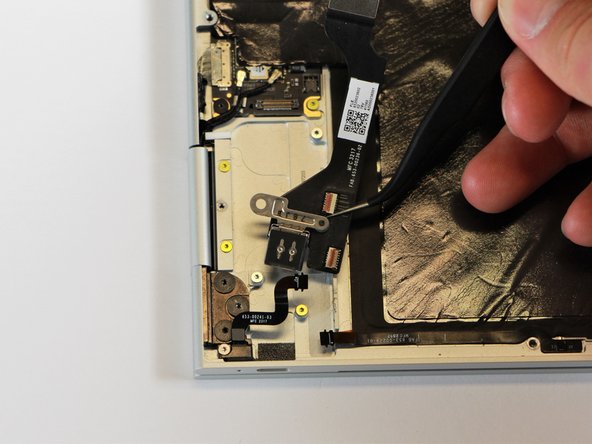
    • Remove the three 2.0mm black screws from the sound card by using a T5 Torx screwdriver to turn them counterclockwise.

    • Remove the gold 3.0mm screw by using a T3 Torx screwdriver to turn it counterclockwise.

  9. Google Pixelbook Sound Card Replacement: 手順 9、 1の画像 1
    • Disconect the thin, black and red cord from the motherboard by using the spudger to snap the connector up and out of place.

  10. Google Pixelbook Sound Card Replacement: 手順 10、 1の画像 1
    • Remove the yellow 2.0mm screw by using the T3 Torx screwdriver to turn the screw counterclockwise.

  11. Google Pixelbook Sound Card Replacement: 手順 11、 1の画像 1
    • Remove the small, red component by lifting it up with the spudger.

  12. Google Pixelbook Sound Card Replacement: 手順 12、 1の画像 1
    • Disconnect the metal component of the thin, black component by lifting it up with the spudger.

  13. Google Pixelbook Sound Card Replacement: 手順 13、 2の画像 1 Google Pixelbook Sound Card Replacement: 手順 13、 2の画像 2
    • Remove the right charging port by picking it up with the tweezers and lifting it from the computer.

  14. Google Pixelbook Sound Card Replacement, Sound Card: 手順 14、 1の画像 1
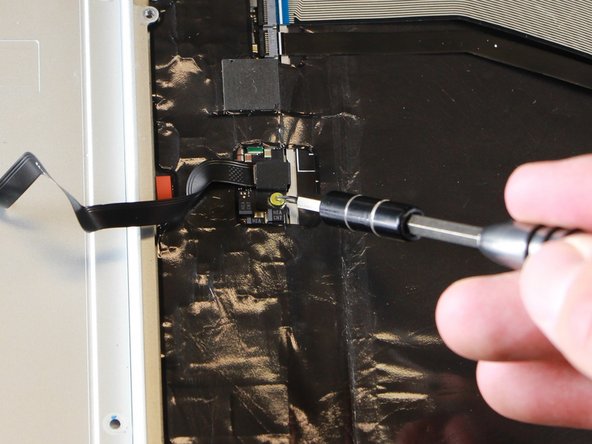
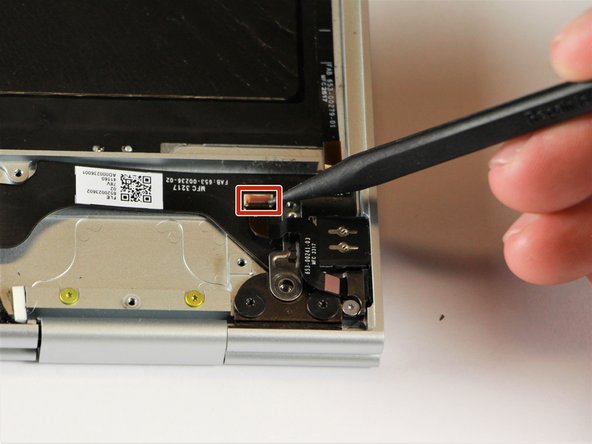
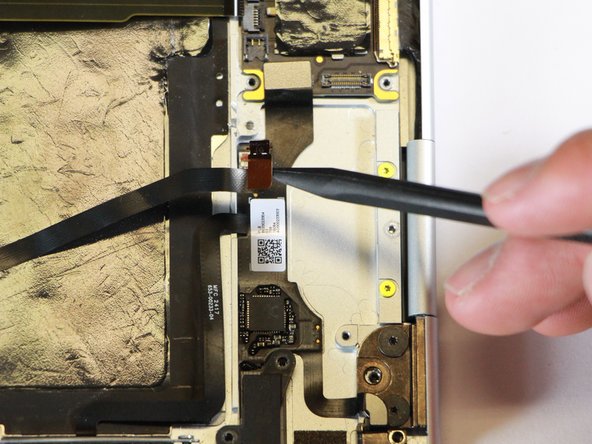
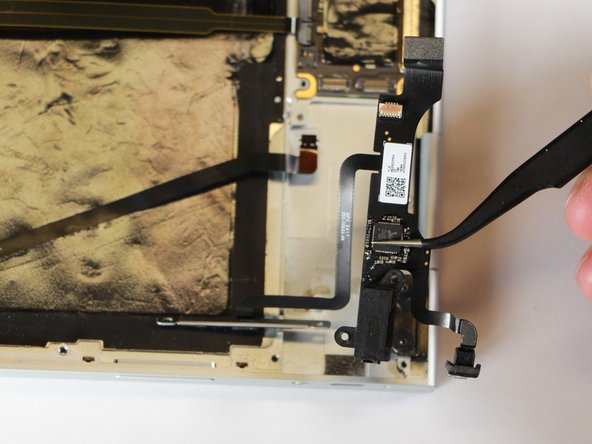
    • Use the spudger to disconnect the sound card from the motherboard by pulling the connector up and away from the motherboard.

  15. Google Pixelbook Sound Card Replacement: 手順 15、 2の画像 1 Google Pixelbook Sound Card Replacement: 手順 15、 2の画像 2
    • Flip open the connection point on the sound card by using the spudger to pop the latch upward.

    • Disconnect the black ribbon cable from the sound card by using the spudger or your fingers to pull the cable out and away from the connecting port.

  16. Google Pixelbook Sound Card Replacement: 手順 16、 2の画像 1 Google Pixelbook Sound Card Replacement: 手順 16、 2の画像 2
    • Use the needle-nose tweezers to remove the silver casing by lifting it up and out of the laptop.

  17. Google Pixelbook Sound Card Replacement: 手順 17、 1の画像 1
    • Disconnect the speaker from the laptop frame by pulling the black ribbon cable out and away from the port.

    • The speaker may be tough to pull out of the frame if it has not been disconnected previously.

  18. Google Pixelbook Sound Card Replacement: 手順 18、 1の画像 1
    • Use a T3 Torx screwdriver to remove the two silver 3.0mm screws located on the vertical edge of the casing by turning the screws counterclockwise.

  19. Google Pixelbook Sound Card Replacement: 手順 19、 2の画像 1 Google Pixelbook Sound Card Replacement: 手順 19、 2の画像 2
    • Use the needle-nose tweezers to remove the sound card by lifting it up and out of the laptop.

終わりに

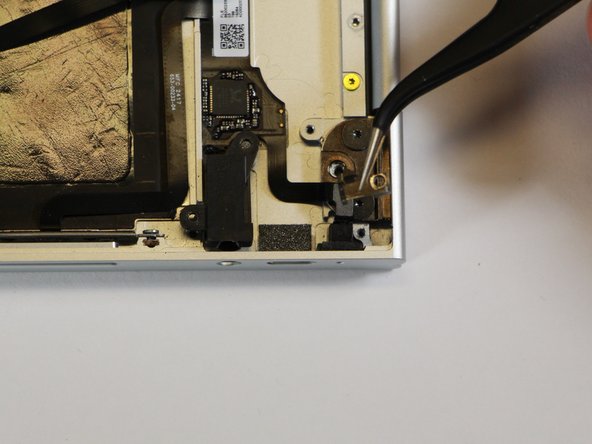
To reassemble your device, follow these instructions in reverse order.

2 の人々がこのガイドを完成させました。

作成者

4人の作成者と共同で作成されました。

Derrick Unger

メンバー登録日: 01/24/18

361 ポイント

2のガイドは作成済み

チーム

Cal Poly, Team S18-G1, Livingston Winter 2018 Cal Poly, Team S18-G1, Livingston Winter 2018人のメンバー

CPSU-LIVINGSTON-W18S18G1

4 メンバー

7のガイドは作成済み

コメント 1 件

Great guide. My headphones broke inside the jack, tried many different techniques to get it out and am now looking to just replace the jack or soundcard. Anyone have any ideas where to source these parts? Looked everywhere, Inc eBay.

Ryan Clifford - 返信

コメントを追加

統計データ:

過去 24時間: 0

過去 7 日: 1

過去 30 日: 9

今までの合計 1,728