メインコンテンツにスキップ

Google Pixelbook Motherboard Replacement

必要な工具と部品

  1. Google Pixelbook Motherboard Replacement, Battery (Back Panel): 手順 1、 3の画像 1 Google Pixelbook Motherboard Replacement, Battery (Back Panel): 手順 1、 3の画像 2 Google Pixelbook Motherboard Replacement, Battery (Back Panel): 手順 1、 3の画像 3
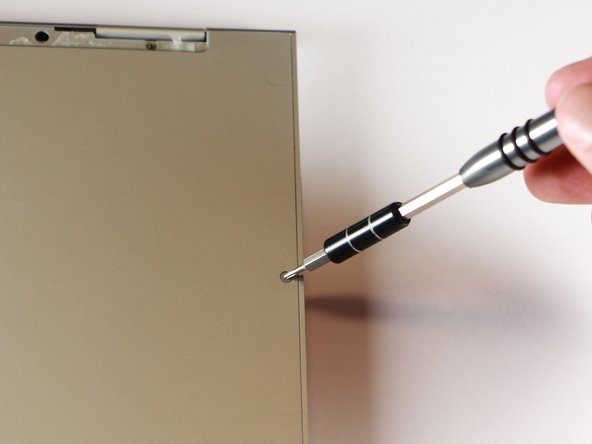
    • Use the iFixit opening tools or a metal spudger to pry the rubber covers off the back of your Pixelbook.

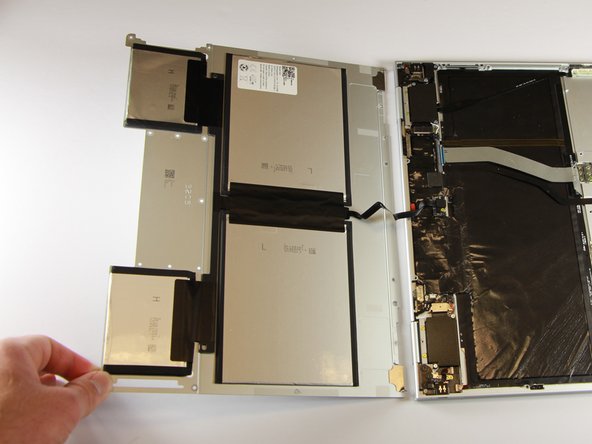
    • Peel the linings off completely until the back of the Pixelbook looks bare.

  2. Google Pixelbook Motherboard Replacement: 手順 2、 2の画像 1 Google Pixelbook Motherboard Replacement: 手順 2、 2の画像 2
    • Remove the two yellow 2.0mm screws by using a T3 Torx screwdriver.

  3. Google Pixelbook Motherboard Replacement: 手順 3、 3の画像 1 Google Pixelbook Motherboard Replacement: 手順 3、 3の画像 2 Google Pixelbook Motherboard Replacement: 手順 3、 3の画像 3
    • Remove the seventeen 3.0mm T5 Torx screws from the bottom panel.

  4. Google Pixelbook Motherboard Replacement: 手順 4、 3の画像 1 Google Pixelbook Motherboard Replacement: 手順 4、 3の画像 2 Google Pixelbook Motherboard Replacement: 手順 4、 3の画像 3
    • Use the nylon spudger to pry the edge of the Pixelbook up until you can grab the edge with your fingers.

    • Open the back panel completely and lay it flat so you see the whole inside of the computer.

  5. Google Pixelbook Motherboard Replacement: 手順 5、 2の画像 1 Google Pixelbook Motherboard Replacement: 手順 5、 2の画像 2
    • Remove the yellow 2.0mm screw from the middle of the panel by using the T3 Torx screwdriver to turn the screw counterclockwise.

  6. Google Pixelbook Motherboard Replacement: 手順 6、 2の画像 1 Google Pixelbook Motherboard Replacement: 手順 6、 2の画像 2
    • Remove the small, black casing by using the spudger to lift it up from its place.

  7. Google Pixelbook Motherboard Replacement: 手順 7、 1の画像 1
    • Disconnect the flat, black cord from the main component by using a spudger to push it out of the slot, or by using your hand to carefully pull it out.

    • Your back panel is now free from the main component.

  8. Google Pixelbook Motherboard Replacement, Left Charging Port: 手順 8、 2の画像 1 Google Pixelbook Motherboard Replacement, Left Charging Port: 手順 8、 2の画像 2
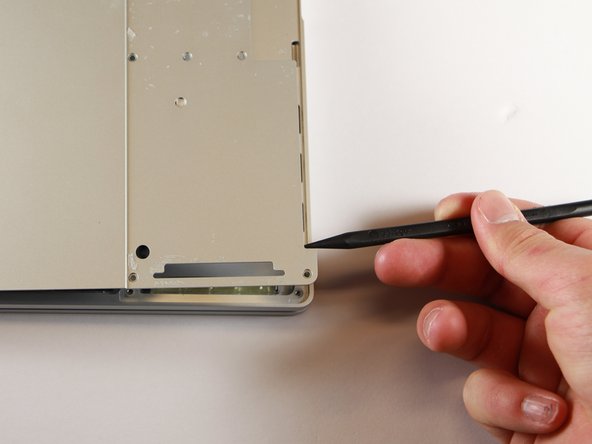
    • Remove the two 3.0mm silver screws from the thin, black component by using a T3 Torx screwdriver to turn the screws counterclockwise.

  9. Google Pixelbook Motherboard Replacement: 手順 9、 2の画像 1 Google Pixelbook Motherboard Replacement: 手順 9、 2の画像 2
    • Disconnect the thin, black and white cord from the motherboard by using the spudger to snap the connector up and out of place.

  10. Google Pixelbook Motherboard Replacement: 手順 10、 1の画像 1
    • Remove the thin, black component by pulling it up and out of the laptop with your fingers.

    • This photo shows the bottom screw still in the black box, but yours should be removed.

  11. Google Pixelbook Motherboard Replacement: 手順 11、 1の画像 1
    • Remove the gold 2.0mm corner screw by turning it counterclockwise with a T3 Torx screwdriver.

  12. Google Pixelbook Motherboard Replacement: 手順 12、 2の画像 1 Google Pixelbook Motherboard Replacement: 手順 12、 2の画像 2
    • Using needle-nose tweezers, remove the silver casing by lifting it up and out of the computer.

  13. Google Pixelbook Motherboard Replacement: 手順 13、 2の画像 1 Google Pixelbook Motherboard Replacement: 手順 13、 2の画像 2
    • Remove the three 3.0mm black screws on the right side by using a T5 Torx screwdriver to turn the screws counterclockwise.

    • Remove the silver 2.0mm screw on the left side by using a T3 Torx screwdriver to turn the screw counterclockwise.

  14. Google Pixelbook Motherboard Replacement: 手順 14、 1の画像 1
    • Disconnect the thin, black ribbon cable by using the spudger to lift it up from the computer.

  15. Google Pixelbook Motherboard Replacement: 手順 15、 2の画像 1 Google Pixelbook Motherboard Replacement: 手順 15、 2の画像 2
    • Use the needle-nose tweezers to remove the charging port by lifting the component up and out of the Pixelbook.

  16. Google Pixelbook Motherboard Replacement, Right Charging Port: 手順 16、 2の画像 1 Google Pixelbook Motherboard Replacement, Right Charging Port: 手順 16、 2の画像 2
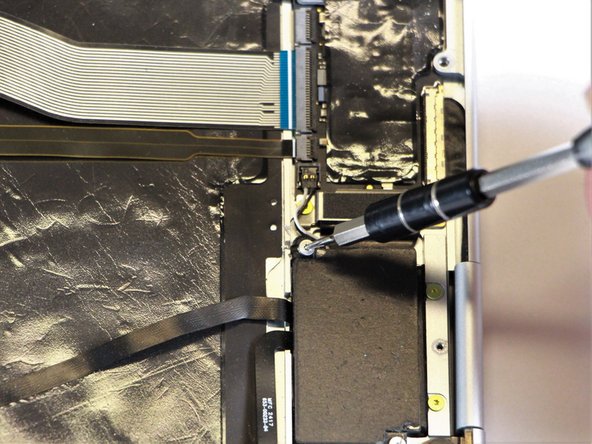
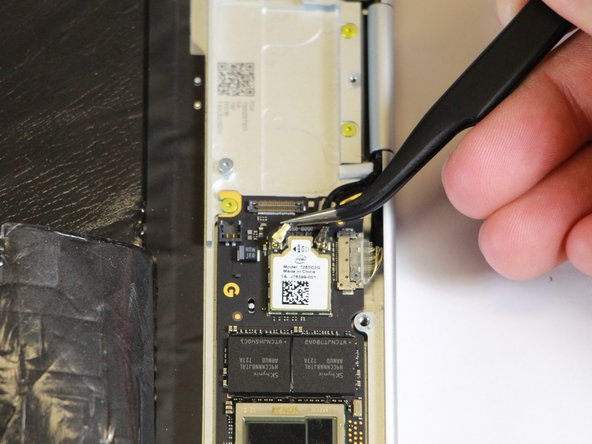
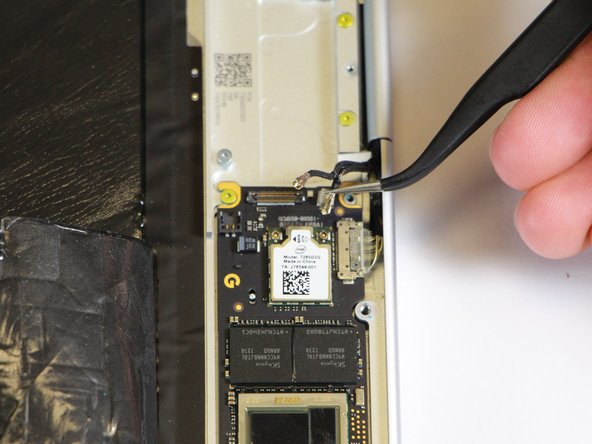
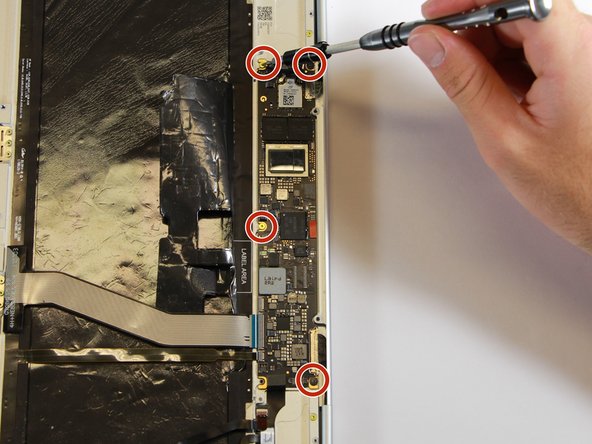
    • Remove the three 2.0mm black screws from the sound card by using a T5 Torx screwdriver to turn them counterclockwise.

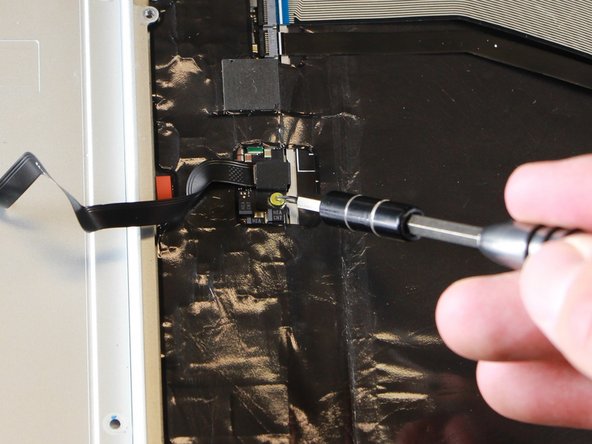
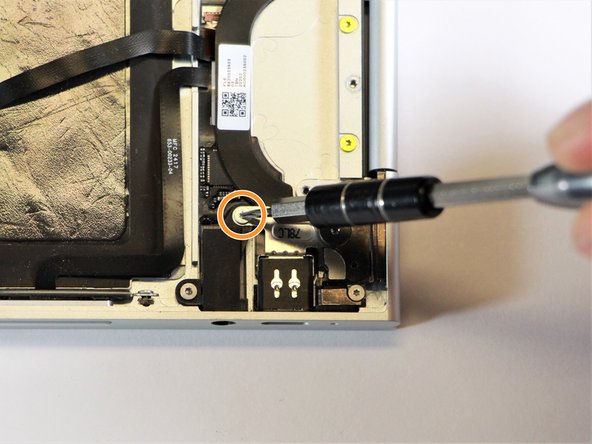
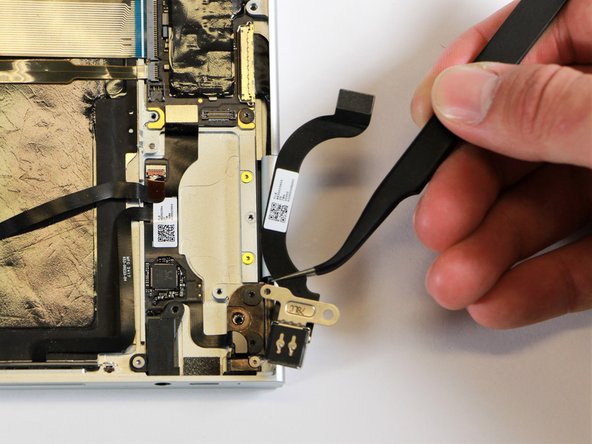
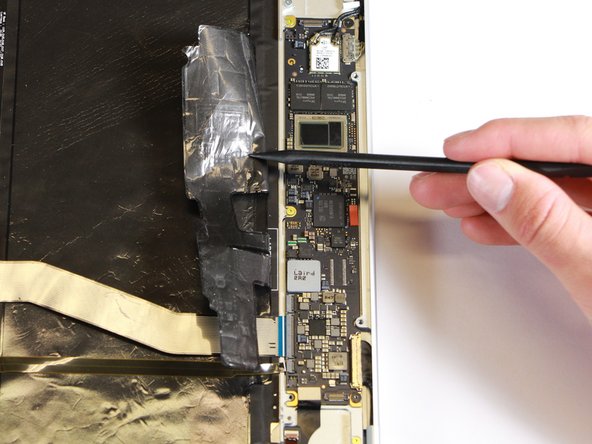
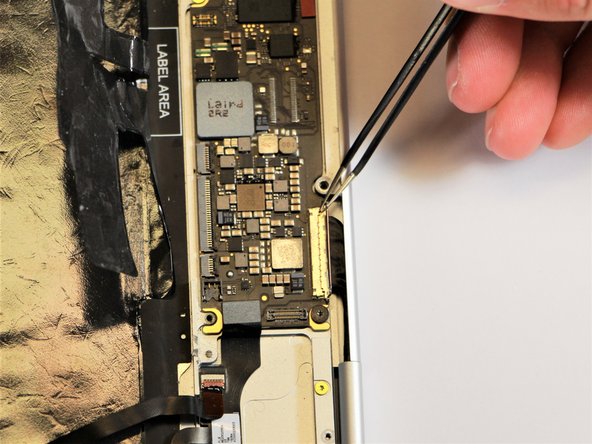
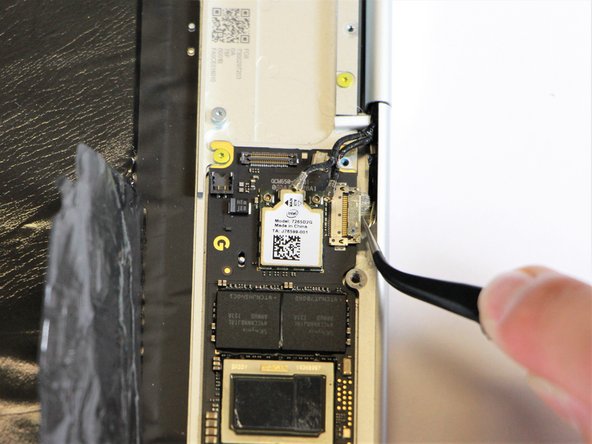
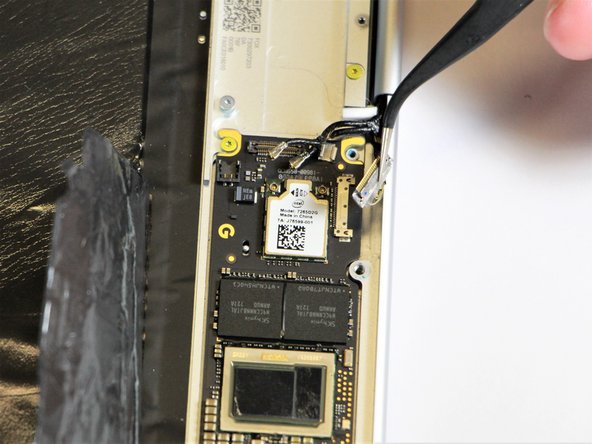
    • Remove the gold 3.0mm screw by using a T3 Torx screwdriver to turn it counterclockwise.

  17. Google Pixelbook Motherboard Replacement: 手順 17、 1の画像 1
    • Disconect the thin, black and red cord from the motherboard by using the spudger to snap the connector up and out of place.

  18. Google Pixelbook Motherboard Replacement: 手順 18、 1の画像 1
    • Remove the yellow 2.0mm screw by using the T3 Torx screwdriver to turn the screw counterclockwise.

  19. Google Pixelbook Motherboard Replacement: 手順 19、 1の画像 1
    • Remove the small, red component by lifting it up with the spudger.

  20. Google Pixelbook Motherboard Replacement: 手順 20、 1の画像 1
    • Disconnect the metal component of the thin, black component by lifting it up with the spudger.

  21. Google Pixelbook Motherboard Replacement: 手順 21、 2の画像 1 Google Pixelbook Motherboard Replacement: 手順 21、 2の画像 2
    • Remove the right charging port by picking it up with the tweezers and lifting it from the computer.

  22. Google Pixelbook Motherboard Replacement, Motherboard: 手順 22、 2の画像 1 Google Pixelbook Motherboard Replacement, Motherboard: 手順 22、 2の画像 2
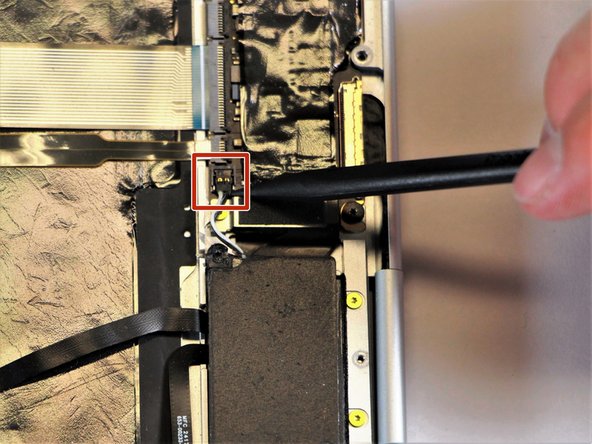
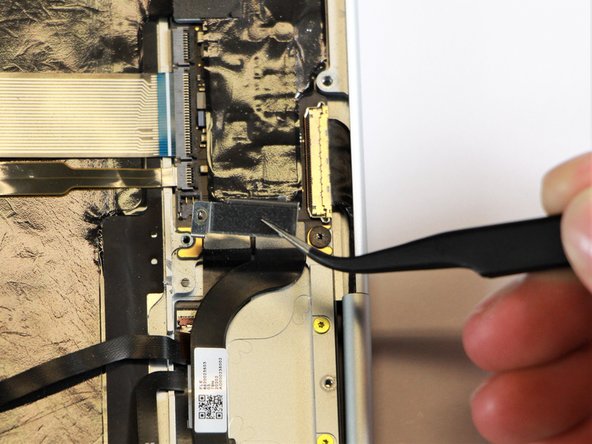
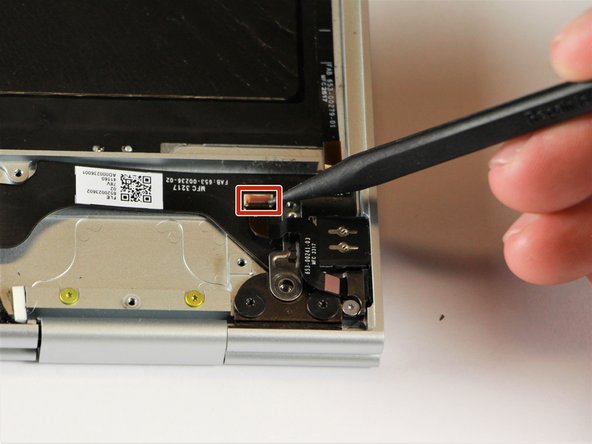
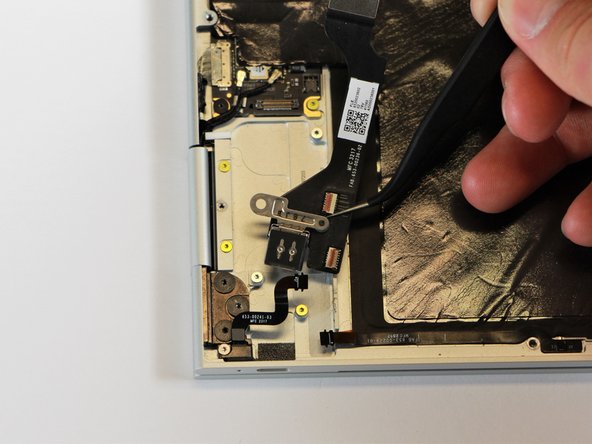
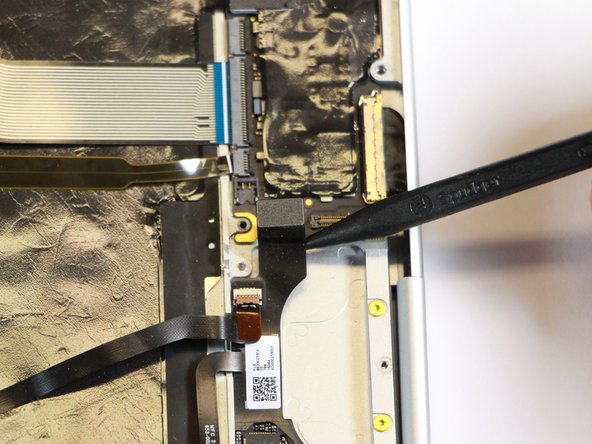
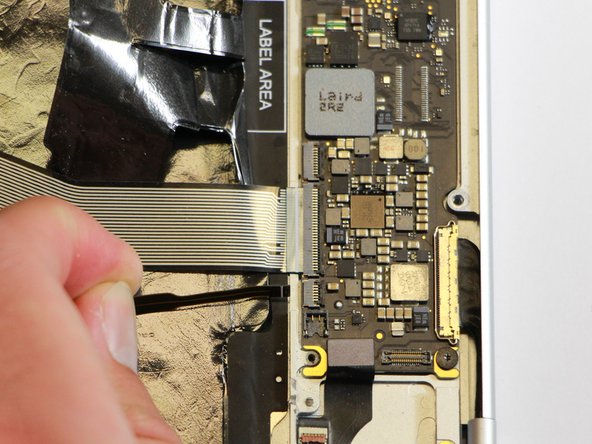
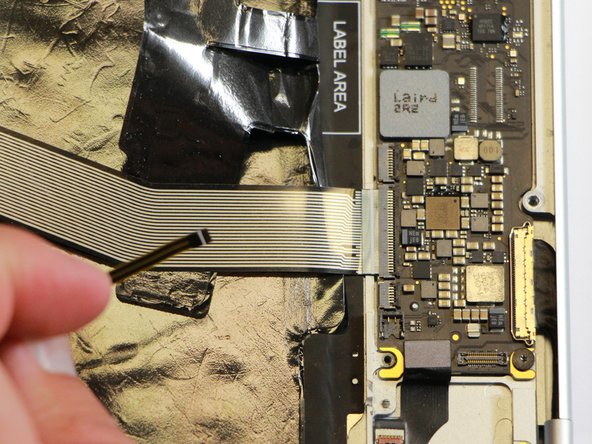
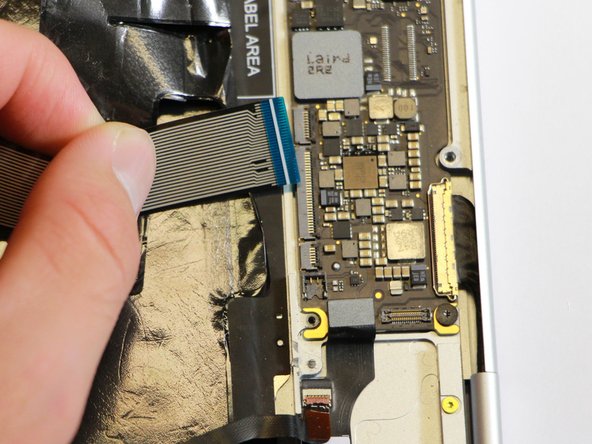
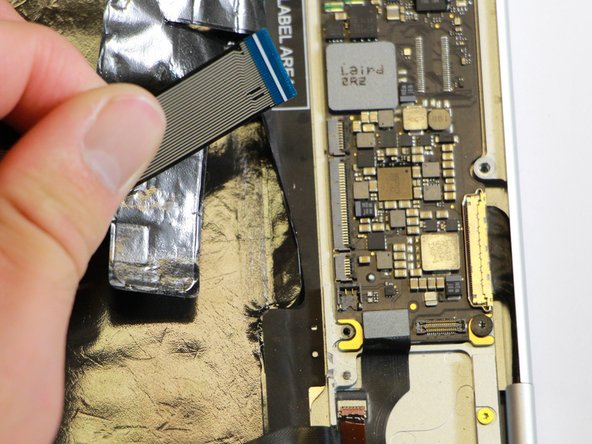
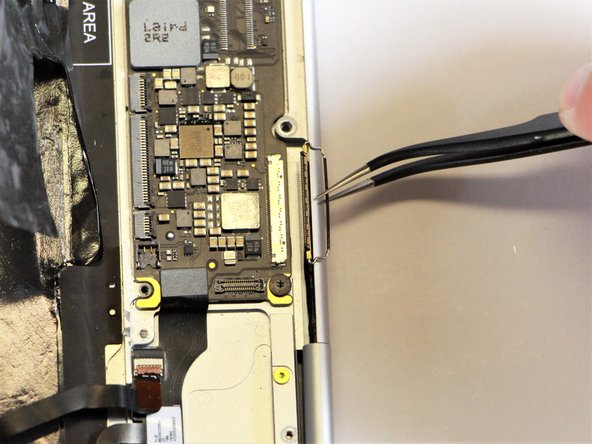
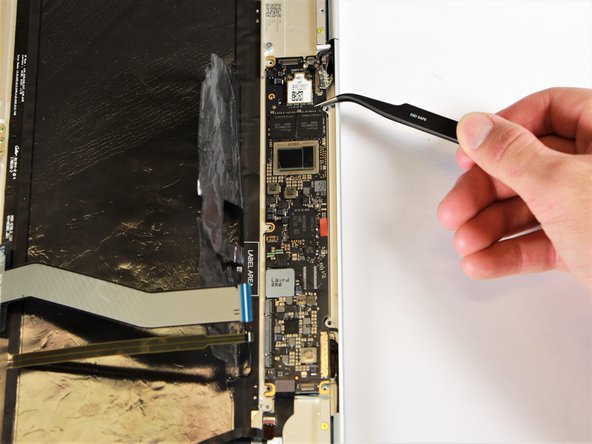
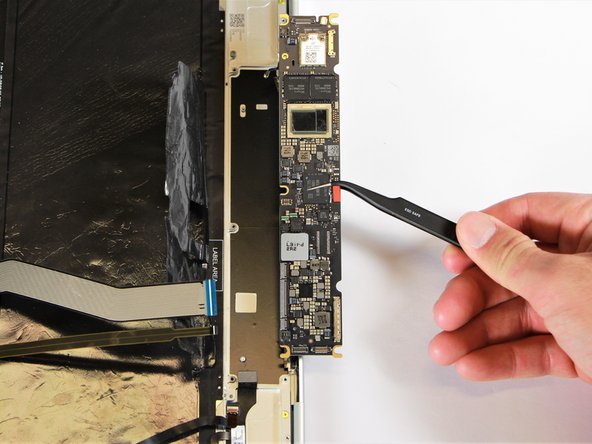
    • Disconnect the flat, black cord from the motherboard by using a spudger to push it upwards out of the slot, or by using your hand to carefully pull upward.

  23. Google Pixelbook Motherboard Replacement: 手順 23、 3の画像 1 Google Pixelbook Motherboard Replacement: 手順 23、 3の画像 2 Google Pixelbook Motherboard Replacement: 手順 23、 3の画像 3
    • Fold back the plastic covering on the motherboard using the nylon spudger.

  24. Google Pixelbook Motherboard Replacement: 手順 24、 3の画像 1 Google Pixelbook Motherboard Replacement: 手順 24、 3の画像 2 Google Pixelbook Motherboard Replacement: 手順 24、 3の画像 3
    • Disconnect the two black cables from the motherboard by pulling the connectors upward using the needle-nose tweezers.

  25. Google Pixelbook Motherboard Replacement: 手順 25、 3の画像 1 Google Pixelbook Motherboard Replacement: 手順 25、 3の画像 2 Google Pixelbook Motherboard Replacement: 手順 25、 3の画像 3
    • Disconnect the flat ribbon cable from the motherboard by using your hand to gently pull it out of the socket, or by using a pair of tweezers to pull it out.

  26. Google Pixelbook Motherboard Replacement: 手順 26、 3の画像 1 Google Pixelbook Motherboard Replacement: 手順 26、 3の画像 2 Google Pixelbook Motherboard Replacement: 手順 26、 3の画像 3
    • Disconnect the large flat ribbon cable from the motherboard by using your hand to gently pull it out of the socket, or by using a pair of tweezers to pull it out.

  27. Google Pixelbook Motherboard Replacement: 手順 27、 3の画像 1 Google Pixelbook Motherboard Replacement: 手順 27、 3の画像 2 Google Pixelbook Motherboard Replacement: 手順 27、 3の画像 3
    • Raise the retaining latch of the motherboard connector by using the needle-nose tweezers.

    • Disconnect the large flat cable from the motherboard by gently pulling on the latch using the needle-nose tweezers.

  28. Google Pixelbook Motherboard Replacement: 手順 28、 3の画像 1 Google Pixelbook Motherboard Replacement: 手順 28、 3の画像 2 Google Pixelbook Motherboard Replacement: 手順 28、 3の画像 3
    • Disconnect the flat cable from the motherboard by using the needle-nose tweezers to gently pull the connector out of the slot.

  29. Google Pixelbook Motherboard Replacement: 手順 29、 2の画像 1 Google Pixelbook Motherboard Replacement: 手順 29、 2の画像 2
    • Remove the gold 3.0mm screws and the black, flat 2.0mm screws from the motherboard by using a T3 Torx screwdriver to turn the screws counterclockwise.

  30. Google Pixelbook Motherboard Replacement: 手順 30、 3の画像 1 Google Pixelbook Motherboard Replacement: 手順 30、 3の画像 2 Google Pixelbook Motherboard Replacement: 手順 30、 3の画像 3
    • Remove the motherboard by gently lifting it out of the laptop using the needle-nose tweezers.

終わりに

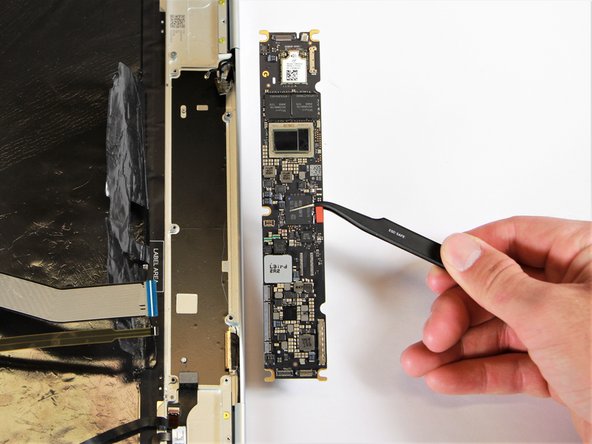
To reassemble your device, follow these instructions in reverse order.

9 の人々がこのガイドを完成させました。

作成者

3人の作成者と共同で作成されました。

Logan Lawson

メンバー登録日: 01/24/18

410 ポイント

1ガイドが承認済み

チーム

Cal Poly, Team S18-G1, Livingston Winter 2018 Cal Poly, Team S18-G1, Livingston Winter 2018人のメンバー

CPSU-LIVINGSTON-W18S18G1

4 メンバー

7のガイドは作成済み

14 件のコメント

This would be much more helpful if all the “components” being removed were identified.

TIA,

R

rocwoof - 返信

You’ve put together a very good procedure for replacing a motherboard. My pixelbook needs a motherboard. Where can I buy one? Google does not sell them.

Tony Meier - 返信

You’ve put together a very good procedure for replacing a motherboard. My pixelbook needs a motherboard. Where can I buy one? Google does not sell them.

Tony Meier - 返信

I believe the step8 & step16 mentioned “charging port“ shall be the loudspeaker in fact.

baokai zheng - 返信

It’s bad instruction to pull cable out without unlocking the retaining tab, also it’s impossible to put cable back while the connector is still in locking position. Never pull a cable while it’s locked in the connector, this practice is only used by novices.

nabe_03 - 返信

コメントを追加

統計データ:

過去 24時間: 2

過去 7 日: 16

過去 30 日: 91

今までの合計 13,327