メインコンテンツにスキップ

Google Pixelbook Go Right Charging Port Replacement

必要な工具と部品

  1. Google Pixelbook Go Right Charging Port Replacement, Back Panel: 手順 1、 2の画像 1 Google Pixelbook Go Right Charging Port Replacement, Back Panel: 手順 1、 2の画像 2
    • Flip the device so that the back is facing up.

    • Peel the rubber stoppers off the top and bottom of the device.

  2. Google Pixelbook Go Right Charging Port Replacement: 手順 2、 2の画像 1 Google Pixelbook Go Right Charging Port Replacement: 手順 2、 2の画像 2
    • Remove ten 3 mm screws from around the edge of the back panel using a T5 Torx screwdriver.

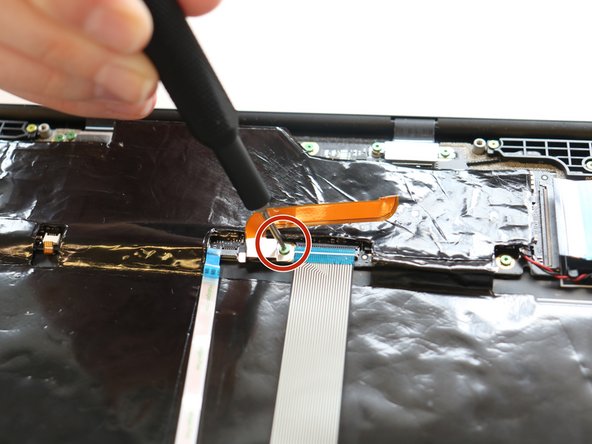
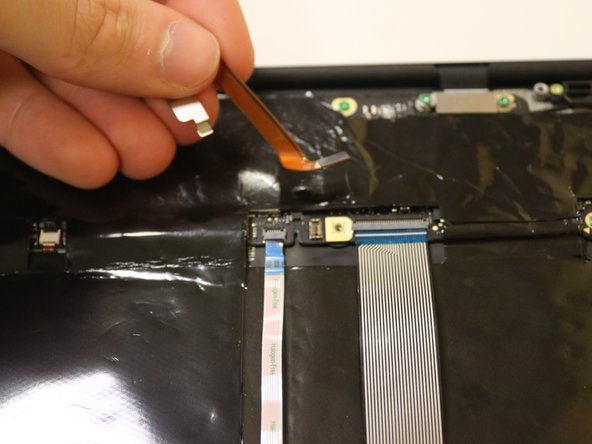
  3. Google Pixelbook Go Right Charging Port Replacement: 手順 3、 3の画像 1 Google Pixelbook Go Right Charging Port Replacement: 手順 3、 3の画像 2 Google Pixelbook Go Right Charging Port Replacement: 手順 3、 3の画像 3
    • Use an iFixit opening tool to pry up the back panel cover.

    • There is an orange ribbon cable that connects the cover to the base, so don't separate the two pieces completely.

    • Remove the single 2 mm screw using a Torx T3 screwdriver.

    • Disconnect the orange cable from the base of the device.

  4. Google Pixelbook Go Right Charging Port Replacement: 手順 4、 1の画像 1
    • Insert wisdom here.

  5. Google Pixelbook Go Right Charging Port Replacement, Right Charging Port: 手順 5、 1の画像 1
    • Remove the three pink screws from the right charging port using a T3 Torx screwdriver.

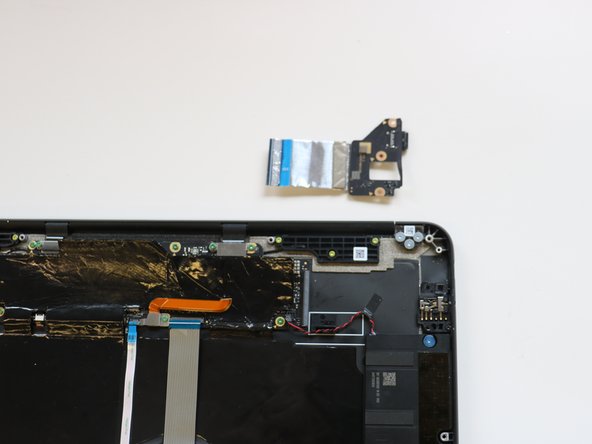
  6. Google Pixelbook Go Right Charging Port Replacement: 手順 6、 2の画像 1 Google Pixelbook Go Right Charging Port Replacement: 手順 6、 2の画像 2
    • Remove the right charging port by picking it up and lifting it from the computer.

終わりに

To reassemble your device, follow these instructions in reverse order.

作成者

1人の作成者と共同作成されました。

Katie Brennan

メンバー登録日: 03/01/23

85 ポイント

1ガイドが承認済み

チーム

University of Delaware, Team 11-1, McGuire Spring 2023 University of Delaware, Team 11-1, McGuire Spring 2023人のメンバー

UD-MCGUIRE-S23S11G1

5 メンバー

4のガイドは作成済み

0 件のコメント

コメントを追加

統計データ:

過去 24時間: 0

過去 7 日: 2

過去 30 日: 6

今までの合計 154