メインコンテンツにスキップ

Google Pixelbook Go Motherboard Replacement

必要な工具と部品

  1. Google Pixelbook Go Motherboard Replacement, Back Panel: 手順 1、 2の画像 1 Google Pixelbook Go Motherboard Replacement, Back Panel: 手順 1、 2の画像 2
    • Flip the device so that the back is facing up.

    • Peel the rubber stoppers off the top and bottom of the device.

  2. Google Pixelbook Go Motherboard Replacement: 手順 2、 2の画像 1 Google Pixelbook Go Motherboard Replacement: 手順 2、 2の画像 2
    • Remove ten 3 mm screws from around the edge of the back panel using a T5 Torx screwdriver.

  3. Google Pixelbook Go Motherboard Replacement: 手順 3、 3の画像 1 Google Pixelbook Go Motherboard Replacement: 手順 3、 3の画像 2 Google Pixelbook Go Motherboard Replacement: 手順 3、 3の画像 3
    • Use an iFixit opening tool to pry up the back panel cover.

    • There is an orange ribbon cable that connects the cover to the base, so don't separate the two pieces completely.

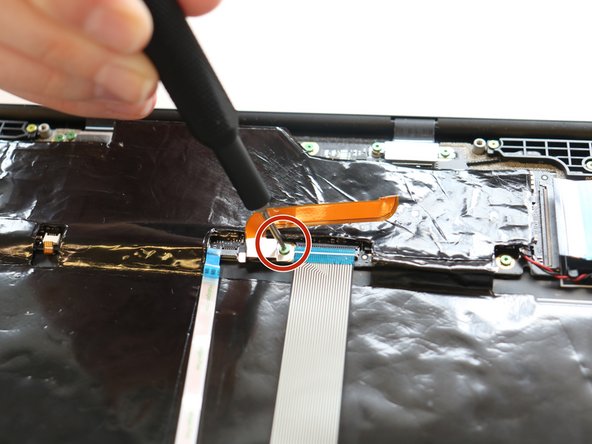
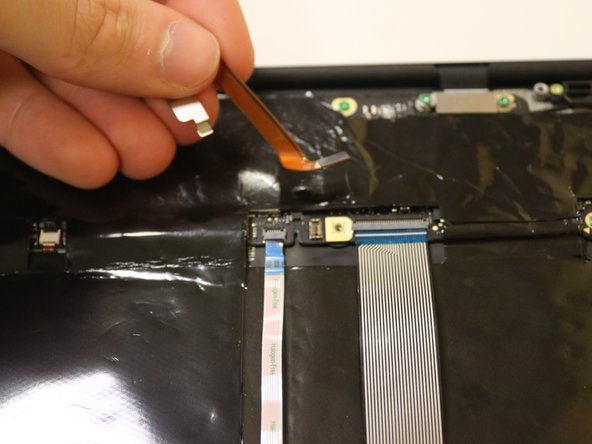
    • Remove the single 2 mm screw using a Torx T3 screwdriver.

    • Disconnect the orange cable from the base of the device.

  4. Google Pixelbook Go Motherboard Replacement: 手順 4、 1の画像 1
    • Insert wisdom here.

  5. Google Pixelbook Go Motherboard Replacement, Motherboard: 手順 5、 1の画像 1
    • Remove the seven 2.0 mm screws using a T3 Torx screwdriver.

  6. Google Pixelbook Go Motherboard Replacement: 手順 6、 3の画像 1 Google Pixelbook Go Motherboard Replacement: 手順 6、 3の画像 2 Google Pixelbook Go Motherboard Replacement: 手順 6、 3の画像 3
    • If they didn't fall off already, remove the small, metal casings at the top of your Pixelbook Go.

    • Both pieces are different. Be mindful of which piece goes to which side, or refer back to this step.

  7. Google Pixelbook Go Motherboard Replacement: 手順 7、 3の画像 1 Google Pixelbook Go Motherboard Replacement: 手順 7、 3の画像 2 Google Pixelbook Go Motherboard Replacement: 手順 7、 3の画像 3
    この手順で使用する道具:
    Tweezers
    $4.99
    購入する
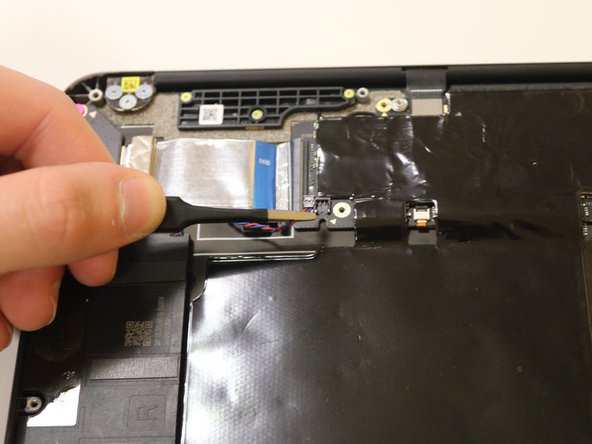
    • Disconnect the blue and red wiring cable using the needle nose tweezers. Grab as close to the connection as you can, and tug in an upwards motion.

    • Do this to both sides.

  8. Google Pixelbook Go Motherboard Replacement: 手順 8、 3の画像 1 Google Pixelbook Go Motherboard Replacement: 手順 8、 3の画像 2 Google Pixelbook Go Motherboard Replacement: 手順 8、 3の画像 3
    • Detach the left-hand side, wide ribbon by pulling away from the connection itself. Grab as close as you can to the connection using your spudger.

    • This part may require additional force, but be mindful not to snap it.

  9. Google Pixelbook Go Motherboard Replacement: 手順 9、 2の画像 1 Google Pixelbook Go Motherboard Replacement: 手順 9、 2の画像 2
    • Similarly, detach the right-hand side, flat ribbon by pulling away from the connection.

  10. Google Pixelbook Go Motherboard Replacement: 手順 10、 2の画像 1 Google Pixelbook Go Motherboard Replacement: 手順 10、 2の画像 2
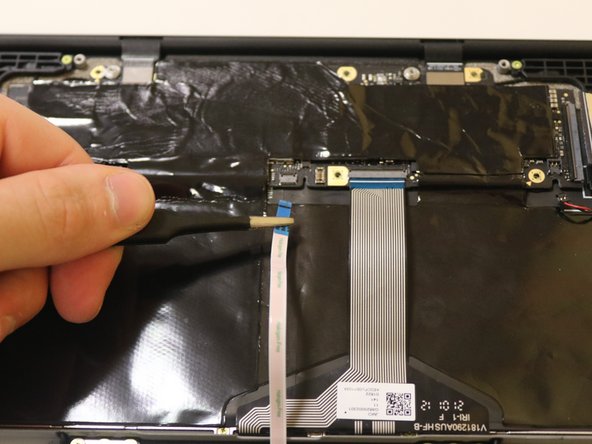
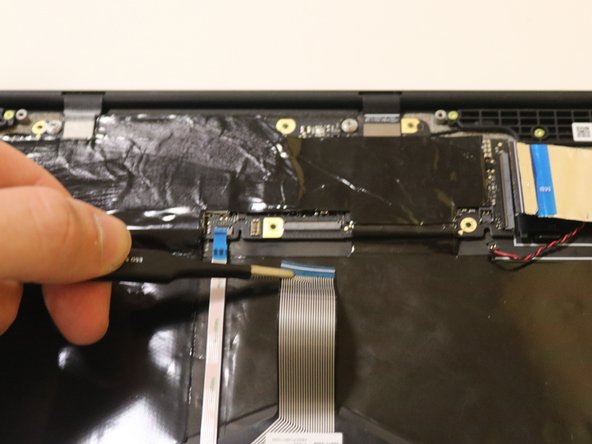
    • Detach the thin, flat cable in the middle using your spudger or by gently pulling with your hand near the connection itself.

  11. Google Pixelbook Go Motherboard Replacement: 手順 11、 2の画像 1 Google Pixelbook Go Motherboard Replacement: 手順 11、 2の画像 2
    • Detach the wider, middle cable using the same steps as before. Pull away from the connection, grabbing as close to the connection as you can.

  12. Google Pixelbook Go Motherboard Replacement: 手順 12、 2の画像 1 Google Pixelbook Go Motherboard Replacement: 手順 12、 2の画像 2
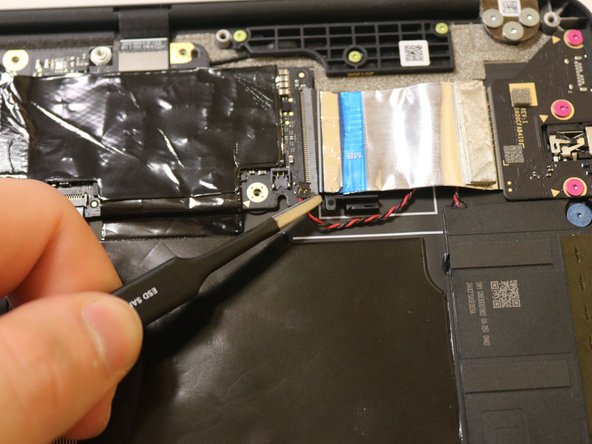
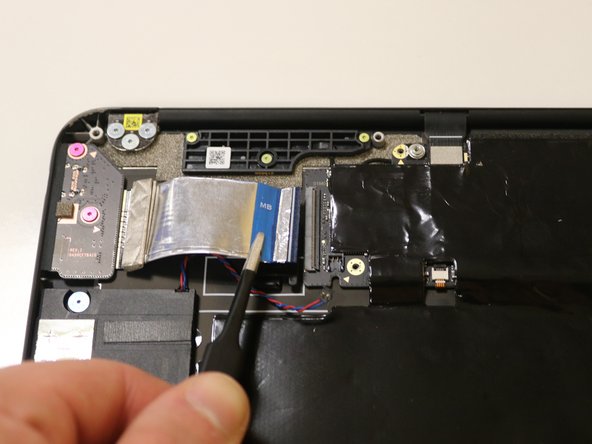
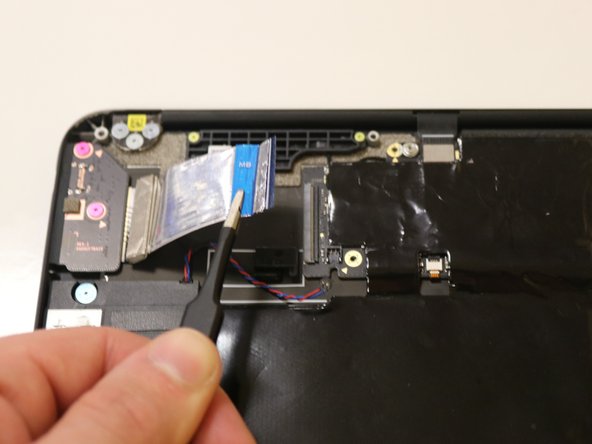
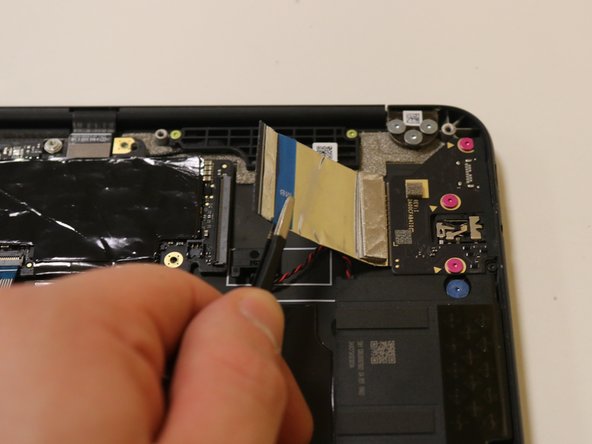
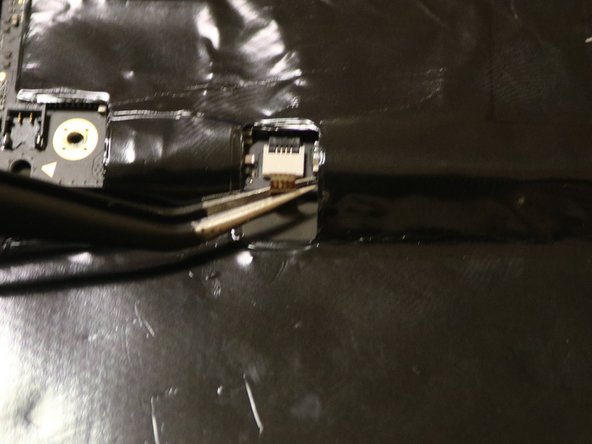
    • Detach the small, copper colored cable from the motherboard. Since this cable is so small, it will require needle-nose tweezers.

  13. Google Pixelbook Go Motherboard Replacement: 手順 13、 3の画像 1 Google Pixelbook Go Motherboard Replacement: 手順 13、 3の画像 2 Google Pixelbook Go Motherboard Replacement: 手順 13、 3の画像 3
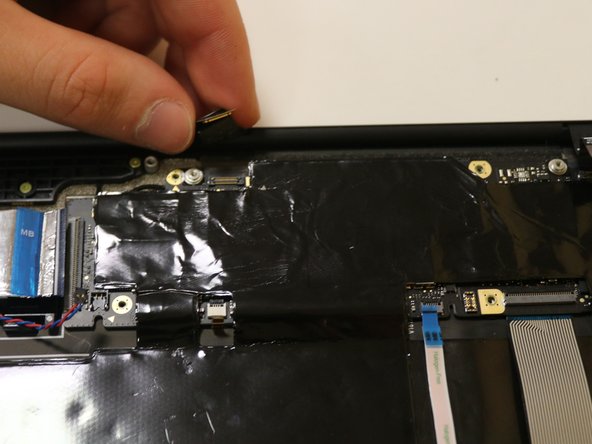
    • By hand, disconnect the top two clips gently. Although you want to detach these clips from the motherboard, these clips will remain attached on the reverse end to the base.

  14. Google Pixelbook Go Motherboard Replacement: 手順 14、 3の画像 1 Google Pixelbook Go Motherboard Replacement: 手順 14、 3の画像 2 Google Pixelbook Go Motherboard Replacement: 手順 14、 3の画像 3
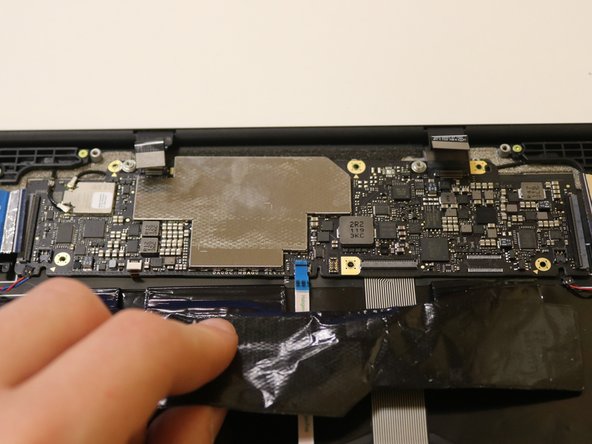
    • Gently peel back the adhesive plastic covering towards the main body.

    • Avoid ripping the plastic covering as this is easy to do.

  15. Google Pixelbook Go Motherboard Replacement: 手順 15、 3の画像 1 Google Pixelbook Go Motherboard Replacement: 手順 15、 3の画像 2 Google Pixelbook Go Motherboard Replacement: 手順 15、 3の画像 3
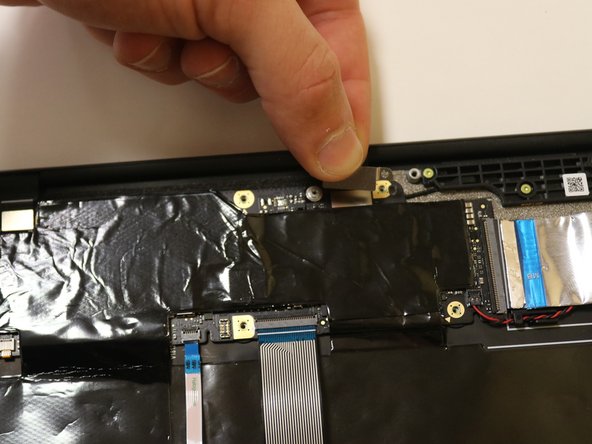
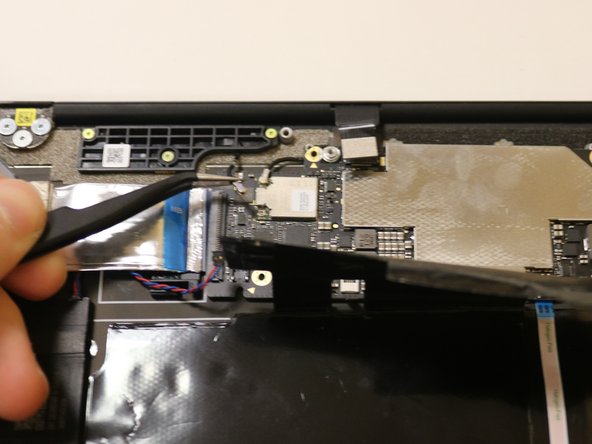
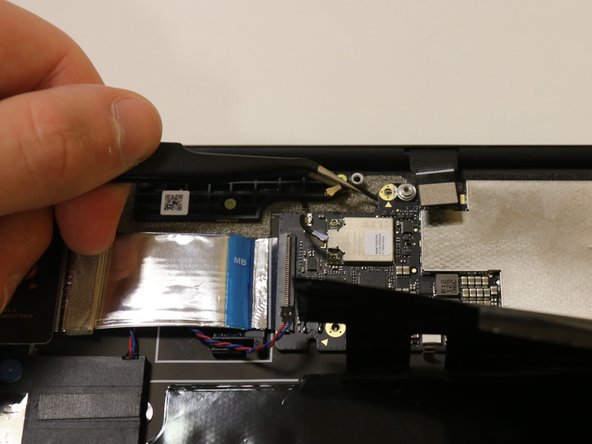
    • Detach the final two clips attached to the motherboard using the needle nose tweezers, located at the top left of the motherboard.

  16. Google Pixelbook Go Motherboard Replacement: 手順 16、 3の画像 1 Google Pixelbook Go Motherboard Replacement: 手順 16、 3の画像 2 Google Pixelbook Go Motherboard Replacement: 手順 16、 3の画像 3
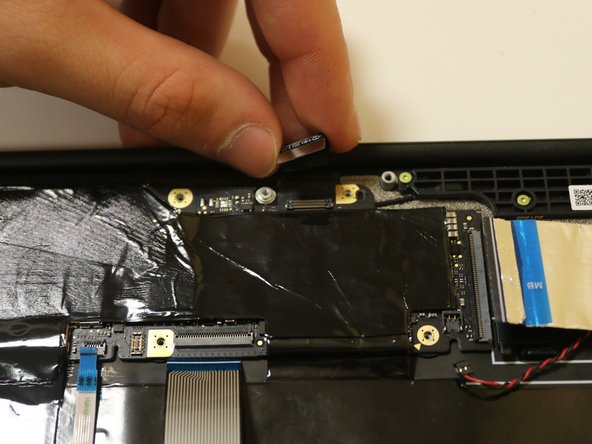
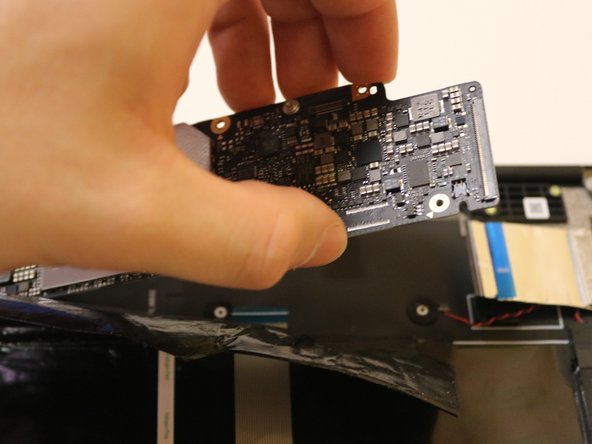
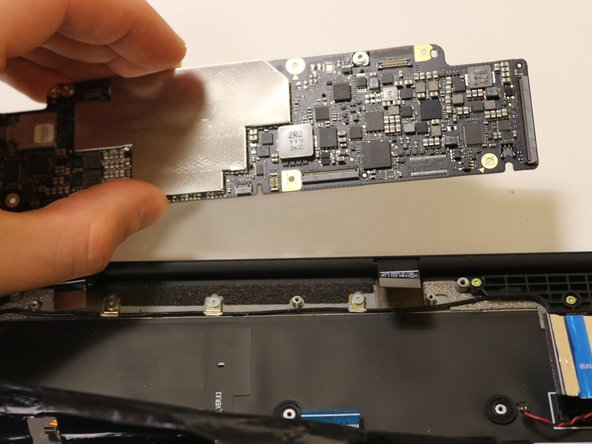
    • Remove the motherboard by gently lifting with your hands.

終わりに

To reassemble your device, follow these instructions in reverse order.

ある他の人がこのガイドを完成しました。

作成者

2人の作成者と共同で作成されました。
Hayden McGrory

メンバー登録日: 03/01/23

305 ポイント

1ガイドが承認済み

チーム

University of Delaware, Team 11-1, McGuire Spring 2023 University of Delaware, Team 11-1, McGuire Spring 2023人のメンバー

UD-MCGUIRE-S23S11G1

5 メンバー

4のガイドは作成済み

0 件のコメント

コメントを追加

統計データ:

過去 24時間: 2

過去 7 日: 9

過去 30 日: 20

今までの合計 487