はじめに
I had two different Pixel Buds A-Series cases that weren't working correctly, but in different ways. I decided to tear them down to see if I could get one of them working... and I did!
必要な工具と部品
-
-
Use a heat gun on low setting to warm up the plastic all the way around the seam. It doesn't take much.
-
Squeeze the sides of the case and you should see it start to open up slightly in the front. Use a guitar pick or plastic pick to wedge into the seam. A thin pick works best.
-
Once you get the first pick in, work it around to one side, then insert a second pick the same way as the first to the opposite side.
-
You may need to re-heat the case a couple times during this process. Keep squeezing the case and work the pics to each side. Doing so should release the clips and allow you to separate the two halves.
-
Be patient and don't use too much heat.
-
-
-
This case had an issue that caused the buds to stay connected, even after being inserted into the case. However, if the case was plugged in, everything worked as expected. So, this lead me to try swapping the mainboard with another unit.
-
Once the case is open, carefully slide the halves apart. There is a thin ribbon cable connecting the parts.
-
At the bottom is a thin plastic separator on top of the main board applied with a small amount of adhesive. You should be able to easily pull it up out of the way.
-
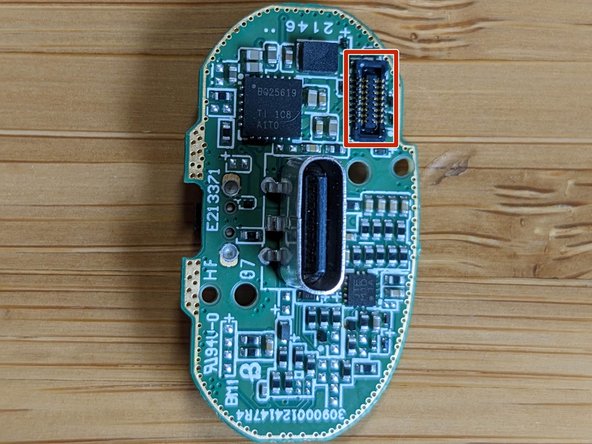
Underneath, you'll find the main board held in place by two screws. One is highlighted in the picture, the second is above it to the right.
-
Remove the two screws, then to remove the board use a toothpick to push on the USB connector from the bottom. This will make it easier to dislodge the board, allowing you to remove it from the bottom
-
-
-
-
To replace the board, you'll need to disconnect the ribbon cable.
-
Use a plastic pry tool to carefully release the connector from the board. It just presses vertically straight down on the board, so lift it straight off.
-
-
-
If you're interested in taking apart the top half, I've added some more steps. Otherwise, just replace your main board and put it back together.
-
On my second case, it had an issue preventing it from detecting if the top was opened or closed, presumably causing the battery to drain because it never went to sleep.
-
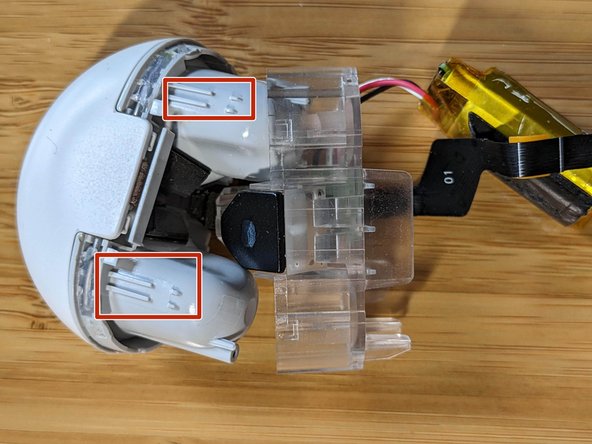
To get at the top section, remove the two screws on either side of the battery.
-
Next remove the screw holding cover for the LED and remove the cover. This step is probably optional.
-
-
-
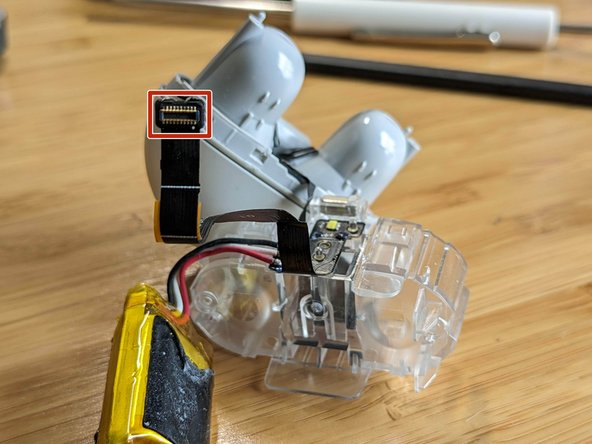
Now you can get at the ribbon cable that connects up to the contact pins for the ear buds.
-
In the picture I think the item shown in the marker is the magnetic sensor that detects if the case is open or closed. Since it is embedded into the ribbon cable, I did not see any easy way to replace it. In order to do so, you'd need to replace the entire ribbon cable and possibly the contact pins as well.
-


To reassemble your device, follow these instructions in reverse order. If you were able to separate the case without any damage, it should snap back together.
To reassemble your device, follow these instructions in reverse order. If you were able to separate the case without any damage, it should snap back together.
ある他の人がこのガイドを完成しました。

5 件のコメント
Where can I buy the boards and other PCB parts?
@captainshanks - I don't think you can buy new replacement parts from Google. You'd need to look for used items on eBay or Facebook, etc. When I fixed mine, I had two broken cases that failed in different ways, so I salvaged parts from one to fix the other.
Jason York - 返信
Thank you for the quick reply. I'll try to do more indepth searching.
Hi, so did you find the headphone parts? If so, drop a link to the store, thanks in advance. Because I tried searching on the Internet, but I couldn't find anything.
Klark Kent - 返信
@klarkkent - When I fixed mine, I had two broken cases that failed in different ways, so I salvaged parts from one to fix the other. You might have some luck finding something "for parts only" on eBay.