はじめに
Use this guide to apply replacement adhesive to your Pixel 2’s display.
Before you begin, you should already have removed the Pixel 2’s display. Detailed instructions for removing the display can be found here.
必要な工具と部品
-
-
Remove any trace of the old adhesive from the Pixel 2's case.
-
If you're reinstalling your existing display, be sure to remove any remaining adhesive from the back of your display as well.
-
After removing all traces of glue and glass, clean the adhesion areas with high concentration isopropyl alcohol (at least 90%). This will ensure a better seal for the display.
-
-
-
-
Peel away the white backing, exposing one side of the adhesive strip.
-
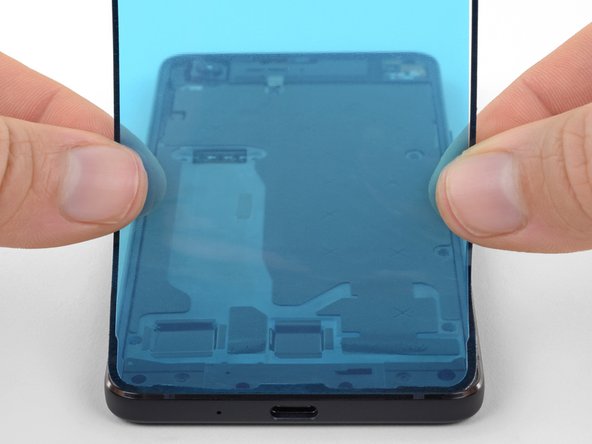
Carefully place the adhesive strip on the phone case, with the exposed side down, and the blue backing up.
-
Start at the bottom of the case, lining up the contours along the bottom edge of the adhesive with those of the case. Then lay down the rest of the adhesive.
-
-
-
With the adhesive lined up with the edges of the case, use your finger or a spudger to press the adhesive strip down against the case.
-
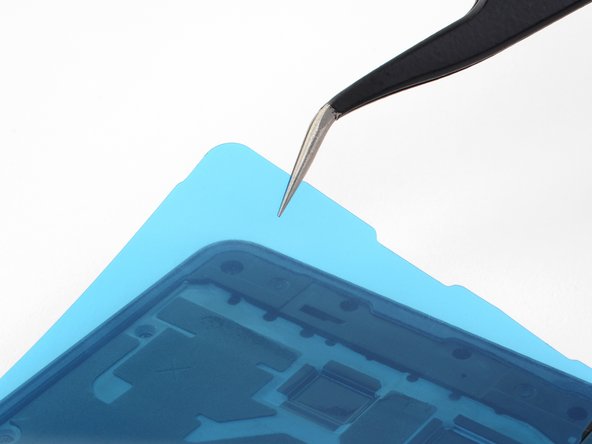
Use a pair of tweezers to remove the inner portion of the blue backing. It may be necessary to hold the adhesive down with a spudger to avoid pulling up the adhesive strip.
-


Repair didn’t go as planned? Check out our Answers community for troubleshooting help.
Repair didn’t go as planned? Check out our Answers community for troubleshooting help.
17 の人々がこのガイドを完成させました。

コメント 1 件
Adhesive tend to stick inside the bag, use extra caution to remove sheet from the package.
Do not touch adhesive at any point, you might mess up the forming of the adhesive.