メインコンテンツにスキップ

GoPro Hero 3 Silver Image Sensor Replacement

必要な工具と部品

  1. GoPro Hero 3 Silver Image Sensor Replacement, Battery: 手順 1、 2の画像 1 GoPro Hero 3 Silver Image Sensor Replacement, Battery: 手順 1、 2の画像 2
    • Pull back on the tab on the back of GoPro to open the battery cover.

  2. GoPro Hero 3 Silver Image Sensor Replacement: 手順 2、 1の画像 1
    • Pull the battery out using the tab.

  3. GoPro Hero 3 Silver Image Sensor Replacement, Image Sensor: 手順 3、 2の画像 1 GoPro Hero 3 Silver Image Sensor Replacement, Image Sensor: 手順 3、 2の画像 2
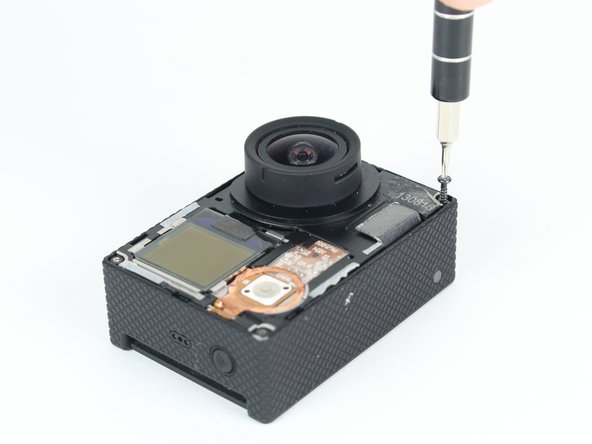
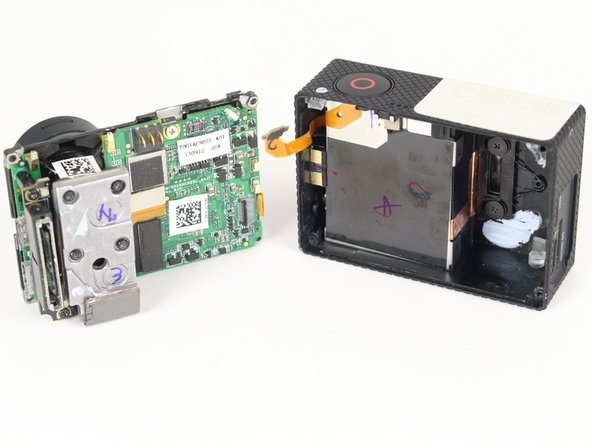
    • Use the plastic opening tool to remove the faceplate.

    • There is some adhesive and clips so be careful and the faceplate should pop right off.

  4. GoPro Hero 3 Silver Image Sensor Replacement: 手順 4、 2の画像 1 GoPro Hero 3 Silver Image Sensor Replacement: 手順 4、 2の画像 2
    • Now that the faceplate is off, it is time to remove the 4 screws on each corner.

    • Use the T4 tool bit from the iFixit toolkit in order to remove the 4 screws on each corner.

  5. GoPro Hero 3 Silver Image Sensor Replacement: 手順 5、 2の画像 1 GoPro Hero 3 Silver Image Sensor Replacement: 手順 5、 2の画像 2
    • Note: Make sure you remove the door cover of the USB, mini HDMI, and SD port before. Separating the motherboard will be easier.

    • Using the plastic opening tool, slowly pry open the motherboard assembly.

  6. GoPro Hero 3 Silver Image Sensor Replacement: 手順 6、 2の画像 1 GoPro Hero 3 Silver Image Sensor Replacement: 手順 6、 2の画像 2
    • Use the spudger to gently pry off the connector of the housing to the motherboard.

    • You should now have the motherboard assembly and the housing separated.

  7. GoPro Hero 3 Silver Image Sensor Replacement: 手順 7、 2の画像 1 GoPro Hero 3 Silver Image Sensor Replacement: 手順 7、 2の画像 2
    • Use the spudger to remove the heat shield tape and detach the image sensor from the motherboard.

    • Using the T4 Torx toolbit, remove the 4 screws that connect the sensor to the lens.

  8. GoPro Hero 3 Silver Image Sensor Replacement: 手順 8、 2の画像 1 GoPro Hero 3 Silver Image Sensor Replacement: 手順 8、 2の画像 2
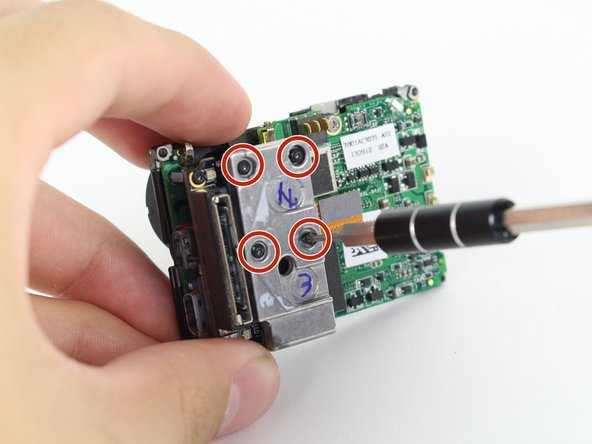
    • Remove the silver connector of the image sensor from the motherboard using the spudger to pry it off.

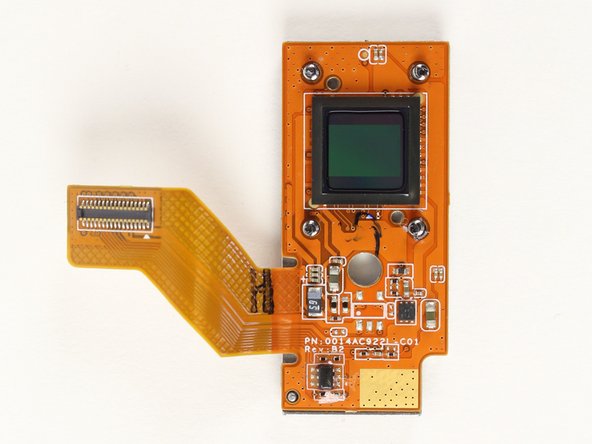
    • You should now be able to remove the image sensor by simply pulling it.

    Where i can buy the image sensor, and for how much

    Yudha prabowo - 返信

終わりに

To reassemble your device, follow these instructions in reverse order.

2 の人々がこのガイドを完成させました。

作成者

4人の作成者と共同で作成されました。

Jose Villa

メンバー登録日: 04/01/15

297 ポイント

1ガイドが承認済み

チーム

Cal Poly, Team 24-7, Lancaster Spring 2015 Cal Poly, Team 24-7, Lancaster Spring 2015人のメンバー

CPSU-LANCASTER-S15S24G7

3 メンバー

21のガイドは作成済み

2 件のコメント

After the sensor has been replaced, does the camera need any catibration?

enrilazaro - 返信

Your pictures are really dark.

Nick Ruiz - 返信

コメントを追加

統計データ:

過去 24時間: 0

過去 7 日: 1

過去 30 日: 4

今までの合計 1,852