メインコンテンツにスキップ

General Pipe Cleaners Drain Cleaner PMEBO 2016 Reverse Switch Replacement

必要な工具と部品

  1. General Pipe Cleaners Drain Cleaner PMEBO 2016 Reverse Switch Replacement, Reverse Switch: 手順 1、 1の画像 1
    • Before you begin, make sure the drain cleaner is disconnected from power.

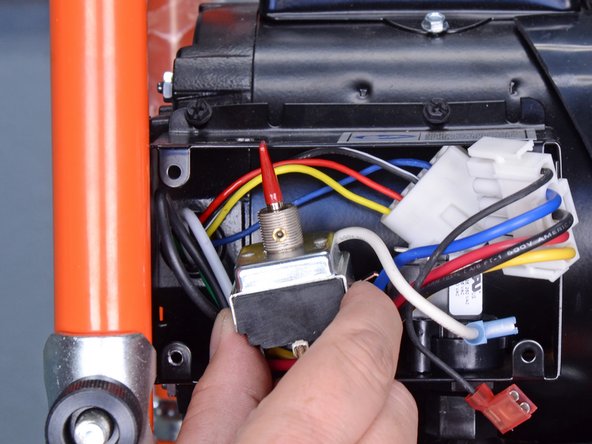
    • Use a Phillips #2 driver to remove the two screws securing the control box cover.

  2. General Pipe Cleaners Drain Cleaner PMEBO 2016 Reverse Switch Replacement: 手順 2、 1の画像 1
    • Remove the control box cover.

  3. General Pipe Cleaners Drain Cleaner PMEBO 2016 Reverse Switch Replacement: 手順 3、 1の画像 1
    • Use a 9/16 inch deep socket and ratchet to remove the nut securing the reverse switch.

  4. General Pipe Cleaners Drain Cleaner PMEBO 2016 Reverse Switch Replacement: 手順 4、 1の画像 1
    • Remove the reverse switch guard.

  5. General Pipe Cleaners Drain Cleaner PMEBO 2016 Reverse Switch Replacement: 手順 5、 2の画像 1 General Pipe Cleaners Drain Cleaner PMEBO 2016 Reverse Switch Replacement: 手順 5、 2の画像 2
    • Squeeze the tabs on either side of the reverse switch connector.

    • Pull the two halves of the connector apart to disconnect it.

    • Take note of where everything is connected in the control box before disconnecting anything else.

  6. General Pipe Cleaners Drain Cleaner PMEBO 2016 Reverse Switch Replacement: 手順 6、 2の画像 1 General Pipe Cleaners Drain Cleaner PMEBO 2016 Reverse Switch Replacement: 手順 6、 2の画像 2
    • Pull the white cable straight off of its spade connector on the power switch diaphragm.

  7. General Pipe Cleaners Drain Cleaner PMEBO 2016 Reverse Switch Replacement: 手順 7、 2の画像 1 General Pipe Cleaners Drain Cleaner PMEBO 2016 Reverse Switch Replacement: 手順 7、 2の画像 2
    • Pull the black cable straight off of its spade connector on the power switch diaphragm.

  8. General Pipe Cleaners Drain Cleaner PMEBO 2016 Reverse Switch Replacement: 手順 8、 3の画像 1 General Pipe Cleaners Drain Cleaner PMEBO 2016 Reverse Switch Replacement: 手順 8、 3の画像 2 General Pipe Cleaners Drain Cleaner PMEBO 2016 Reverse Switch Replacement: 手順 8、 3の画像 3
    • Slide the switch assembly down out of its hole in the control box and pull it out of the control box.

    • Be careful not to snag the switch on any cables during removal.

終わりに

To reassemble your device, follow these instructions in reverse order.

Adam O'Camb

メンバー登録日: 04/11/15

197,115 ポイント

416のガイドは作成済み

0 件のコメント

コメントを追加

統計データ:

過去 24時間: 1

過去 7 日: 6

過去 30 日: 14

今までの合計 531