メインコンテンツにスキップ

Gateway P-6831FX WiFi Card Replacement

必要な工具と部品

  1. Gateway P-6831FX WiFi Card Replacement, WiFi Card: 手順 1、 2の画像 1 Gateway P-6831FX WiFi Card Replacement, WiFi Card: 手順 1、 2の画像 2
    • Turn your laptop upside down and remove the five Philips #0 (5mm) screws for the cover of the WiFi Card.

    • Make sure to unplug your laptop charger, as removing the WiFi while the device is charging may damage the WiFi and or the charger.

  2. Gateway P-6831FX WiFi Card Replacement: 手順 2、 2の画像 1 Gateway P-6831FX WiFi Card Replacement: 手順 2、 2の画像 2
    • Gently pull the cover away from the device.

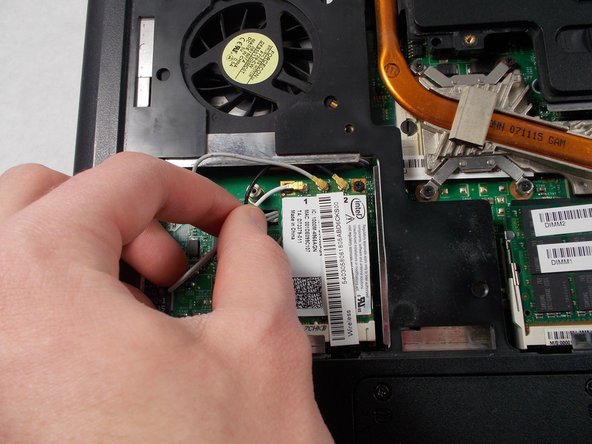
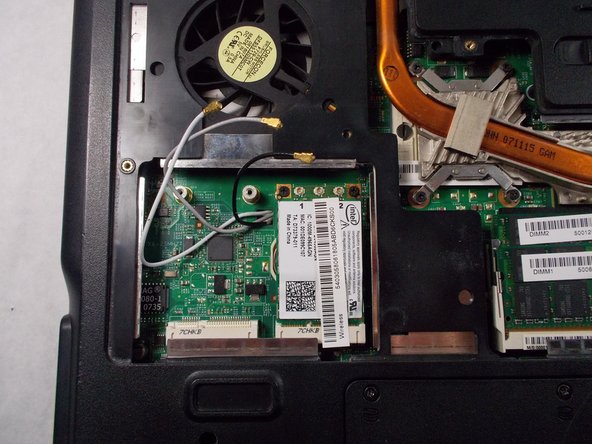
  3. Gateway P-6831FX WiFi Card Replacement: 手順 3、 3の画像 1 Gateway P-6831FX WiFi Card Replacement: 手順 3、 3の画像 2 Gateway P-6831FX WiFi Card Replacement: 手順 3、 3の画像 3
    • Remove the three wires above the WiFi Card.

    • Take note of the color for each wire and it's corresponding location.

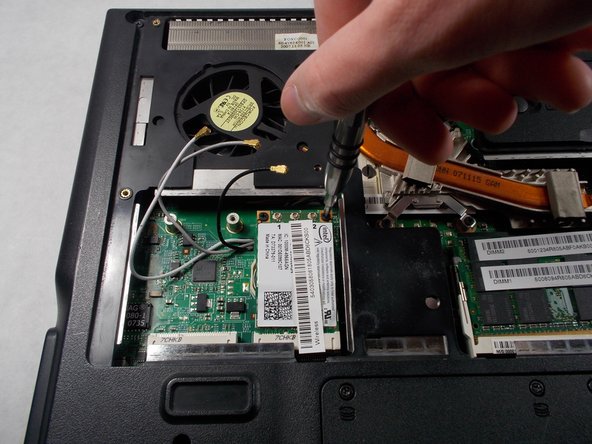
  4. Gateway P-6831FX WiFi Card Replacement: 手順 4、 3の画像 1 Gateway P-6831FX WiFi Card Replacement: 手順 4、 3の画像 2 Gateway P-6831FX WiFi Card Replacement: 手順 4、 3の画像 3
    • Remove the two Phillips #0 (2mm) screws above the WiFi card.

    • The WiFi Card will lift up once the screws are removed.

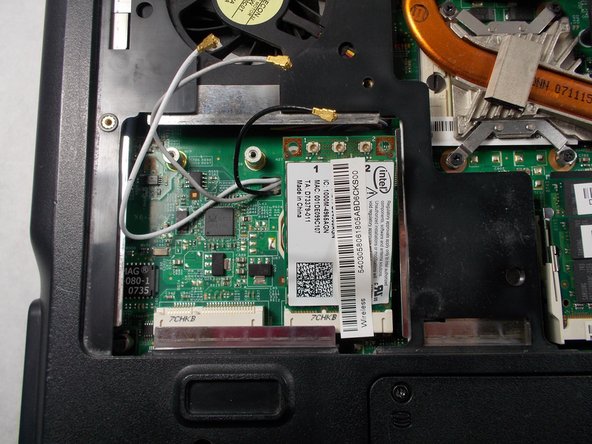
  5. Gateway P-6831FX WiFi Card Replacement: 手順 5、 2の画像 1 Gateway P-6831FX WiFi Card Replacement: 手順 5、 2の画像 2
    • With the WiFi Card lifted up, gently pull the WiFi Card out of the socket and remove it from the device.

終わりに

To reassemble your device, follow these instructions in reverse order.

作成者

1人の作成者と共同作成されました。

Chandler Jardin

メンバー登録日: 03/19/18

507 ポイント

4のガイドは作成済み

チーム

UMass Dartmouth, Team S3-G5, Peak Spring 2018 UMass Dartmouth, Team S3-G5, Peak Spring 2018人のメンバー

UMASSD-PEAK-S18S3G5

2 メンバー

12のガイドは作成済み

0 件のコメント

コメントを追加

統計データ:

過去 24時間: 0

過去 7 日: 0

過去 30 日: 0

今までの合計 413