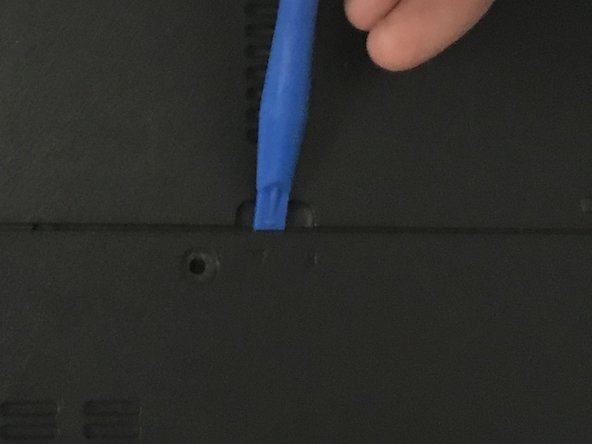
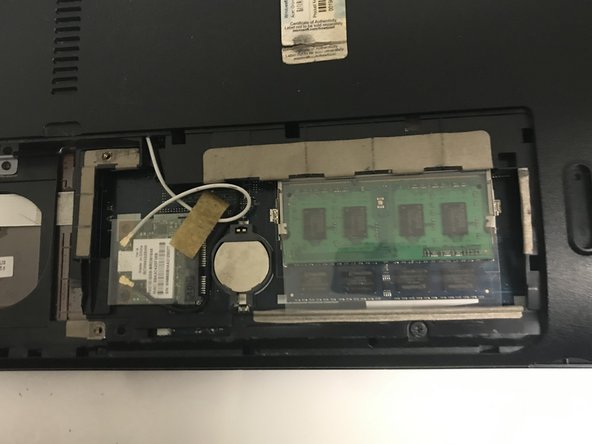
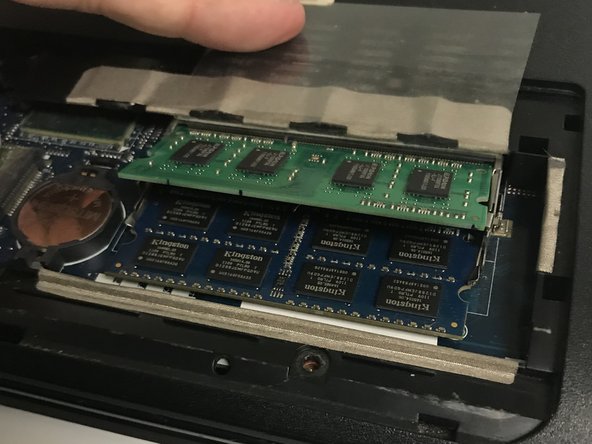
メインコンテンツにスキップ

Gateway NV55C49u RAM Replacement

必要な工具と部品

  1. Gateway NV55C49u RAM Replacement, RAM: 手順 1、 1の画像 1
    • Flip the laptop bottom side up.

  2. Gateway NV55C49u RAM Replacement: 手順 2、 1の画像 1
    • Slide the battery lock to show the red background.

  3. Gateway NV55C49u RAM Replacement: 手順 3、 2の画像 1 Gateway NV55C49u RAM Replacement: 手順 3、 2の画像 2
    • Push the battery slider to the other side. This will automatically eject the battery.

    • You can now remove the battery.

  4. Gateway NV55C49u RAM Replacement: 手順 4、 1の画像 1
    • Remove the two 6.0mm Phillips #00 screws from the back cover.

  5. Gateway NV55C49u RAM Replacement: 手順 5、 3の画像 1 Gateway NV55C49u RAM Replacement: 手順 5、 3の画像 2 Gateway NV55C49u RAM Replacement: 手順 5、 3の画像 3
    • Remove the back cover by placing the plastic opening tool in the indention, and prying upwards.

  6. Gateway NV55C49u RAM Replacement: 手順 6、 2の画像 1 Gateway NV55C49u RAM Replacement: 手順 6、 2の画像 2
    • Hold back the plastic that protects the RAM so you can access the clips underneath.

    • Gently push the holding clips outwards. The RAM will angle itself upwards.

    • Gently remove the RAM from the laptop

    • Make sure not to touch any part of the RAM except the sides.

    • When reassembling, insert the RAM into the connector, and then push it down until the clips lock it into place

終わりに

To reassemble your device, follow these instructions in reverse order.

ある他の人がこのガイドを完成しました。

作成者

1人の作成者と共同作成されました。

Matthew

メンバー登録日: 09/23/18

385 ポイント

2のガイドは作成済み

チーム

University of North Texas, Team S8-G1, Riccardelli Fall 2018 University of North Texas, Team S8-G1, Riccardelli Fall 2018人のメンバー

UNT-RICCARDELLI-F18S8G1

5 メンバー

9のガイドは作成済み

0 件のコメント

コメントを追加

統計データ:

過去 24時間: 0

過去 7 日: 1

過去 30 日: 3

今までの合計 244