はじめに
There will be prerequisites that you need to be complete before displacing the Hard Drive. The prerequisites are available to you in the repair guide manual.
必要な工具と部品
-
-
Remove the five identical 3/16" Phillips screws that secures the hard drive and memory cover using a Phillips #0 Screwdriver.
 FixBotに聞いてみる
-
-
-
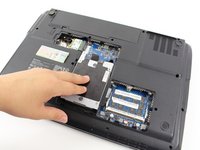
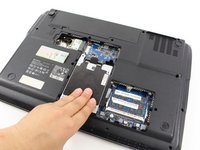
Lift up the base cover from the the top with your hands to a 90 degree angle.
-
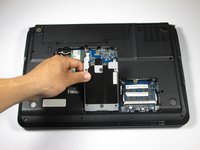
Remove the base cover and place it in a safe and dry place.
-
-
-
-
Remove the 1/4" Phillip screw located at the top right of the Hard Drive using a Phillips #0 Screwdriver .
-
-
-
Remove the Hard Drive component from its compartment. To do so, slide the component downward away from the battery pack.
-
Lift the Hard Drive to a 90 degree angle and out of its slot.
-
Place the Hard Drive in a designated zone.
-
-
-
Remove the four identical 1/8" Phillip screws located in every corner of the Hard Drive using the Phillips #0 Screwdriver.
-
-
-
Access to the Hard drive by gently sliding the metal cover away from the Hard Drive.
-


To reassemble your device, follow these instructions in reverse order.
チーム

Cal Poly, Team 7-24, Regan Spring 2014 Cal Poly, Team 7-24, Regan Spring 2014人のメンバー
CPSU-REGAN-S14S7G24
4 メンバー
18のガイドは作成済み