メインコンテンツにスキップ

Gateway NE51006u LCD Screen Replacement

必要な工具と部品

  1. Gateway NE51006u LCD Screen Replacement, Battery: 手順 1、 2の画像 1 Gateway NE51006u LCD Screen Replacement, Battery: 手順 1、 2の画像 2
    • Make sure your device is powered off before beginning this guide.

    • Place your device on your workspace, screen facing down. Take the Spudger and use the pointed end to catch the latch below the battery. Drag the latch to the right until the battery detaches from the body of the device.

  2. Gateway NE51006u LCD Screen Replacement: 手順 2、 1の画像 1
    • Pull the battery out, making sure to pull the battery parallel to the device.

  3. Gateway NE51006u LCD Screen Replacement, Hard Drive: 手順 3、 1の画像 1
    • Ensure device is powered off and unplugged from a power source. Place the device upside down.

  4. Gateway NE51006u LCD Screen Replacement: 手順 4、 1の画像 1
    • Use a PH0 Phillips head screwdriver to remove the 9.0 mm screw on the rectangular panel underneath the device.

  5. Gateway NE51006u LCD Screen Replacement: 手順 5、 1の画像 1
    • Use a plastic opening tool to pry open the rectangular panel the 9.0 mm screw was removed from.

  6. Gateway NE51006u LCD Screen Replacement: 手順 6、 3の画像 1 Gateway NE51006u LCD Screen Replacement: 手順 6、 3の画像 2 Gateway NE51006u LCD Screen Replacement: 手順 6、 3の画像 3
    • Remove a single 9.0 mm screw on the silver box containing the hard drive. Pull the plastic flap at the side opposite to the side of the screw housing back in order to remove the silver box containing the hard drive.

  7. Gateway NE51006u LCD Screen Replacement: 手順 7、 3の画像 1 Gateway NE51006u LCD Screen Replacement: 手順 7、 3の画像 2 Gateway NE51006u LCD Screen Replacement: 手順 7、 3の画像 3
    • Remove the two 9.0 mm screws on each side of the silver box to slide the hard drive from the silver box housing.

  8. Gateway NE51006u LCD Screen Replacement, LCD Screen: 手順 8、 2の画像 1 Gateway NE51006u LCD Screen Replacement, LCD Screen: 手順 8、 2の画像 2
    • Make sure your device is powered off before beginning this guide.

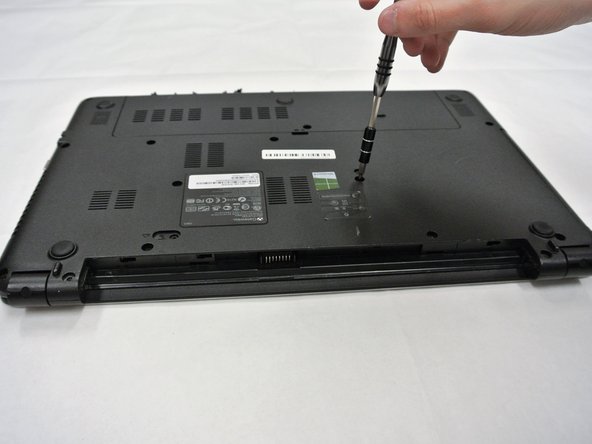
    • Remove the black screw covers covering the 4.2 mm screws located inside of the cylindrical hinges at the bottom corners of the screen housing, then use a PH0 Philips head screwdriver to unscrew them.

  9. Gateway NE51006u LCD Screen Replacement: 手順 9、 2の画像 1 Gateway NE51006u LCD Screen Replacement: 手順 9、 2の画像 2
    • Prior to completing the steps laid out in this guide, it is imperative that the user remove the battery and hard drive via the battery and hard drive replacement guide steps available.

    • Use a PH0 Philips head screwdriver to remove the remaining 9.0 mm screws on the back of the device which should be sixteen screw in total.

  10. Gateway NE51006u LCD Screen Replacement: 手順 10、 1の画像 1
    • Open the laptop and use a plastic opening tool to pry open the sides of the laptop base starting closest to the hinges. Continue doing this until the laptop base is separate from the keyboard.

  11. Gateway NE51006u LCD Screen Replacement: 手順 11、 3の画像 1 Gateway NE51006u LCD Screen Replacement: 手順 11、 3の画像 2 Gateway NE51006u LCD Screen Replacement: 手順 11、 3の画像 3
    • After prying the keyboard unit off of the base, Lift the white, hinged covers connected to the three ribbons shown and pull gently to disconnect.

    • When putting the laptop back together, lift the hinged covers and connect the ribbons before dropping the hinged covers back down.

  12. Gateway NE51006u LCD Screen Replacement: 手順 12、 3の画像 1 Gateway NE51006u LCD Screen Replacement: 手順 12、 3の画像 2 Gateway NE51006u LCD Screen Replacement: 手順 12、 3の画像 3
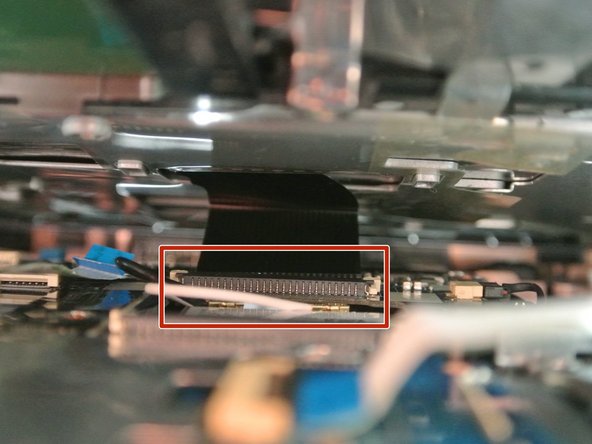
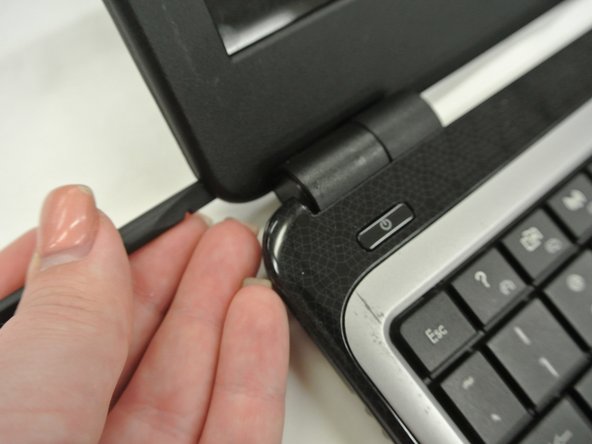
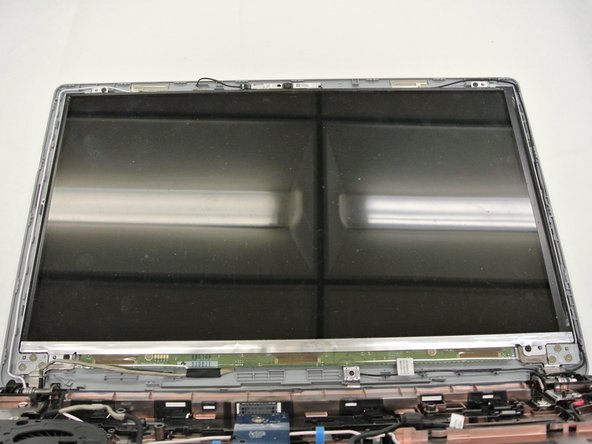
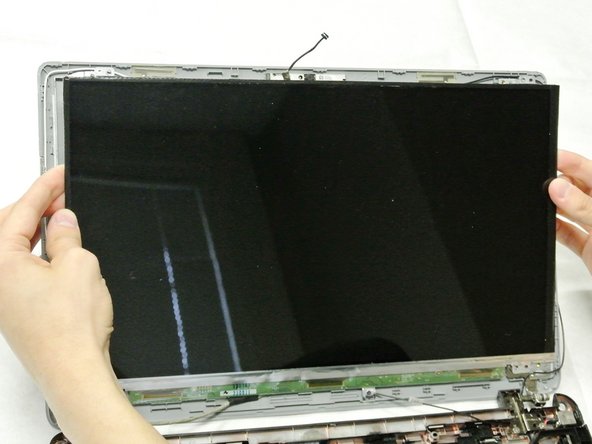
    • Use a plastic opening tool or spudger to remove the plastic frame around the LCD screen. Do this by pressing the wedge in between the crease found in between the two halves of the screen casing.

    • You will hear a soft click and feel the connection between the two points break as you run the tool around the sides of screen casing.

  13. Gateway NE51006u LCD Screen Replacement: 手順 13、 2の画像 1 Gateway NE51006u LCD Screen Replacement: 手順 13、 2の画像 2
    • Unplug the black cable connected to the webcam above the LCD screen.

  14. Gateway NE51006u LCD Screen Replacement: 手順 14、 2の画像 1 Gateway NE51006u LCD Screen Replacement: 手順 14、 2の画像 2
    • Use a PH0 Phillips head to remove four 3.4mm black screws. Remove the screen from the casing before moving on to the next step.

  15. Gateway NE51006u LCD Screen Replacement: 手順 15、 3の画像 1 Gateway NE51006u LCD Screen Replacement: 手順 15、 3の画像 2 Gateway NE51006u LCD Screen Replacement: 手順 15、 3の画像 3
    • Peel the tape off the cable connected to the back of the LCD screen and unplug the cable which is connected to the bottom. The screen should now be fully removed from the laptop casing.

終わりに

To reassemble your device, follow these instructions in reverse order.

ある他の人がこのガイドを完成しました。

作成者

2人の作成者と共同で作成されました。

Omer Tunagur

メンバー登録日: 01/29/18

423 ポイント

3のガイドは作成済み

チーム

University of Alabama, Team S2-G8, Bedsole Spring 2018 University of Alabama, Team S2-G8, Bedsole Spring 2018人のメンバー

UA-BEDSOLE-S18S2G8

4 メンバー

10のガイドは作成済み

0 件のコメント

コメントを追加

統計データ:

過去 24時間: 0

過去 7 日: 1

過去 30 日: 2

今までの合計 314