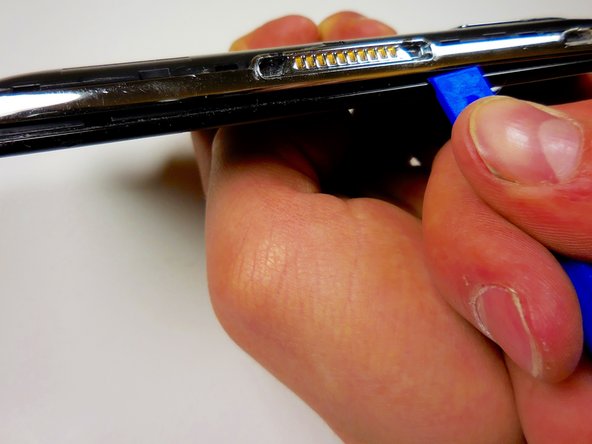
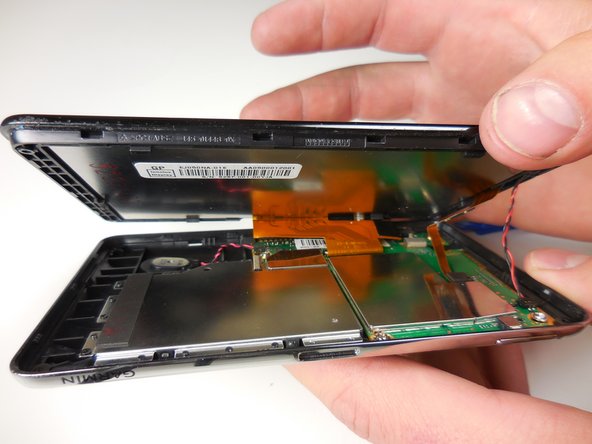
メインコンテンツにスキップ

Garmin nüvi 3590 LMT Light Sensor Replacement

必要な工具と部品

  1. Garmin nüvi 3590 LMT Light Sensor Replacement, Battery: 手順 1、 1の画像 1
    • Turn the device off by pressing and holding the power button on the top left of the device.

  2. Garmin nüvi 3590 LMT Light Sensor Replacement: 手順 2、 1の画像 1
    • Use the plastic opening tool to separate the tabs on the black back cover of the device by leveraging the tool against the frame around the perimeter of the device.

  3. Garmin nüvi 3590 LMT Light Sensor Replacement: 手順 3、 1の画像 1
    • Once all of the tabs are popped out, take the back cover off.

    • The back cover is a separate piece from the device.

  4. Garmin nüvi 3590 LMT Light Sensor Replacement: 手順 4、 2の画像 1 Garmin nüvi 3590 LMT Light Sensor Replacement: 手順 4、 2の画像 2
    • Using the plastic spudger, carefully remove the white tab connected to the battery from the device by pulling the tab in the opposite direction from which it is connected.

  5. Garmin nüvi 3590 LMT Light Sensor Replacement: 手順 5、 3の画像 1 Garmin nüvi 3590 LMT Light Sensor Replacement: 手順 5、 3の画像 2 Garmin nüvi 3590 LMT Light Sensor Replacement: 手順 5、 3の画像 3
    • Use the plastic spudger to lift the battery up and away from the device.

    • Do not puncture or bend the battery. Serious health complications could occur.

  6. Garmin nüvi 3590 LMT Light Sensor Replacement, Light Sensor: 手順 6、 2の画像 1 Garmin nüvi 3590 LMT Light Sensor Replacement, Light Sensor: 手順 6、 2の画像 2
    • Using the T5 bit, unscrew the four 5.7mm screws in the four corners of the device.

  7. Garmin nüvi 3590 LMT Light Sensor Replacement: 手順 7、 3の画像 1 Garmin nüvi 3590 LMT Light Sensor Replacement: 手順 7、 3の画像 2 Garmin nüvi 3590 LMT Light Sensor Replacement: 手順 7、 3の画像 3
    • Leverage the plastic opening tool to pop the tabs between the black screen and the metal frame around the perimeter of the device.

    • Do not forcibly separate the two pieces after the tabs have been popped as there are connections between the two pieces that could be torn.

  8. Garmin nüvi 3590 LMT Light Sensor Replacement: 手順 8、 2の画像 1 Garmin nüvi 3590 LMT Light Sensor Replacement: 手順 8、 2の画像 2
    • Using your fingers, pull the red and black wire from the back of the screen.

  9. Garmin nüvi 3590 LMT Light Sensor Replacement: 手順 9、 2の画像 1 Garmin nüvi 3590 LMT Light Sensor Replacement: 手順 9、 2の画像 2
    • Locate the red and black wire connected to the circuit board with the round, black, rubbery disc that was connected to the other half of the device (that disc is the light sensor). Gently pull the wire up from the circuit board.

終わりに

To reassemble your device, follow these instructions in reverse order.

ある他の人がこのガイドを完成しました。

作成者

3人の作成者と共同で作成されました。

David

メンバー登録日: 03/11/15

424 ポイント

3のガイドは作成済み

チーム

Colorado Springs, Team 4-1, Panko Spring 2015 Colorado Springs, Team 4-1, Panko Spring 2015人のメンバー

UCCS-PANKO-S15S4G1

2 メンバー

5のガイドは作成済み

0 件のコメント

コメントを追加

統計データ:

過去 24時間: 1

過去 7 日: 3

過去 30 日: 7

今までの合計 359