メインコンテンツにスキップ

Garmin eTrex Vista H LCD screen Replacement

必要な工具と部品

  1. Garmin eTrex Vista H LCD screen Replacement, Removing Battery: 手順 1、 1の画像 1
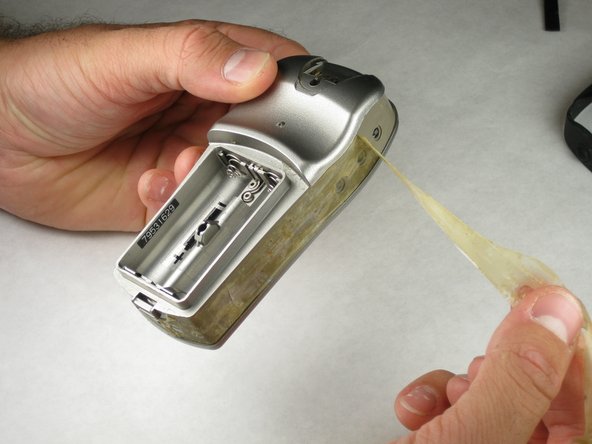
    • Flip the device to the backside, and locate the metal tab at the center of the back cover.

  2. Garmin eTrex Vista H LCD screen Replacement: 手順 2、 1の画像 1
    • Lift the metal tab up, and rotate it counterclockwise. This will unlock the back case cover.

  3. Garmin eTrex Vista H LCD screen Replacement: 手順 3、 2の画像 1 Garmin eTrex Vista H LCD screen Replacement: 手順 3、 2の画像 2
    • Lift the battery plate off to either insert or remove 2 AA batteries.

  4. Garmin eTrex Vista H LCD screen Replacement, Disassembling the Garmin eTrex Vista-H Outer Case: 手順 4、 2の画像 1 Garmin eTrex Vista H LCD screen Replacement, Disassembling the Garmin eTrex Vista-H Outer Case: 手順 4、 2の画像 2
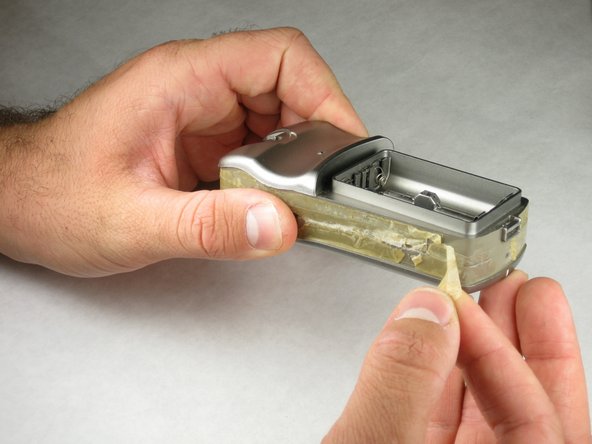
    • With the wedge side of a spudger (or a small, flat head screwdriver), remove the black rubber case support from the device body.

  5. Garmin eTrex Vista H LCD screen Replacement: 手順 5、 3の画像 1 Garmin eTrex Vista H LCD screen Replacement: 手順 5、 3の画像 2 Garmin eTrex Vista H LCD screen Replacement: 手順 5、 3の画像 3
    • With the pick side of a spudger (or tweezers), peel the sticky tape from the device.

  6. Garmin eTrex Vista H LCD screen Replacement: 手順 6、 1の画像 1
    • Split the front and rear panels by inserting a small pointed tool (such as a pen point or a screwdriver tip SL1.5) in the 5 plastic tabs along the sides of the device.

    • Do not remove the back panels quickly. If too much force is applied, there is a wire connection that will break.

    • CAUTION! Be careful not to force the tabs inward. This will result in broken tabs.

  7. Garmin eTrex Vista H LCD screen Replacement: 手順 7、 2の画像 1 Garmin eTrex Vista H LCD screen Replacement: 手順 7、 2の画像 2
    • With tweezers (or your fingernails), carefully disconnect the wires between the PC input and the motherboard.

  8. Garmin eTrex Vista H LCD screen Replacement, Disassembling Garmin eTrex Vista H Motherboard: 手順 8、 1の画像 1
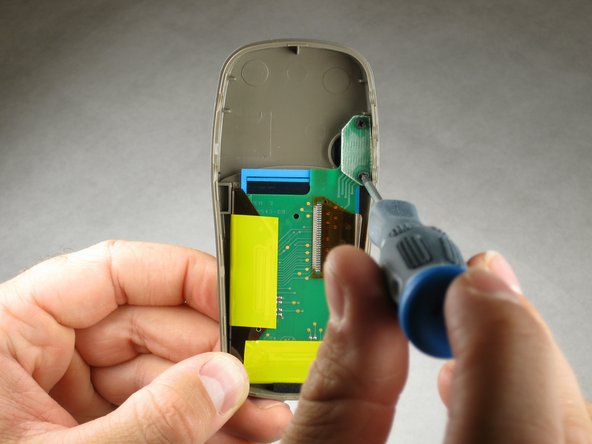
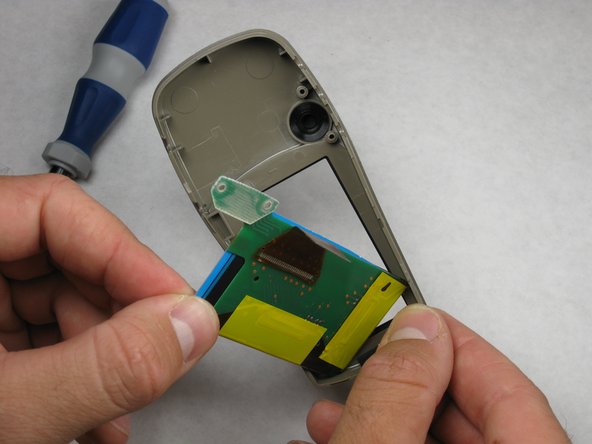
    • The motherboard should look like this. If it is dirty, gently use a small paintbrush to clean it of dust.

  9. Garmin eTrex Vista H LCD screen Replacement: 手順 9、 1の画像 1
    • There are no screws holding the motherboard in place.

    • Carefully lift the motherboard from the case.

  10. Garmin eTrex Vista H LCD screen Replacement: 手順 10、 2の画像 1 Garmin eTrex Vista H LCD screen Replacement: 手順 10、 2の画像 2
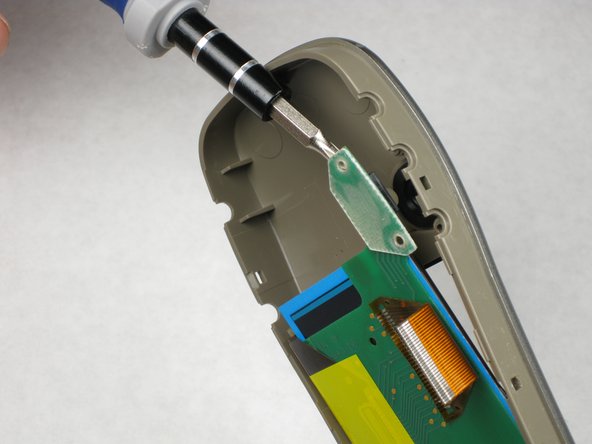
    • With the pointed end of a spudger (or the small end of a Philips #00 screwdriver), gently unhook the small black tabs by pressing into the interlocking hooks that are sunk into the white wire connector.

    • Gently pull the wire ribbon from the white connector.

    It is easy to pull the ribbon cable off, but reinserting the ribbon cable back into the wire connector is very challenging. Any tips?

    Robin Van Eyk - 返信

  11. Garmin eTrex Vista H LCD screen Replacement, LCD screen: 手順 11、 3の画像 1 Garmin eTrex Vista H LCD screen Replacement, LCD screen: 手順 11、 3の画像 2 Garmin eTrex Vista H LCD screen Replacement, LCD screen: 手順 11、 3の画像 3
    • After removing the motherboard, locate the two #1 Philips screws.

    • Carefully remove both screws.

  12. Garmin eTrex Vista H LCD screen Replacement: 手順 12、 2の画像 1 Garmin eTrex Vista H LCD screen Replacement: 手順 12、 2の画像 2
    • Gently remove the LCD screen from the case by lifting the area that held the two #1 Philips screws.

    • Do not remove the LSC screen by lifting the sides, only the area that held the two #1 Philips screws.

  13. Garmin eTrex Vista H LCD screen Replacement: 手順 13、 1の画像 1
    • Insert the new LCD screen in the device.

    Hi, Sir, i need display units for garmin etrexH, and etrex10, please let me k now the unit cost and where i can buy...thanks

    shiva raj - 返信

    Hi, I was wondering where I could get one new screen for my garmin etrex legend HCx.

    Thank you very much,

    Jordi

    Arctictern - 返信

    Hi there…Could you please help…Looking for a replacement LCD screen for a Garmin Venture Etrex? Kind regards….

    leon.visagie75@gmail.com

    Leon Visagie - 返信

終わりに

To reassemble your device, follow these instructions in reverse order.

3 の人々がこのガイドを完成させました。

作成者

6人の作成者と共同で作成されました。

Lauren Noyes

メンバー登録日: 10/17/10

248 ポイント

3のガイドは作成済み

チーム

Cal Poly, Team 21-30, Regan Fall 2010 Cal Poly, Team 21-30, Regan Fall 2010人のメンバー

CPSU-REGAN-F10S21G30

3 メンバー

5のガイドは作成済み

コメント 1 件

where can I find the LCD test

carlos gomes - 返信

コメントを追加

統計データ:

過去 24時間: 0

過去 7 日: 3

過去 30 日: 17

今までの合計 11,889