メインコンテンツにスキップ

Garmin Nuvi 65LM Battery Replacement

必要な工具と部品

  1. Garmin Nuvi 65LM Battery Replacement, Plastic device casing: 手順 1、 2の画像 1 Garmin Nuvi 65LM Battery Replacement, Plastic device casing: 手順 1、 2の画像 2
    • Place the device on a flat surface with the screen facing down.

    • Remove the four 4.80 mm T5 screws on the corners of the device with a T5 Torx screwdriver.

  2. Garmin Nuvi 65LM Battery Replacement: 手順 2、 2の画像 1 Garmin Nuvi 65LM Battery Replacement: 手順 2、 2の画像 2
    • There is a ribbon cable that will still connect the front and back panels once they are pried part.

    • Use the plastic opening tool to gently pry apart the front and back casing panels. Repeat this at multiple locations around the edge of the device. You should hear the clips that hold the front and back together pop apart.

    • Once there is a large gap between the from and back casing panels, use your hands to separate the two halves.

  3. Garmin Nuvi 65LM Battery Replacement: 手順 3、 3の画像 1 Garmin Nuvi 65LM Battery Replacement: 手順 3、 3の画像 2 Garmin Nuvi 65LM Battery Replacement: 手順 3、 3の画像 3
    • Use a spudger to pop up the ZIF connector tab that fastens the ribbon cable to the motherboard.

    • Gently pull the front panel away and set it on your flat work surface.

  4. Garmin Nuvi 65LM Battery Replacement, Battery: 手順 4、 3の画像 1 Garmin Nuvi 65LM Battery Replacement, Battery: 手順 4、 3の画像 2 Garmin Nuvi 65LM Battery Replacement, Battery: 手順 4、 3の画像 3
    • Make sure the GPS is laying on a flat surface with the open side showing.

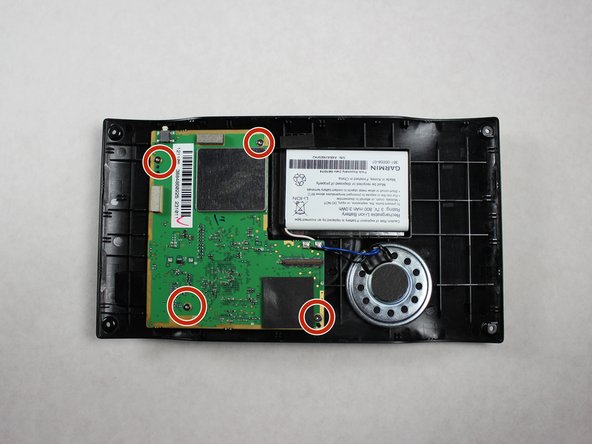
    • Unscrew the four marked 4.00 mm screws with a T5 torque screwdriver

    • Be sure to keep track of where you place the screws. A magnetic project mat works great for this.

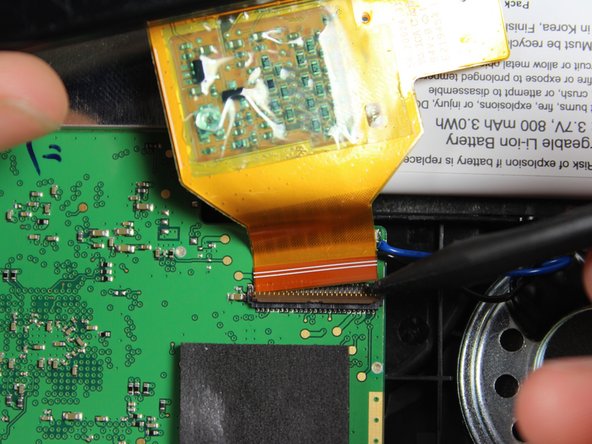
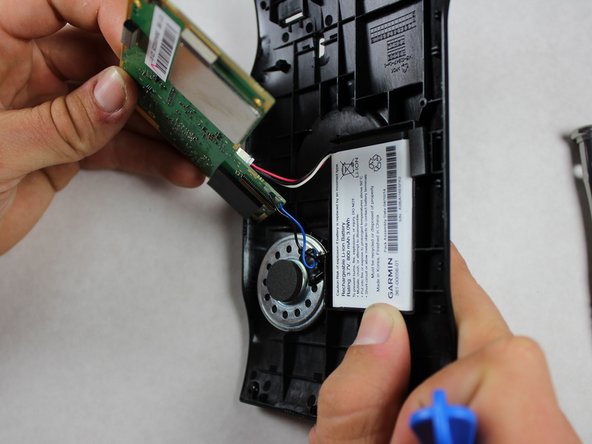
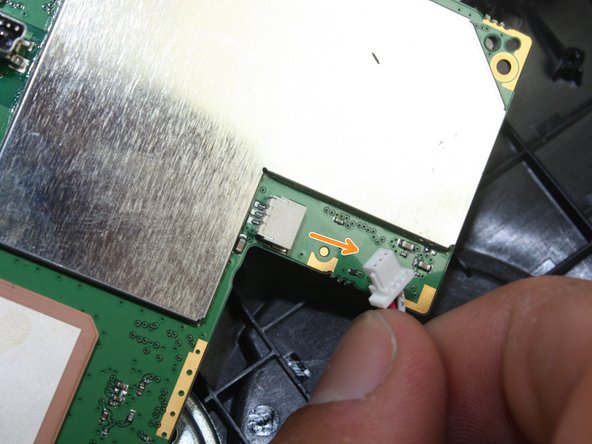
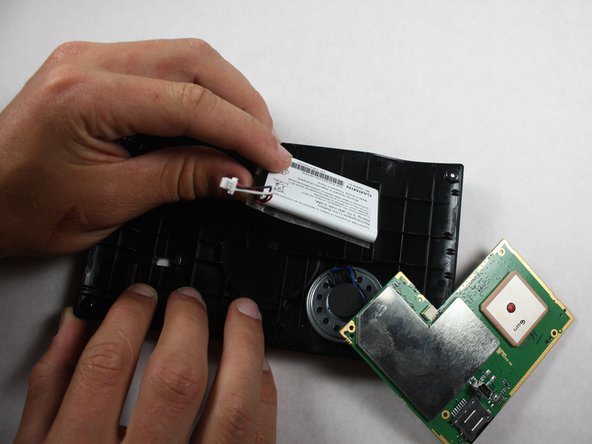
    • Gently lift the motherboard off of the plastic casing.

    • The speaker and battery are still connected to the motherboard so do not pull the motherboard completely away from the casing.

  5. Garmin Nuvi 65LM Battery Replacement: 手順 5、 3の画像 1 Garmin Nuvi 65LM Battery Replacement: 手順 5、 3の画像 2 Garmin Nuvi 65LM Battery Replacement: 手順 5、 3の画像 3
    • Turn the motherboard over to find the plug which connects the battery to the motherboard.

    • Gently disconnect the plug by catching on the raised rib of the plug with your fingernail. Then pull the plug away from the connection.

  6. Garmin Nuvi 65LM Battery Replacement: 手順 6、 2の画像 1 Garmin Nuvi 65LM Battery Replacement: 手順 6、 2の画像 2
    • Set the motherboard down out of the way of the battery.

    • Using the flat end of the plastic opening tool carefully pry the battery and its adhesive away from the casing.

    • The adhesive holding the battery down is very strong. Prying the battery up may take some force but go slowly and carefully in order to avoid damaging the battery.

    • Once most of the adhesive is unstuck from the casing, use your hands to remove the battery completely.

終わりに

To reassemble your device, follow these instructions in reverse order.

4 の人々がこのガイドを完成させました。

作成者

5人の作成者と共同で作成されました。

Kai Ling Liang

メンバー登録日: 04/26/15

246 ポイント

2のガイドは作成済み

チーム

Cal Poly, Team 15-3, Amido Spring 2015 Cal Poly, Team 15-3, Amido Spring 2015人のメンバー

CPSU-AMIDO-S15S15G3

4 メンバー

6のガイドは作成済み

3 件のコメント

my garmin gps I need a new power pack for it, it plugs into the cigarette lighter. tell me how to order or where do I order.

vickie - 返信

it doesn't have screws anywhere

vickie -

Excellent guide! A little more detail about how the ZIP cable connection is made would add to this

leerw - 返信

コメントを追加

統計データ:

過去 24時間: 0

過去 7 日: 10

過去 30 日: 23

今までの合計 3,686