メインコンテンツにスキップ

Garmin Nuvi 2529 Disassembly

必要な工具と部品

  1. Garmin Nuvi 2529 Disassembly, Removing screws from back cover: 手順 1、 2の画像 1 Garmin Nuvi 2529 Disassembly, Removing screws from back cover: 手順 1、 2の画像 2
    • Turn the device over and remove the 4 x T5 screws.

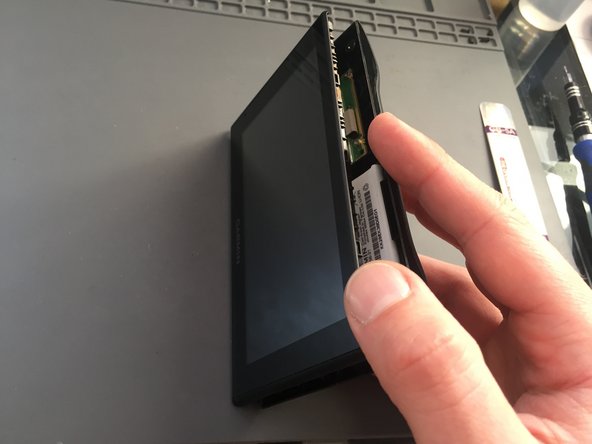
  2. Garmin Nuvi 2529 Disassembly, Prying off the back cover: 手順 2、 3の画像 1 Garmin Nuvi 2529 Disassembly, Prying off the back cover: 手順 2、 3の画像 2 Garmin Nuvi 2529 Disassembly, Prying off the back cover: 手順 2、 3の画像 3
    • Use the prying tool to release the platic clips on the back, going around all the sides.

    • Start prying from the sides or the top left corner and work your way around the screen.

    • Be careful at the bottom as the screen connector is still attached. Don't try to fully remove it.

    • Slide the screen slightly upwards to reveal the connector

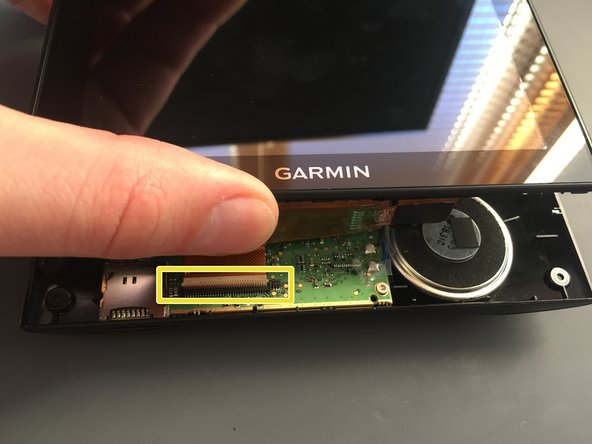
  3. Garmin Nuvi 2529 Disassembly, Disconnecting the screen connector: 手順 3、 3の画像 1 Garmin Nuvi 2529 Disassembly, Disconnecting the screen connector: 手順 3、 3の画像 2 Garmin Nuvi 2529 Disassembly, Disconnecting the screen connector: 手順 3、 3の画像 3
    • Slide up the screen to get access to the connector

    • Use the plastic prying tool to lift up the latch that secures the ribbon cable and then slide the cable out.

    • Once the cable is out, lift off the screen.

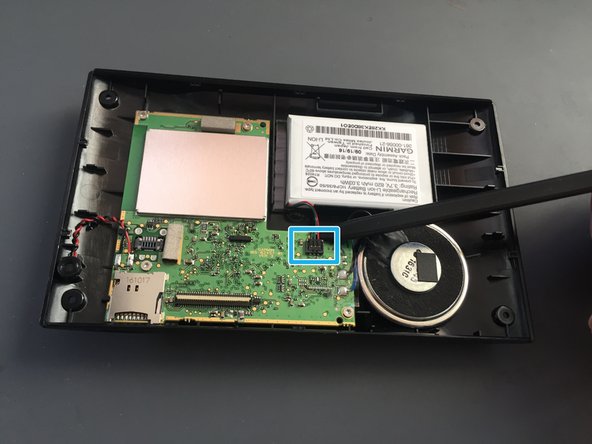
  4. Garmin Nuvi 2529 Disassembly, Disconnecting the battery and microphone: 手順 4、 3の画像 1 Garmin Nuvi 2529 Disassembly, Disconnecting the battery and microphone: 手順 4、 3の画像 2 Garmin Nuvi 2529 Disassembly, Disconnecting the battery and microphone: 手順 4、 3の画像 3
    • Before you can take the logic board out disconnect the battery.

    • Remove the microphone from its socket with a plastic spudger.

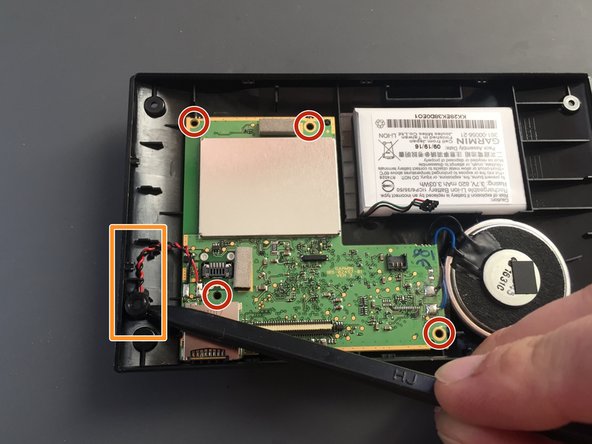
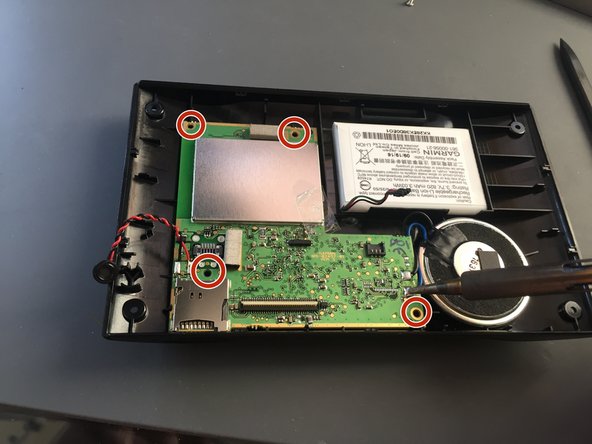
    • Remove the 4 x T5 screws that secures the logic board to the back cover.

  5. Garmin Nuvi 2529 Disassembly, Desoldering the speakers: 手順 5、 3の画像 1 Garmin Nuvi 2529 Disassembly, Desoldering the speakers: 手順 5、 3の画像 2 Garmin Nuvi 2529 Disassembly, Desoldering the speakers: 手順 5、 3の画像 3
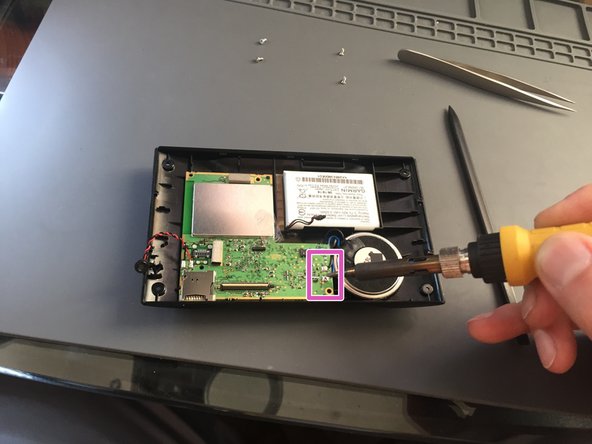
    • Peel off the clear tape from the speaker connections with tweezers.

    • Use your soldering iron to de-solder the two wires from the speaker.

    • Try to minimise the contact time with your iron on the bard to avoid warping and thermal shocking the board. (I used 390 C ~ 740 F)

    • Finally remove the 4 x T5 screws that secure the logic board to the back cover.

  6. Garmin Nuvi 2529 Disassembly, Removing the logic board from back cover: 手順 6、 2の画像 1 Garmin Nuvi 2529 Disassembly, Removing the logic board from back cover: 手順 6、 2の画像 2
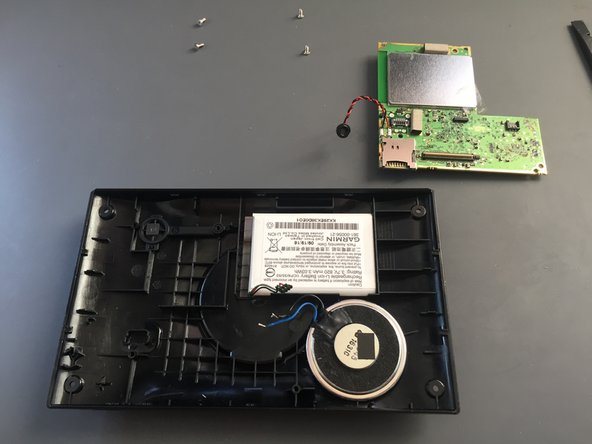
    • Use the spudger to pop the lociboard out.

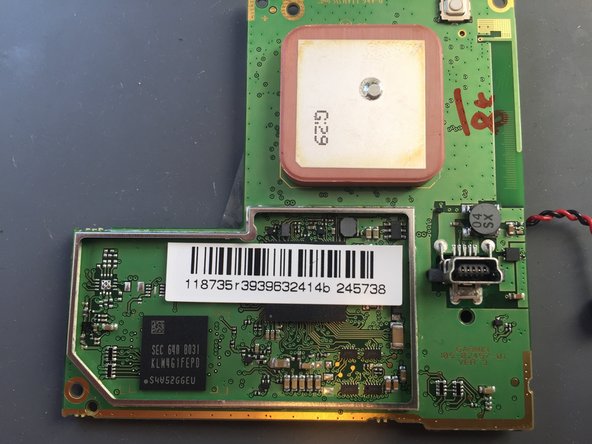
  7. Garmin Nuvi 2529 Disassembly, Exposing all components pt. 1: 手順 7、 3の画像 1 Garmin Nuvi 2529 Disassembly, Exposing all components pt. 1: 手順 7、 3の画像 2 Garmin Nuvi 2529 Disassembly, Exposing all components pt. 1: 手順 7、 3の画像 3
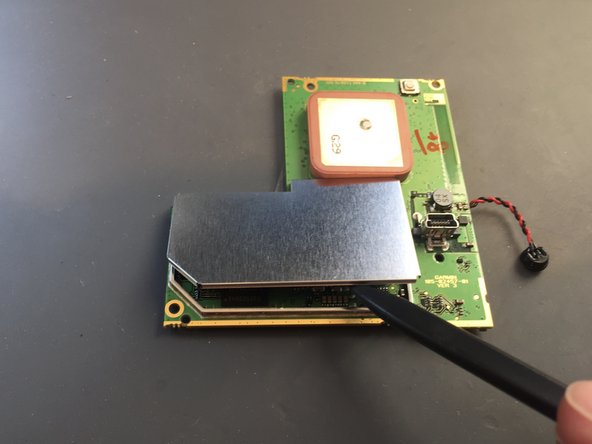
    • To reveal all the components, use the spudger to lift off the metal cover of the protected circuitry

    • Make sure you apply even pressure and don't force the cover off. If it is bent whilst removing, it will be difficult to reassemble.

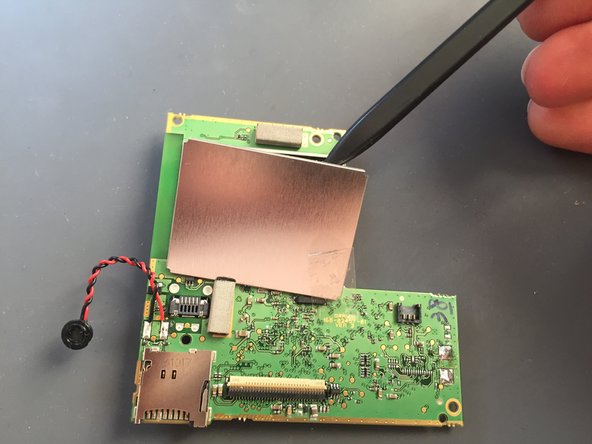
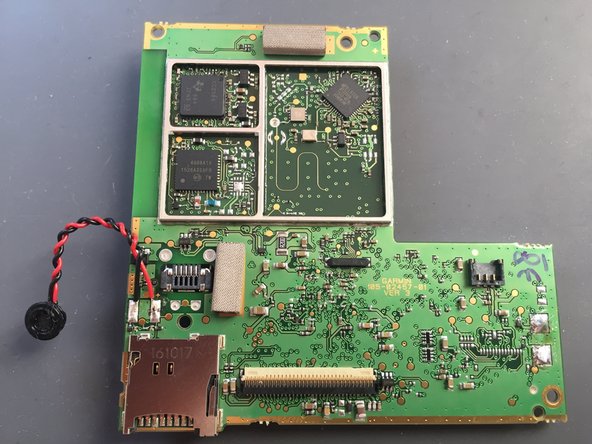
  8. Garmin Nuvi 2529 Disassembly, Exposing all components pt. 2: 手順 8、 3の画像 1 Garmin Nuvi 2529 Disassembly, Exposing all components pt. 2: 手順 8、 3の画像 2 Garmin Nuvi 2529 Disassembly, Exposing all components pt. 2: 手順 8、 3の画像 3
    • Repeat the same step on the back of the logic board.

    • Now you successfully exposed all the parts.

終わりに

To reassemble your device, follow these instructions in reverse order.

ある他の人がこのガイドを完成しました。

作成者

1人の作成者と共同作成されました。

honakrisi

メンバー登録日: 01/28/20

3,328 ポイント

7のガイドは作成済み

0 件のコメント

コメントを追加

統計データ:

過去 24時間: 0

過去 7 日: 0

過去 30 日: 0

今までの合計 45