メインコンテンツにスキップ

このバージョンは誤った内容を含んでいる可能性があります。最新の承認済みスナップショットに切り替えてください。

必要な工具と部品

  1. この手順は未翻訳です。 翻訳を手伝う。

    : 手順 1、 1の画像 1
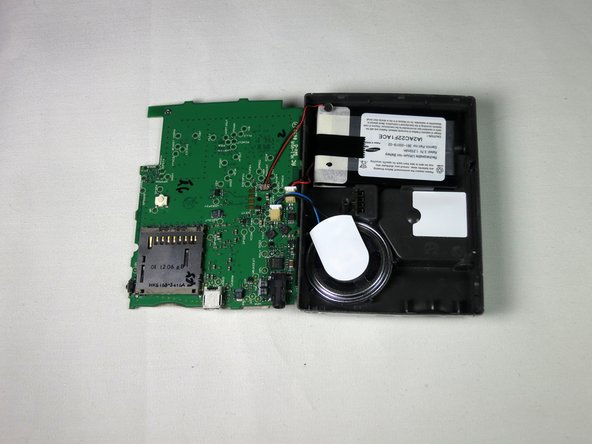
    • After following the instructions in the main dis-assembly guide, you should have the screen detached from the motherboard.

  2. この手順は未翻訳です。 翻訳を手伝う。

    : 手順 2、 3の画像 1 : 手順 2、 3の画像 2 : 手順 2、 3の画像 3
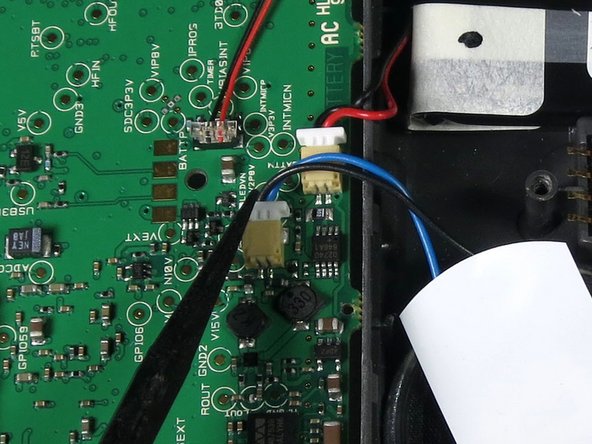
    • Use the tweezers or the spudger to lift the tan latch off the ribbon cable (ZIF connector)and gently pull out the ZIF connector and cable from underneath the opened latch.

  3. この手順は未翻訳です。 翻訳を手伝う。

    : 手順 3、 2の画像 1 : 手順 3、 2の画像 2
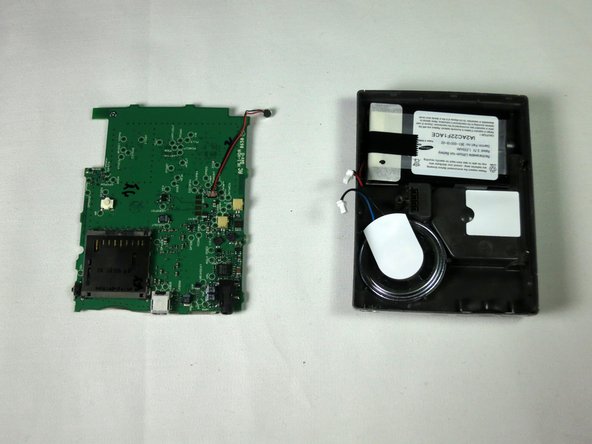
    • The motherboard will now freely separate from the back casing; lay it flat next to the housing.

  4. この手順は未翻訳です。 翻訳を手伝う。

    : 手順 4、 3の画像 1 : 手順 4、 3の画像 2 : 手順 4、 3の画像 3
    • Detach blue speaker cable from motherboard.

    • Battery cable is detached in this picture, and it is not required to do so to install a new speaker.

  5. この手順は未翻訳です。 翻訳を手伝う。

    : 手順 5、 2の画像 1 : 手順 5、 2の画像 2
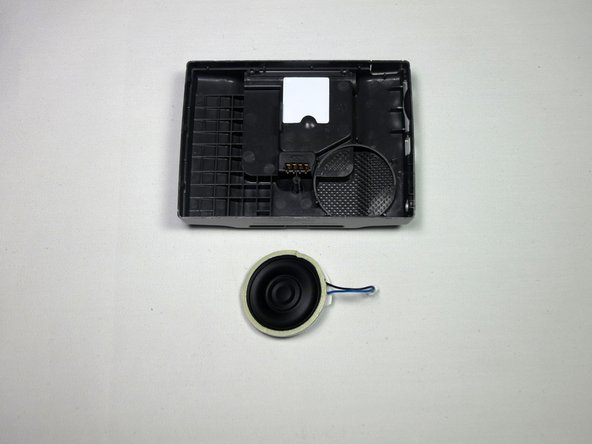
    • Detach speaker from casing and insert new, functional speaker.

    • Battery is removed in the picture and is not required for the installation of a new speaker.

ゴール

作成者

6人の作成者と共同で作成されました。

Matt West

メンバー登録日: 04/18/13

31 ポイント

4のガイドは作成済み

チーム

Cal Poly, Team 13-65, Johann Spring 2013 Cal Poly, Team 13-65, Johann Spring 2013人のメンバー

CPSU-JOHANN-S13S13G65

3 メンバー

6のガイドは作成済み

0 件のコメント

コメントを追加

統計データ:

過去 24時間: 1

過去 7 日: 9

過去 30 日: 11

今までの合計 313