メインコンテンツにスキップ

Garmin Nüvi 370 Battery Replacement

必要な工具と部品

  1. Garmin Nüvi 370 Battery Replacement, Battery: 手順 1、 1の画像 1
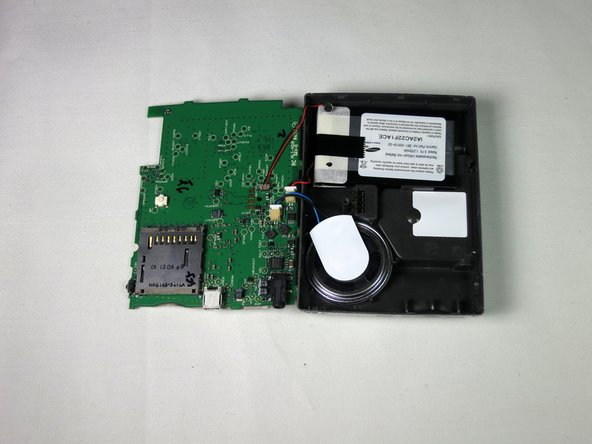
    • After following the instructions in the main dis-assembly guide, you should have the screen detached from the motherboard.

  2. Garmin Nüvi 370 Battery Replacement: 手順 2、 3の画像 1 Garmin Nüvi 370 Battery Replacement: 手順 2、 3の画像 2 Garmin Nüvi 370 Battery Replacement: 手順 2、 3の画像 3
    • Use the tweezers or the spudger to lift the tan latch off the ribbon cable (ZIF connector)and gently pull out the ZIF connector and cable from underneath the opened latch.

  3. Garmin Nüvi 370 Battery Replacement: 手順 3、 2の画像 1 Garmin Nüvi 370 Battery Replacement: 手順 3、 2の画像 2
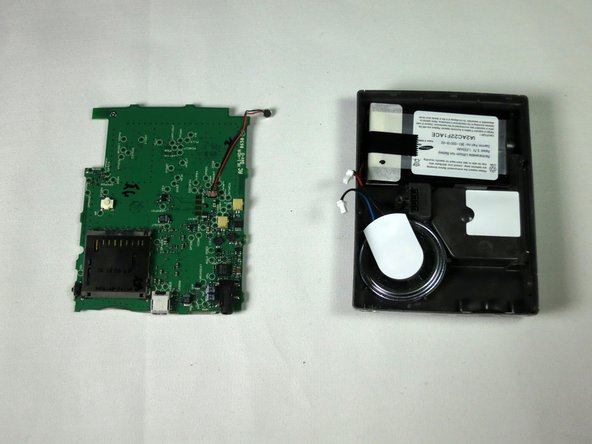
    • The motherboard will now freely separate from the back casing; lay it flat next to the housing.

  4. Garmin Nüvi 370 Battery Replacement: 手順 4、 2の画像 1 Garmin Nüvi 370 Battery Replacement: 手順 4、 2の画像 2
    • Disconnect the speaker and battery from their terminals on the motherboard. This should disconnect the motherboard completely from the back panel.

    • It is recommended that you use tweezers or the spudger for precision.

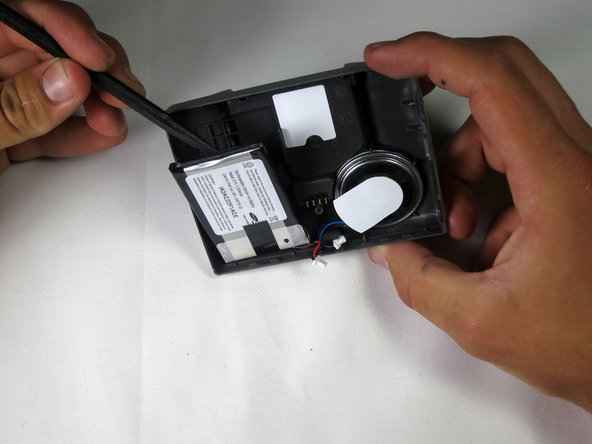
  5. Garmin Nüvi 370 Battery Replacement: 手順 5、 2の画像 1 Garmin Nüvi 370 Battery Replacement: 手順 5、 2の画像 2
    • Using the flat edge of the spudger from above, gently pry the battery away from the plastic.

  6. Garmin Nüvi 370 Battery Replacement: 手順 6、 1の画像 1
    • The battery should now be completely separated from the other components.

    • Insert new, functional battery.

終わりに

To reassemble your device, follow these instructions in reverse order.

3 の人々がこのガイドを完成させました。

作成者

6人の作成者と共同で作成されました。

poopspeedstream

メンバー登録日: 04/19/13

1 ポイント

1ガイドが承認済み

チーム

Cal Poly, Team 13-65, Johann Spring 2013 Cal Poly, Team 13-65, Johann Spring 2013人のメンバー

CPSU-JOHANN-S13S13G65

3 メンバー

6のガイドは作成済み

0 件のコメント

コメントを追加

統計データ:

過去 24時間: 0

過去 7 日: 0

過去 30 日: 0

今までの合計 1,787