メインコンテンツにスキップ

Garmin GPSmap 60CSx Screen Replacement

必要な工具と部品

  1. Garmin GPSmap 60CSx Screen Replacement, Back Cover and AA Batteries: 手順 1、 1の画像 1
    • Lift and twist the battery cover release 90 degrees counterclockwise on the back of the device.

  2. Garmin GPSmap 60CSx Screen Replacement: 手順 2、 1の画像 1
    • Lift battery release up to remove battery cover.

  3. Garmin GPSmap 60CSx Screen Replacement: 手順 3、 2の画像 1 Garmin GPSmap 60CSx Screen Replacement: 手順 3、 2の画像 2
    • Pull AA batteries out.

  4. Garmin GPSmap 60CSx Screen Replacement, Screen: 手順 4、 2の画像 1 Garmin GPSmap 60CSx Screen Replacement, Screen: 手順 4、 2の画像 2
    • Remove the six 10 mm screws on the back of the device with a Phillips #0 Screwdriver.

    • Flip the back panel over to view the green electronics board (the PCB) and the PCB cover.

    • Remove the black, yellow, blue, and red wires connected to the PCB with light force.

  5. Garmin GPSmap 60CSx Screen Replacement: 手順 5、 1の画像 1
    • Take the spudger and place it in the bottom right corner of the black PCB cover.

    • Use the spudger to pry the corner out. This will need to be done to all four corners of the PCB cover.

    • It is best to do remove the bottom corners first.

    • Pull the PCB cover out of the GPSMap 60CSx.

  6. Garmin GPSmap 60CSx Screen Replacement: 手順 6、 2の画像 1 Garmin GPSmap 60CSx Screen Replacement: 手順 6、 2の画像 2
    • Carefully use the spudger to lift the PCB a few centimeters.

    • Pull the PCB towards the bottom of the GPSMap 60CSx.

    • This will pull the other components out of the GPSMap 60CSx like the antenna and the screen.

  7. Garmin GPSmap 60CSx Screen Replacement: 手順 7、 3の画像 1 Garmin GPSmap 60CSx Screen Replacement: 手順 7、 3の画像 2 Garmin GPSmap 60CSx Screen Replacement: 手順 7、 3の画像 3
    • Apply light pressure to the four white tabs that are holding the screen in place.

    • The screen will now come off the PCB.

  8. Garmin GPSmap 60CSx Screen Replacement: 手順 8、 1の画像 1
    • Turn the PCB over so the screen connector is facing you.

    • Move the screen out of the way for access to the screen connector.

  9. Garmin GPSmap 60CSx Screen Replacement: 手順 9、 3の画像 1 Garmin GPSmap 60CSx Screen Replacement: 手順 9、 3の画像 2 Garmin GPSmap 60CSx Screen Replacement: 手順 9、 3の画像 3
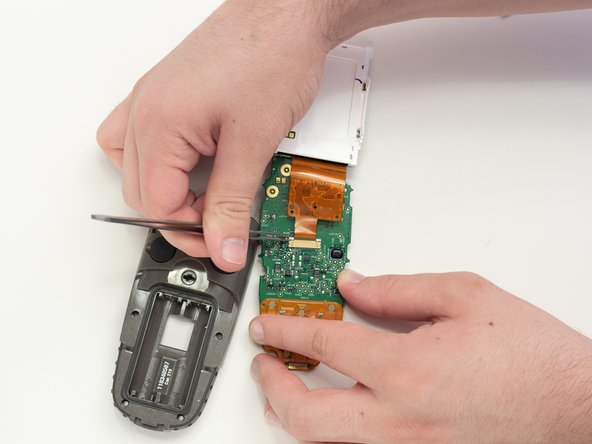
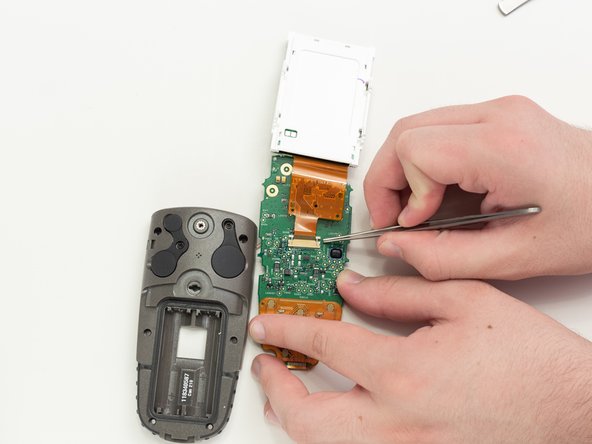
    • Use tweezers to pull the two white pins on the connector forward.

  10. Garmin GPSmap 60CSx Screen Replacement: 手順 10、 1の画像 1
    • Remove the screen ribbon connector and screen.

終わりに

To reassemble your device, follow these instructions in reverse order.

4 の人々がこのガイドを完成させました。

作成者

5人の作成者と共同で作成されました。

Thomas Humphrey

メンバー登録日: 04/05/18

540 ポイント

4のガイドは作成済み

チーム

2 件のコメント

i have a 60csx and the battery bounces the liquid, can help me?

salvador2707 - 返信

Thank you for these step by step detailed instructions.

jlciscorp - 返信

コメントを追加

統計データ:

過去 24時間: 1

過去 7 日: 12

過去 30 日: 36

今までの合計 4,578