メインコンテンツにスキップ

GameSir T4 Pro Joystick Replacement

必要な工具と部品

  1. GameSir T4 Pro Joystick Replacement, Battery: 手順 1、 1の画像 1
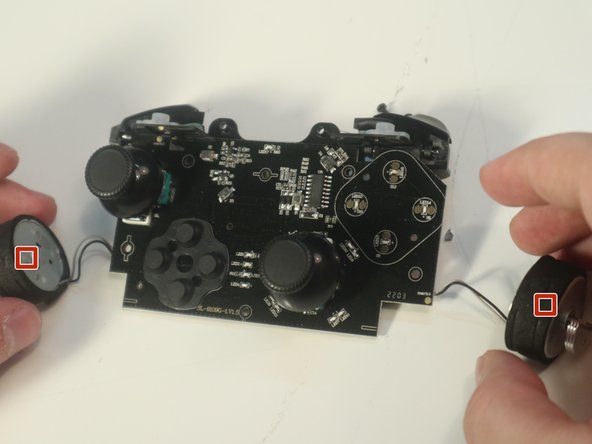
    • Using the Phillips 1 screwdriver, gently turn the screw to the left (repeat this step until all four screws are taken out).

  2. GameSir T4 Pro Joystick Replacement: 手順 2、 1の画像 1
    • Use your iFixit opening tool to break the seam of the back of your controller.

    • Be careful when pulling apart, as the charging port wires are connected to both sides of the controller.

  3. GameSir T4 Pro Joystick Replacement: 手順 3、 1の画像 1
    • Using the plastic spudger, wiggle the connection out of place.

  4. GameSir T4 Pro Joystick Replacement: 手順 4、 1の画像 1
    • Apply a slow, but consistent pull to the old 600 maH battery.

    • Attach new battery onto the pad.

  5. GameSir T4 Pro Joystick Replacement, Joystick: 手順 5、 2の画像 1 GameSir T4 Pro Joystick Replacement, Joystick: 手順 5、 2の画像 2
    • Disconnect the rumblers from the motherboard

    • Be careful not to pull the wires while disconnecting rumbler

  6. GameSir T4 Pro Joystick Replacement: 手順 6、 1の画像 1
    • Using the screwdriver, remove the 5 mm screws from the motherboard

  7. GameSir T4 Pro Joystick Replacement: 手順 7、 2の画像 1 GameSir T4 Pro Joystick Replacement: 手順 7、 2の画像 2
    • Using the wedge tool, pop the joystick out

  8. GameSir T4 Pro Joystick Replacement: 手順 8、 2の画像 1 GameSir T4 Pro Joystick Replacement: 手順 8、 2の画像 2
    • Make sure the square of the joystick matches the square of the pad and pop it in place.

終わりに

To reassemble your device, follow these instructions in reverse order.

ある他の人がこのガイドを完成しました。

作成者

2人の作成者と共同で作成されました。

Madison Puckett

メンバー登録日: 09/16/22

755 ポイント

5のガイドは作成済み

チーム

Western Carolina University, Team 1-4, Virtue Fall 2022 Western Carolina University, Team 1-4, Virtue Fall 2022人のメンバー

WCU-VIRTUE-F22S1G4

4 メンバー

10のガイドは作成済み

3 件のコメント

I bought ps4 joysticks for the repair, but ps4 joysticks seems larger so it's stuck

Mohamed NACERI - 返信

PlayStation4 stick is not compatible with GameSir T4 Pro. The stick for the Nintendo Switch PRO controller does not interfere, but this also requires processing for installation.

NAKIRI - 返信

It appears that you will need to remove the light diffuser(white tubular plastic sleeve) from the case to make the parts fit.

NAKIRI -

コメントを追加

統計データ:

過去 24時間: 3

過去 7 日: 34

過去 30 日: 171

今までの合計 3,792