メインコンテンツにスキップ

Game Boy Pocket Power Button Replacement

必要な工具と部品

  1. Game Boy Pocket Power Button Replacement, Remove the external screws: 手順 1、 3の画像 1 Game Boy Pocket Power Button Replacement, Remove the external screws: 手順 1、 3の画像 2 Game Boy Pocket Power Button Replacement, Remove the external screws: 手順 1、 3の画像 3
    • Place the Game Boy Pocket face-down on a clean, flat surface.

    • Use a Y1 tri-wing screwdriver and turn counterclockwise to remove the four external screws.

    • Use a Y1 tri-wing screwdriver and turn counterclockwise to remove the two screws inside the battery compartment.

  2. Game Boy Pocket Power Button Replacement, Open the device: 手順 2、 3の画像 1 Game Boy Pocket Power Button Replacement, Open the device: 手順 2、 3の画像 2 Game Boy Pocket Power Button Replacement, Open the device: 手順 2、 3の画像 3
    • Place your hands on the front and back covers of the Game Boy Pocket, and carefully separate the device.

    • Set the back cover aside. You will need it to reassemble the device.

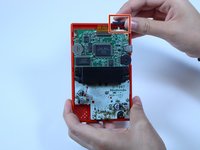
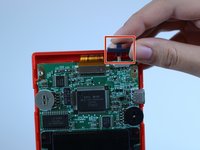
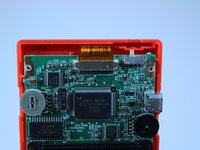
  3. Game Boy Pocket Power Button Replacement, Remove the power button: 手順 3、 3の画像 1 Game Boy Pocket Power Button Replacement, Remove the power button: 手順 3、 3の画像 2 Game Boy Pocket Power Button Replacement, Remove the power button: 手順 3、 3の画像 3
    • Use your fingers to remove the grey power button to the right of the ribbon cable.

終わりに

To reassemble your device, follow these instructions in reverse order.

ある他の人がこのガイドを完成しました。

作成者

3人の作成者と共同で作成されました。

Adriana Rahrig

メンバー登録日: 10/07/14

1,523 ポイント

5のガイドは作成済み

チーム

USF Tampa, Team 1-1, Leahy Fall 2014 USF Tampa, Team 1-1, Leahy Fall 2014人のメンバー

USFT-LEAHY-F14S1G1

4 メンバー

18のガイドは作成済み

0 件のコメント

コメントを追加

統計データ:

過去 24時間: 0

過去 7 日: 14

過去 30 日: 49

今までの合計 3,712