はじめに
このガイドでは、ゲームボーイポケットのフロントハウジングを交換する方法をご紹介します。ひび割れや擦り傷でゲームプレイ中に違和感がある、機能性に問題がある、単に外観やリセールバリューを向上させたいなど、理由は様々でしょう。どんな理由であれ、このガイドがあなたをカバーします!必要なのは、ドライバーを使う予備知識と、小さくて壊れやすいパーツを扱うので慎重な手つきだけです。
ゲームボーイポケットの電源が切れていることを確認してから始めてください。
- ヒント:フロントハウジングはプラスチック製なので、古いものはリサイクルするのが得策です。
必要な工具と部品
-
-
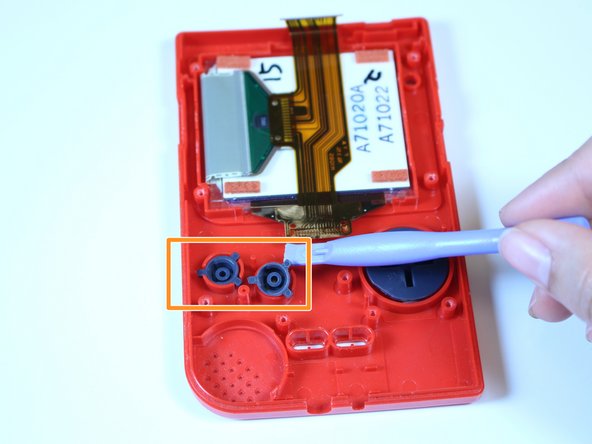
ゲームボーイポケットを伏せて平らな場所に置きます。バッテリーが搭載されているボックスのカバーを、中に入っているバッテリーと一緒に取り外します。
-
Y1トライウイングドライバーを使い、反時計回りに回して外側のネジ4本を外します。
-
Y1トライウイングドライバーを使用し、反時計回りに回してバッテリーが格納されているコンパートメント内側にある2本のネジを外します。
-
-


デバイスを再組み立てする際は、これらの修理ガイドを逆の順番に従って作業を進めてください。
デバイスを再組み立てする際は、これらの修理ガイドを逆の順番に従って作業を進めてください。
2 の人々がこのガイドを完成させました。
以下の翻訳者の皆さんにお礼を申し上げます:
100%

Midori Doiさんは世界中で修理する私たちを助けてくれています! あなたも貢献してみませんか?
翻訳を始める ›
チーム

USF Tampa, Team 1-1, Leahy Fall 2014 USF Tampa, Team 1-1, Leahy Fall 2014人のメンバー
USFT-LEAHY-F14S1G1
4 メンバー
18のガイドは作成済み