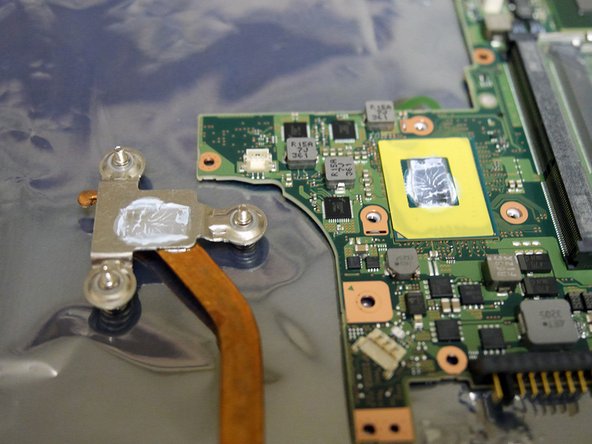
メインコンテンツにスキップ

必要な工具と部品

この分解は修理ガイドでは ありません。 お持ちのFujitsu T902を修理する際は、iFixitの修理ガイドをご利用ください。

  1. この手順は未翻訳です。 翻訳を手伝う。

    : 手順 1、 3の画像 1 : 手順 1、 3の画像 2 : 手順 1、 3の画像 3
    • Power off.

    • Remove battery by pushing down the latch lock and sliding the latch to the left as shown.

    • With your finger nail pry the battery off at the indent for the latch lock.

  2. この手順は未翻訳です。 翻訳を手伝う。

    : 手順 2、 3の画像 1 : 手順 2、 3の画像 2 : 手順 2、 3の画像 3
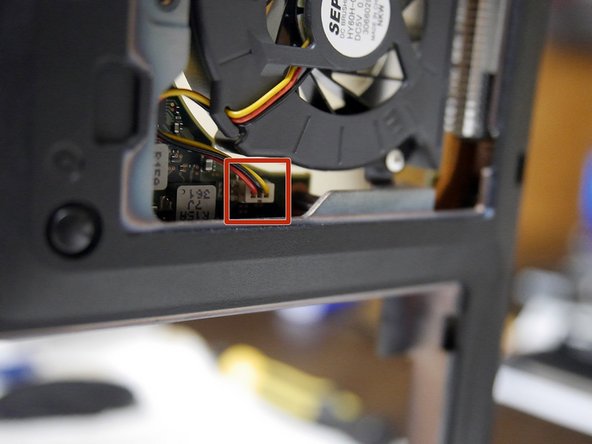
    • With battery removed take out the fan dust catcher (indicated by the red rectangle).

    • Using PH1 Philips screwdriver bit (indicated in third picture) remove the screws identified by the red circles.

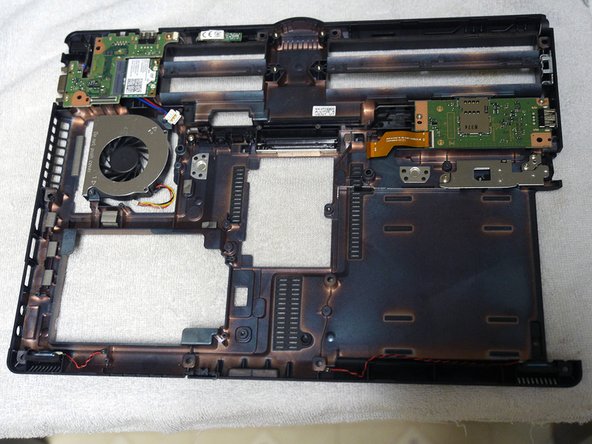
    • Remove the RAM, fan, and hard drive covers.

    • Remove the hard drive. Now everything should look like picture two.

  3. この手順は未翻訳です。 翻訳を手伝う。

    : 手順 3、 2の画像 1 : 手順 3、 2の画像 2
    • Remove expansion bay device. (battery, disk drive, weight saver)

    • Remove stylus pen.

  4. この手順は未翻訳です。 翻訳を手伝う。

    : 手順 4、 2の画像 1 : 手順 4、 2の画像 2
    • Using PH1 bit remove the five indicated screws in the battery well.

    • All screws in this step are the same size and length.

  5. この手順は未翻訳です。 翻訳を手伝う。

    : 手順 5、 2の画像 1 : 手順 5、 2の画像 2
    • Remove RAM.

    • Unplug system fan. (also indicated in picture two)

  6. この手順は未翻訳です。 翻訳を手伝う。

    : 手順 6、 1の画像 1
    • Using PH1 bit remove the 14 indicated screws on the base of the laptop, indicated by picture three.

    • All screws in this step are the same size and length.

  7. この手順は未翻訳です。 翻訳を手伝う。

    : 手順 7、 3の画像 1 : 手順 7、 3の画像 2 : 手順 7、 3の画像 3
    • Next we are going to remove the keyboard top, this gives access to the inside of the laptop.

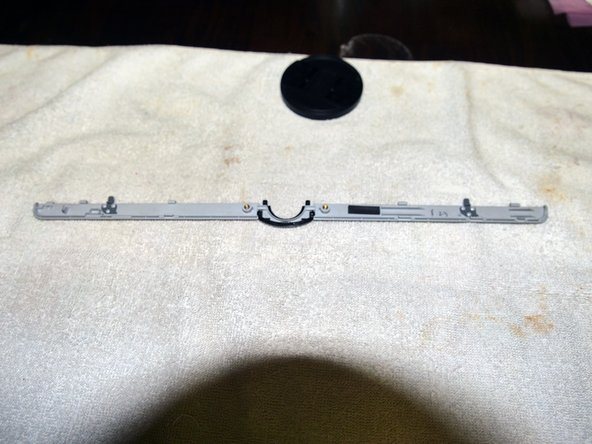
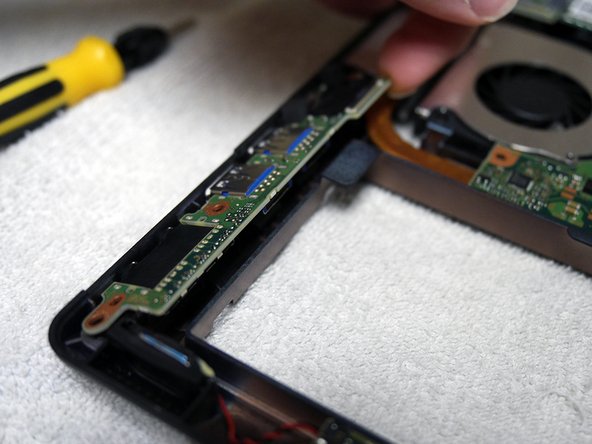
    • There are three tabs on the keyboard cover that keep it attached. (indicated by picture one)

    • Picture two you can see them disconnected, using a finger nail or electronic case opener gently release the tab by applying outward force on the black plastic part of the case.
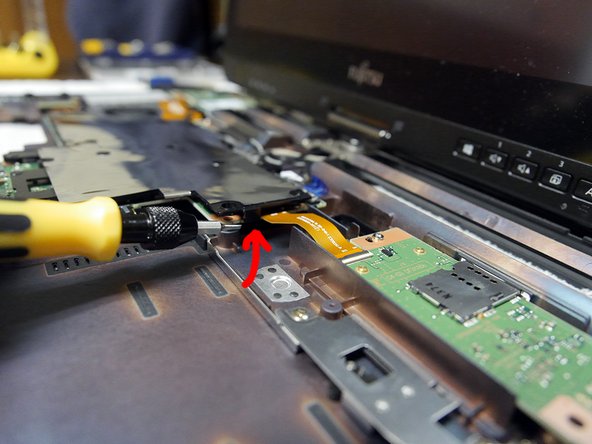
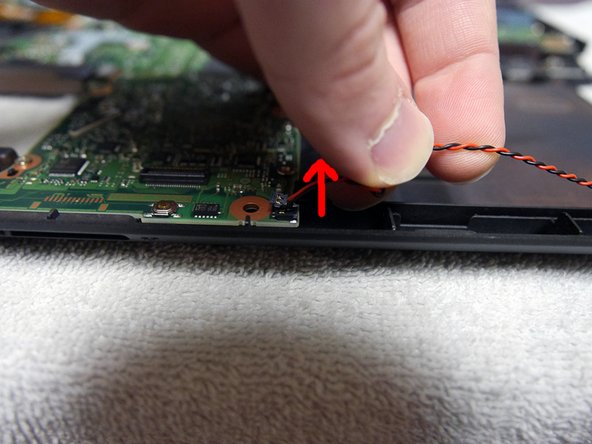
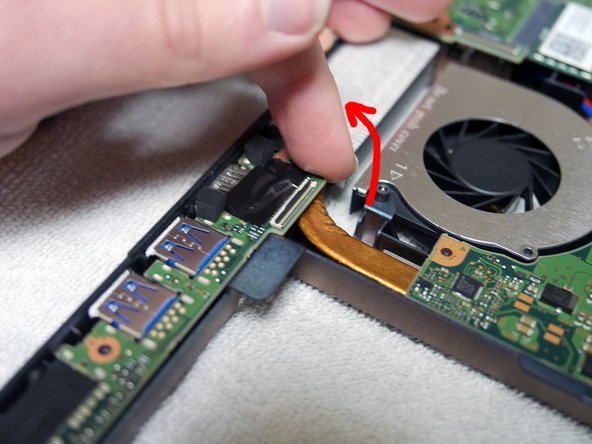
  8. この手順は未翻訳です。 翻訳を手伝う。

    : 手順 8、 3の画像 1 : 手順 8、 3の画像 2 : 手順 8、 3の画像 3
    • After unlatching the three tabs from the last step you should be able to remove the keyboard trim underneath the screen.

    • Apply gentle force around the edges to unhook any tabs and it should come right out.

  9. この手順は未翻訳です。 翻訳を手伝う。

    : 手順 9、 2の画像 1 : 手順 9、 2の画像 2
    • With the tabs unlatched and the keyboard trim removed you should be able to easily pivot the keyboard cover as shown.

    • Be careful not to pull on the data cable still tethered to the motherboard.

    • Using a fingernail or spudger disconnect the trackpad/keyboard data cable, then set aside the keyboard cover.

    • Same connector style as the HDD cable.

  10. この手順は未翻訳です。 翻訳を手伝う。

    : 手順 10、 3の画像 1 : 手順 10、 3の画像 2 : 手順 10、 3の画像 3
    • Remove the data ribbon cable indicated.

    • Very gently using a fingernail or small spudger lift up on the dark plastic part of the ZIF connectors. (illustrated in pictures two and three)

    • After unlatching both locks you can lift up on the cable and set it to the side.

  11. この手順は未翻訳です。 翻訳を手伝う。

    : 手順 11、 3の画像 1 : 手順 11、 3の画像 2 : 手順 11、 3の画像 3
    • Next we are removing the EMI shield attached to the motherbaord.

    • Shown in picture two if you release this one tab the cover pivots right off.

  12. この手順は未翻訳です。 翻訳を手伝う。

    : 手順 12、 2の画像 1 : 手順 12、 2の画像 2
    • Disconnect the speakers.

    • This is a different connector than I've seen before, on these you lift up vertically as indicated in picture two.

  13. この手順は未翻訳です。 翻訳を手伝う。

    : 手順 13、 3の画像 1 : 手順 13、 3の画像 2 : 手順 13、 3の画像 3
    • Next we are removing the USB and audio board. The blue circle is indicated where the only screw is, use your trust PH1 bit.

    • Use a fingernail or spudger to lift up the board as shown before pulling it out.

  14. この手順は未翻訳です。 翻訳を手伝う。

    : 手順 14、 1の画像 1
    • Disconnect the indicated side of the ribbon data cable.

    • Same connector as step 10.

  15. この手順は未翻訳です。 翻訳を手伝う。

    : 手順 15、 1の画像 1
    • Disconnect the indicated side of the ribbon data cable.

    • Same kind of connector as step 10 & 14.

  16. この手順は未翻訳です。 翻訳を手伝う。

    : 手順 16、 3の画像 1 : 手順 16、 3の画像 2 : 手順 16、 3の画像 3
    • Remove the wifi antennas. (picture one)

    • Remove the display, touch, and backlight connectors from the motherboard as indicated in pictures two and three.

  17. この手順は未翻訳です。 翻訳を手伝う。

    : 手順 17、 2の画像 1 : 手順 17、 2の画像 2
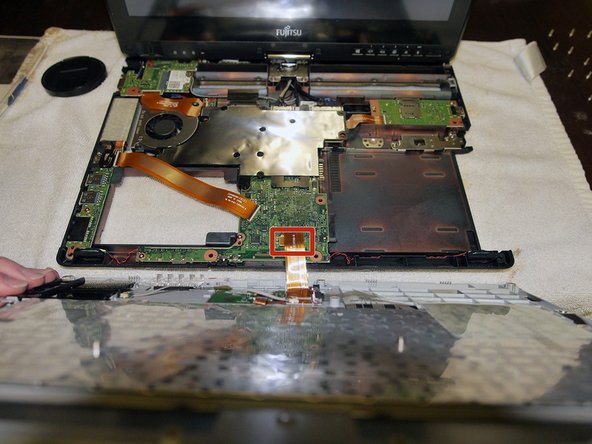
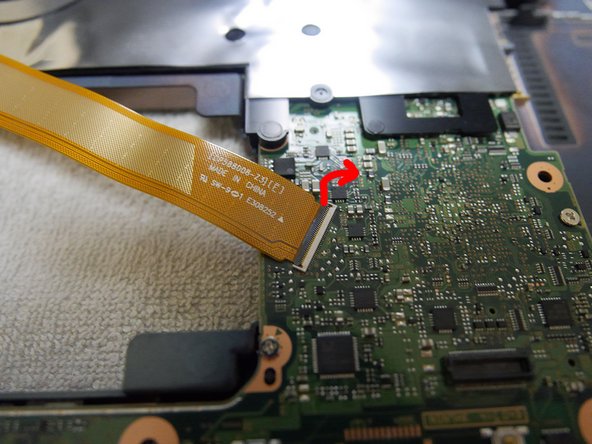
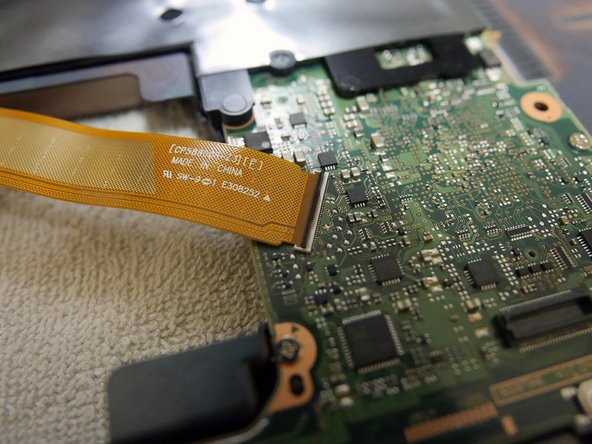
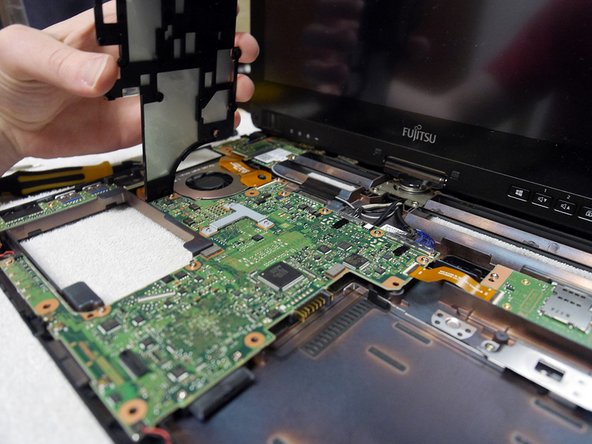
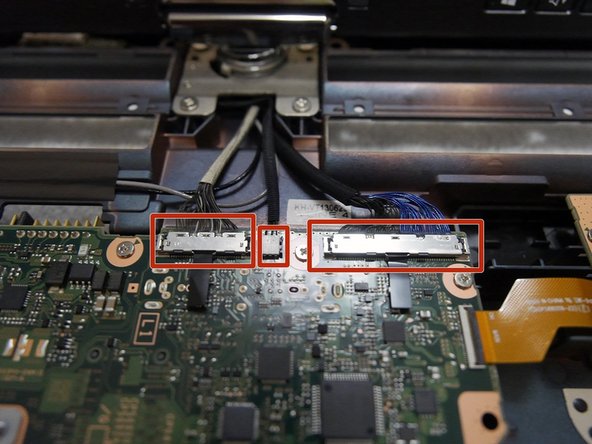
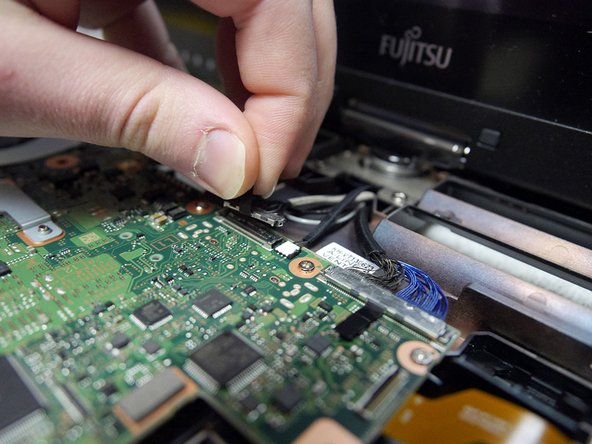
    • After disconnecting the display connections we are ready to unscrew the display mount screws.

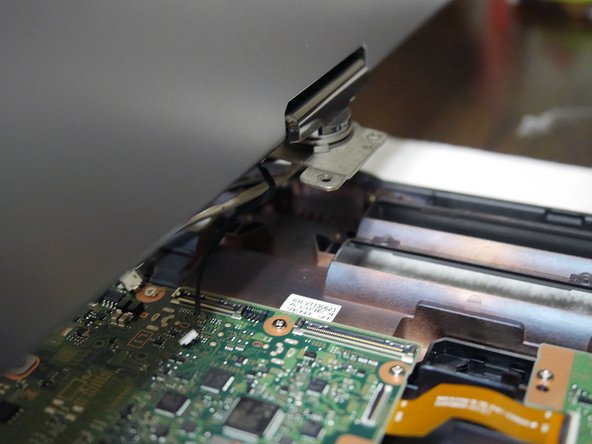
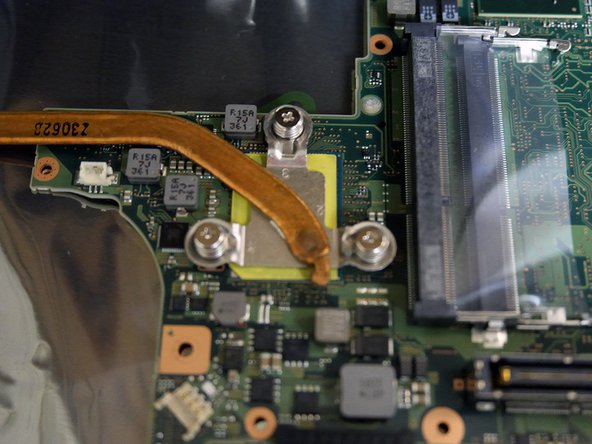
    • Use the trusty PH1 bit to take out the 4 screws indicated in picture one.

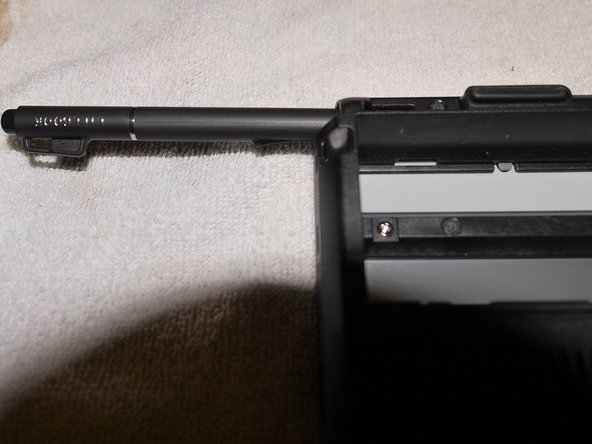
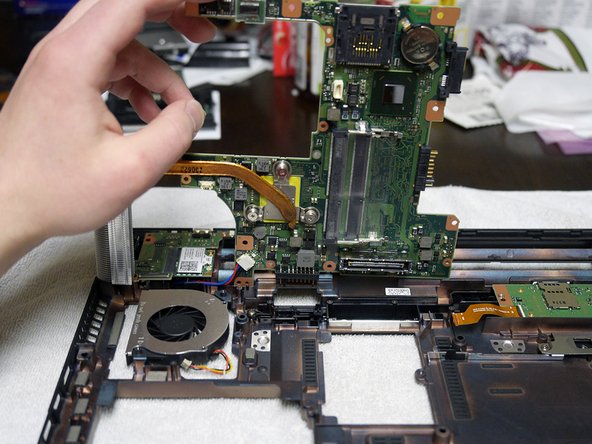
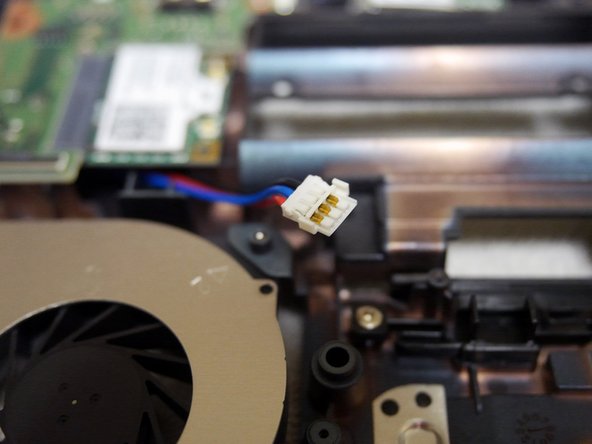
    • You can now lift out the display assembly, 2 antennas and 3 cables will be attached to it. Set it aside.

  18. この手順は未翻訳です。 翻訳を手伝う。

    : 手順 18、 2の画像 1 : 手順 18、 2の画像 2
    • Remove the 9 screws indicated in picture 1 with PH1 bit.

    • Pivot the motherboard up from the front as indicated in picture 2.

  19. この手順は未翻訳です。 翻訳を手伝う。

    : 手順 19、 3の画像 1 : 手順 19、 3の画像 2 : 手順 19、 3の画像 3
    • Next we must disconnect the power plug from the motherboard before we can remove it.

    • This connector is the same style as from step 12.

    • Now you can remove the motherboard and set it aside on an anti-static bag or surface.

    • The motherboard is very sensitive so handle it with care by only touching the edges of the board and make sure you are properly grounded to ensure no ESD occurs.

  20. この手順は未翻訳です。 翻訳を手伝う。

    : 手順 20、 3の画像 1 : 手順 20、 3の画像 2 : 手順 20、 3の画像 3
    • Heatsink is very inadequate, which is why this laptop gets noticeably high temperatures.

    • Board appears to be well designed and made to the highest of quality standards.

    • Thermal paste appears to be gooped on but applying an alternative had no significant advantages.

  21. この手順は未翻訳です。 翻訳を手伝う。

    : 手順 21、 1の画像 1
    • All the screws categorized.

    • Correction: Battery well not keyboard well.

Maxxender

メンバー登録日: 02/22/14

141 ポイント

1ガイドが承認済み

4 件のコメント

Thanks for posting this..

Jennifer Petrila - 返信

Thank you! Very helpful

Eric Miller - 返信

Well done! Thank you!

mgshouldice - 返信

Hi, which one is the digitizer cable?

tnnt05 - 返信

コメントを追加

統計データ:

過去 24時間: 5

過去 7 日: 29

過去 30 日: 80

今までの合計 11,328