メインコンテンツにスキップ

この修理ガイドは変更されています。最新の未承認バージョンに切り替えます。

Fujitsu LifeBook N3510 Wireless Module Replacement

必要な工具と部品

  1. Fujitsu LifeBook N3510 Wireless Module Replacement, Battery: 手順 1、 1の画像 1
    • Locate the two clips on the bottom of the computer that support the battery.

  2. Fujitsu LifeBook N3510 Wireless Module Replacement: 手順 2、 1の画像 1
    • Using your fingers, push the clips inward and then upward.

    • Lift the battery out of the computer.

  3. Fujitsu LifeBook N3510 Wireless Module Replacement, Hinge Cover: 手順 3、 3の画像 1 Fujitsu LifeBook N3510 Wireless Module Replacement, Hinge Cover: 手順 3、 3の画像 2 Fujitsu LifeBook N3510 Wireless Module Replacement, Hinge Cover: 手順 3、 3の画像 3
    • Use a spudger to lift the back of the hinge cover on the left and right sides of the computer.

  4. Fujitsu LifeBook N3510 Wireless Module Replacement: 手順 4、 1の画像 1
    • Lay the computer flat on a stable surface with the monitor pointing away from you.

  5. Fujitsu LifeBook N3510 Wireless Module Replacement: 手順 5、 3の画像 1 Fujitsu LifeBook N3510 Wireless Module Replacement: 手順 5、 3の画像 2 Fujitsu LifeBook N3510 Wireless Module Replacement: 手順 5、 3の画像 3
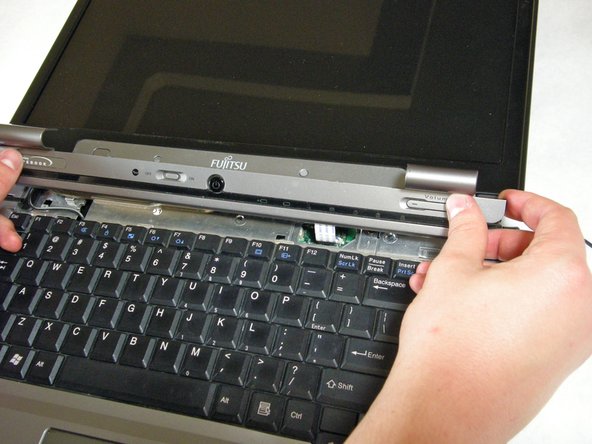
    • Use a spudger to partially lift the hinge cover.

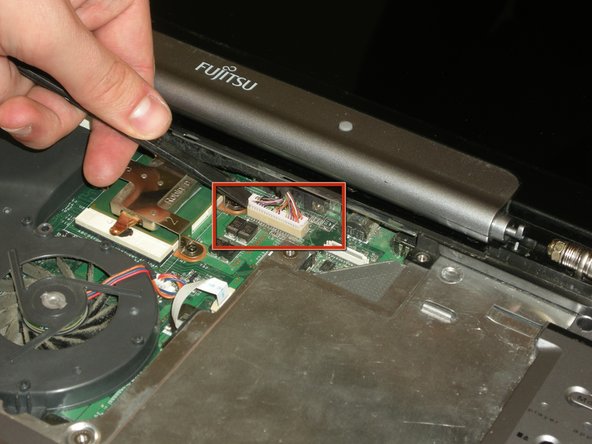
  6. Fujitsu LifeBook N3510 Wireless Module Replacement: 手順 6、 2の画像 1 Fujitsu LifeBook N3510 Wireless Module Replacement: 手順 6、 2の画像 2
    • The hinge cover has a ribbon cable that is attached to the motherboard. To prevent damage, lift the hinge cover slowly.

    • Lift the hinge cover enough to expose the ribbon cable.

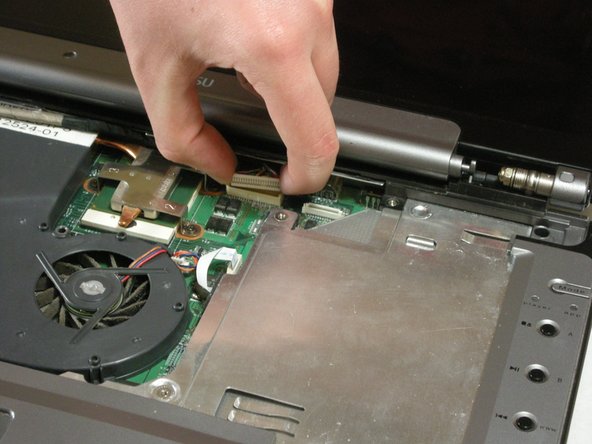
  7. Fujitsu LifeBook N3510 Wireless Module Replacement: 手順 7、 2の画像 1 Fujitsu LifeBook N3510 Wireless Module Replacement: 手順 7、 2の画像 2
    • Disconnect the ribbon cable from the motherboard and remove the hinge cover from the computer.

  8. Fujitsu LifeBook N3510 Wireless Module Replacement, Keyboard: 手順 8、 3の画像 1 Fujitsu LifeBook N3510 Wireless Module Replacement, Keyboard: 手順 8、 3の画像 2 Fujitsu LifeBook N3510 Wireless Module Replacement, Keyboard: 手順 8、 3の画像 3
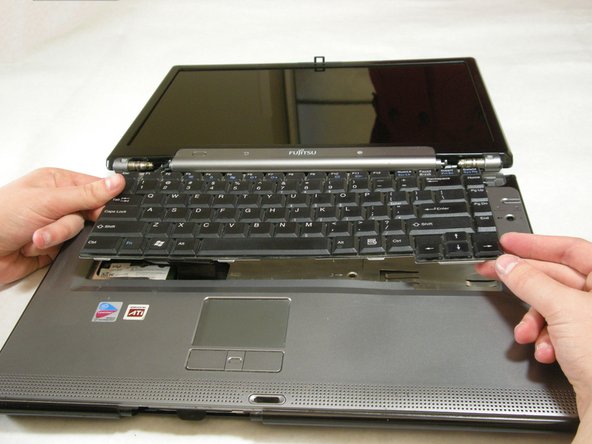
    • The keyboard has a ribbon cable that is attached to the motherboard. To prevent damage, lift keyboard slowly.

    • Lift the keyboard enough to expose the ribbon cable.

  9. Fujitsu LifeBook N3510 Wireless Module Replacement: 手順 9、 2の画像 1 Fujitsu LifeBook N3510 Wireless Module Replacement: 手順 9、 2の画像 2
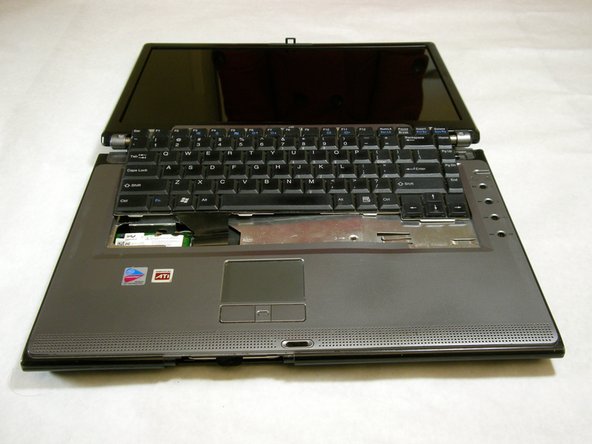
    • Use a spudger to release the ribbon cable from the motherboard.

  10. Fujitsu LifeBook N3510 Wireless Module Replacement: 手順 10、 2の画像 1 Fujitsu LifeBook N3510 Wireless Module Replacement: 手順 10、 2の画像 2
    • After the ribbon has been detached, carefully remove the keyboard.

  11. Fujitsu LifeBook N3510 Wireless Module Replacement, Metal Motherboard Cover: 手順 11、 1の画像 1
    • Remove the following screws, all labeled "3."

    • Two 8.63mm screws.

    • One 7.65mm screw.

    • One 5.74mm screw.

    • Remove the following screw, labeled "15."

    • One 17.81mm screw.

  12. Fujitsu LifeBook N3510 Wireless Module Replacement: 手順 12、 3の画像 1 Fujitsu LifeBook N3510 Wireless Module Replacement: 手順 12、 3の画像 2 Fujitsu LifeBook N3510 Wireless Module Replacement: 手順 12、 3の画像 3
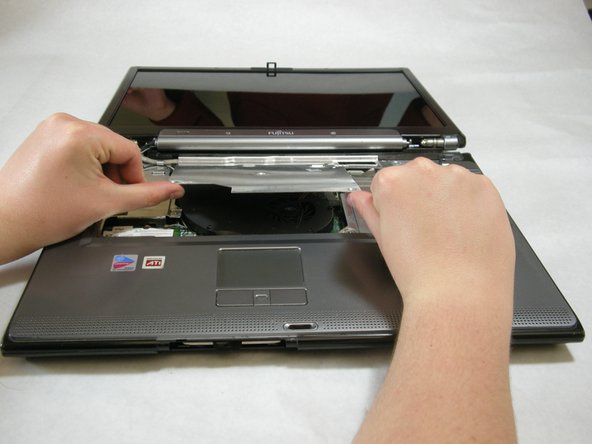
    • Lift the cover with fingers and remove.

  13. Fujitsu LifeBook N3510 Wireless Module Replacement, Display: 手順 13、 1の画像 1
    • Remove labeled screws.

  14. Fujitsu LifeBook N3510 Wireless Module Replacement: 手順 14、 1の画像 1
    • Remove the screws from the bottom of the hinge as shown in the image.

  15. Fujitsu LifeBook N3510 Wireless Module Replacement: 手順 15、 3の画像 1 Fujitsu LifeBook N3510 Wireless Module Replacement: 手順 15、 3の画像 2 Fujitsu LifeBook N3510 Wireless Module Replacement: 手順 15、 3の画像 3
    • Use a spudger to detach and remove cables from the motherboard.

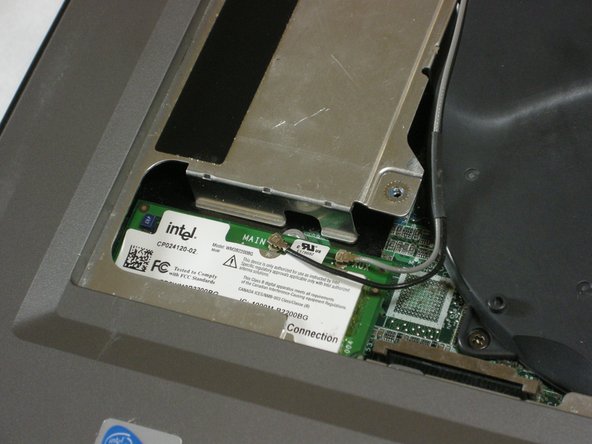
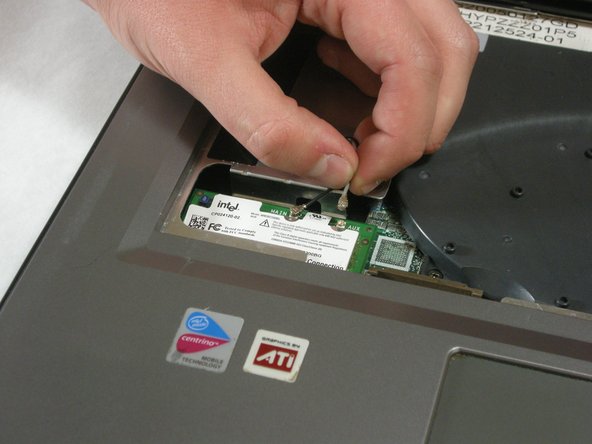
  16. Fujitsu LifeBook N3510 Wireless Module Replacement: 手順 16、 3の画像 1 Fujitsu LifeBook N3510 Wireless Module Replacement: 手順 16、 3の画像 2 Fujitsu LifeBook N3510 Wireless Module Replacement: 手順 16、 3の画像 3
    • Unplug highlighted cables from the wireless module.

  17. Fujitsu LifeBook N3510 Wireless Module Replacement: 手順 17、 3の画像 1 Fujitsu LifeBook N3510 Wireless Module Replacement: 手順 17、 3の画像 2 Fujitsu LifeBook N3510 Wireless Module Replacement: 手順 17、 3の画像 3
    • Hold down the body of the computer by placing your hands in the pictured positions. Then, lift the display from the body.

  18. Fujitsu LifeBook N3510 Wireless Module Replacement, Top Palm Rest Cover: 手順 18、 1の画像 1
    • Remove the 4 labeled screws.

  19. Fujitsu LifeBook N3510 Wireless Module Replacement: 手順 19、 1の画像 1
    • Remove screws from bottom of laptop as shown in the picture.

  20. Fujitsu LifeBook N3510 Wireless Module Replacement: 手順 20、 1の画像 1
    • Lift the palm rest cover from the base of the laptop.

    • You may use spudger if needed, lift from the front corners as shown.

  21. Fujitsu LifeBook N3510 Wireless Module Replacement: 手順 21、 1の画像 1
    • Great job! You have successfully removed the old palm rest cover.

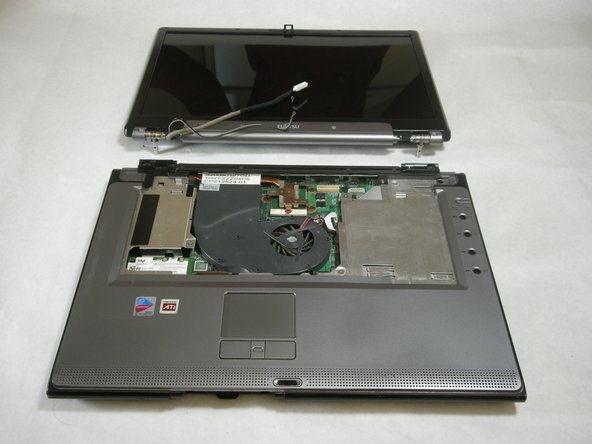
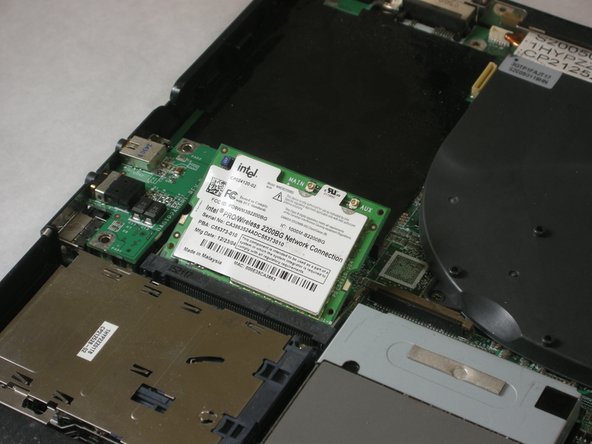
  22. Fujitsu LifeBook N3510 Wireless Module Replacement, Wireless Module: 手順 22、 3の画像 1 Fujitsu LifeBook N3510 Wireless Module Replacement, Wireless Module: 手順 22、 3の画像 2 Fujitsu LifeBook N3510 Wireless Module Replacement, Wireless Module: 手順 22、 3の画像 3
    • Push securing clips outward, the wireless module will pop out.

    • Remove the wireless module.

  23. Fujitsu LifeBook N3510 Wireless Module Replacement: 手順 23、 1の画像 1
    • A picture of the removed wireless module is shown to the left.

終わりに

To reassemble your device, follow these instructions in reverse order.

作成者

7人の作成者と共同で作成されました。

Neil Daniels

メンバー登録日: 01/17/11

1,411 ポイント

11のガイドは作成済み

チーム

Cal Poly, Team 5-18, Amido Winter 2011 Cal Poly, Team 5-18, Amido Winter 2011人のメンバー

CPSU-AMIDO-W11S5G18

3 メンバー

22のガイドは作成済み

0 件のコメント

コメントを追加

統計データ:

過去 24時間: 0

過去 7 日: 0

過去 30 日: 2

今までの合計 2,353