この翻訳は、ソースガイドの最新の更新を反映していない可能性があります。 翻訳の更新に協力してください。 または ソースガイドを参照してください。
はじめに
カメラシェルは、Fujifilm Instax Mini 8の外側を構成するプラスチックケースのことです。内側に配線を隠し、フィルムを保護し、このカメラの主要コンポーネントをコンパクトにまとめています。カメラシェルが損傷すると、デバイスの整合性が損なわれ、カメラの他の部品の故障の原因となることがあります。
必要な工具と部品
-
-
タブを下に押して、フィルムの収納カバーのラッチを外します。
-
コンパートメントからフィルムを取り除きます(フィルムがある場合)。
-
収納カバーを完全に外します。
-
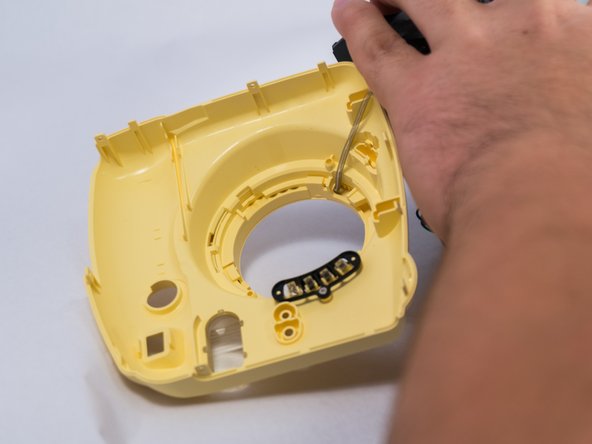
まず#00フィリップスドライバーを使用し、反時計回りに回してネジを取り外します。
How do i remove the compartment cover?
With the film door closed, try inserting the opener tool into the seam between the camera front and back plates on the side closest to the film door hinge, and start working your way around the camera.
Remember there’s another screw under the small oval plate covering where the pictures pop out.
-
-


*デバイスを再組み立てする際は、これらの手順を逆の順番に従って作業を進めてください。
*デバイスを再組み立てする際は、これらの手順を逆の順番に従って作業を進めてください。
12 の人々がこのガイドを完成させました。
以下の翻訳者の皆さんにお礼を申し上げます:
87%

Midori Doiさんは世界中で修理する私たちを助けてくれています! あなたも貢献してみませんか?
翻訳を始める ›

チーム

USF Tampa, Team 4-1, Meier Fall 2015 USF Tampa, Team 4-1, Meier Fall 2015人のメンバー
USFT-MEIER-F15S4G1
4 メンバー
24のガイドは作成済み
18 件のコメント
For removing initial screws, there are 9 screws. The 9th screw is under the cover overlying the exit of the Polaroid film area. (hidden under the cover)
but where near the exit? i cannot find it
It's at the top of the camera where you get picture.
xxx -
I need the circular yellow plastic piece that goes around the lens. How can I obtain that? How do I attach?
jason81173 - 返信
I've drop my instax mini 8 at the airport and it looks perfectly fine at first until I realized that the film compartment has broken and it can't close its 'door', but the instax still can be use just need to press the door against the film everytime I used which is annoying. Does anyone know how to fix it?
Did you find the replacement part?
where do i find the circular plastic piece online how do i find it? what website? what shop?
pls help. battry leak. corrossion. forgot to remove. 1x use palang. what can i do?
you can use vingear and cotton buds to clean the white stuff and then wipe with alcohol; goog;e clean battery leak in youtube then you will know what to do
kit kat -
That final spring is broken on my camera. Do you know what the specs of it are so that I could get a replacement?
HI Jack, I have the same issue, where did you find the spring at the end and what are the specs?
kit kat -
A few missing parts in the assembly that might help if your camera "explodes" on opening:
- The metal flat spring goes under the shot button. As for the button, there are different diameter holes, so is easy to fit properly. Just test clicking feels
- The "black square" part goes under the strap holes, clipped between shell and chassis (you can place it after fitting the front shell)
- The long spring can "disappear" hidden in the front shell after you unclip it from the lens. No panic, you can easily find it opening from the inside of the shell, the front ring cover with the lettering (it has 3 adhesive pads, plus the tabs). With the cover out is very easy to assemble, fitting the spring first in the lens and letting it go straight into the front (youtube video "FUJIFILM instax mini9./error prob. very easy.").
Please, be very careful manipulating the motherboard. This capacitor has high voltage and keeps charge for ages, it can shock you several times and it is quite unpleasant (don't ask how I found it).
Just posting this to thank you. Could not figure out where the black square went after the camera "exploded".
Jamato -
Hello!
When removing the case, two parts fell out:
a black plasicc part and a metal part.
Has anyone an idea where to fit these?
This doesnt show it but there is a screw under a plastic "pop out" cover where the photo comes out at the top
Margaret Compton - 返信