メインコンテンツにスキップ

Fujifilm Finepix F10 6.3 MP Shutter Button Replacement

必要な工具と部品

  1. Fujifilm Finepix F10 6.3 MP Shutter Button Replacement, Back Cover: 手順 1、 1の画像 1
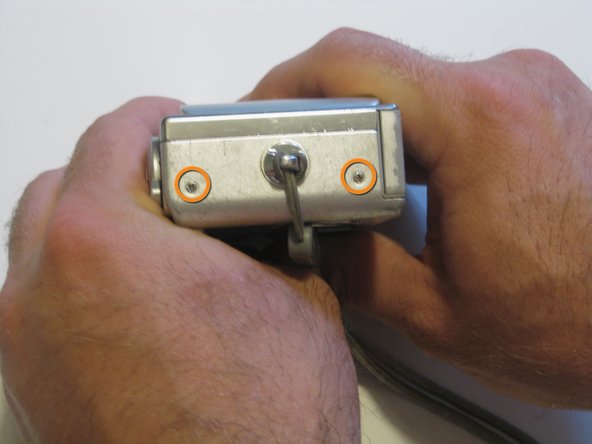
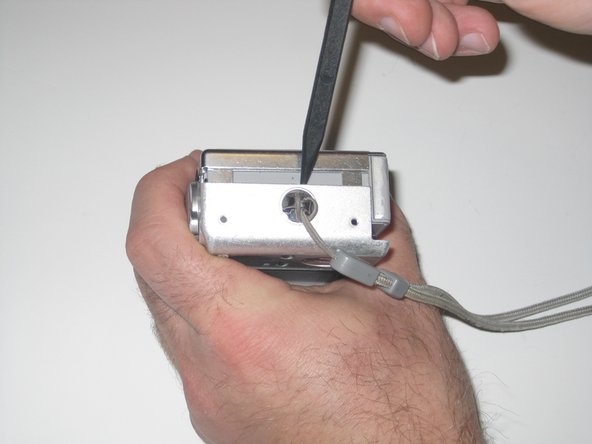
    • Remove the screws from the bottom of the camera using the tri-wing screwdriver.

    • Three 5.4 mm tri-head screws.

  2. Fujifilm Finepix F10 6.3 MP Shutter Button Replacement: 手順 2、 1の画像 1
    • Remove screws from charger side of camera using the Phillips 00 screwdriver.

    • Two 3.3 mm Phillips #00 screws.

  3. Fujifilm Finepix F10 6.3 MP Shutter Button Replacement: 手順 3、 1の画像 1
    • Remove screws from wrist-strap side of camera using the Phillips 00 screwdriver.

    • Two 3.3 mm Phillips #00 screws.

  4. Fujifilm Finepix F10 6.3 MP Shutter Button Replacement: 手順 4、 3の画像 1 Fujifilm Finepix F10 6.3 MP Shutter Button Replacement: 手順 4、 3の画像 2 Fujifilm Finepix F10 6.3 MP Shutter Button Replacement: 手順 4、 3の画像 3
    • Separate the front and back casing using the spudger.

    • Gently pull apart the two casings.

    • Pull the back casing away from the camera.

  5. Fujifilm Finepix F10 6.3 MP Shutter Button Replacement, LCD: 手順 5、 1の画像 1
    • Remove screws from the casing covering the LCD using the Phillips 00 screwdriver.

    • Remove the fifteen 2.9 mm Phillips #00 screws.

  6. Fujifilm Finepix F10 6.3 MP Shutter Button Replacement: 手順 6、 1の画像 1
    • Slide casing out using the spudger.

  7. Fujifilm Finepix F10 6.3 MP Shutter Button Replacement: 手順 7、 2の画像 1 Fujifilm Finepix F10 6.3 MP Shutter Button Replacement: 手順 7、 2の画像 2
    • Gently remove the LCD display data cable by gripping the end that is connected to the motherboard and pulling out.

  8. Fujifilm Finepix F10 6.3 MP Shutter Button Replacement, Shutter Button: 手順 8、 2の画像 1 Fujifilm Finepix F10 6.3 MP Shutter Button Replacement, Shutter Button: 手順 8、 2の画像 2
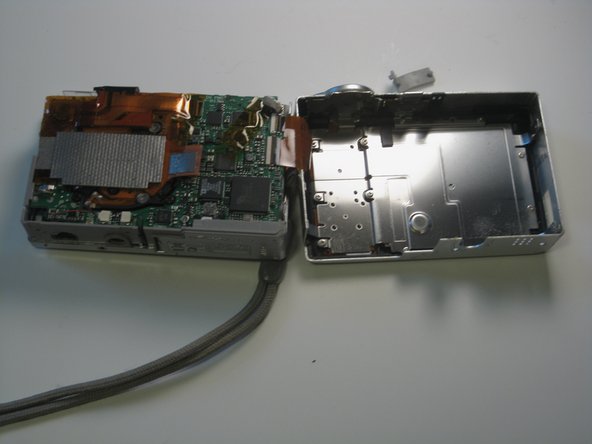
    • Pull on the shutter button display data cable on the end connected to the motherboard until it slides out.

  9. Fujifilm Finepix F10 6.3 MP Shutter Button Replacement: 手順 9、 2の画像 1 Fujifilm Finepix F10 6.3 MP Shutter Button Replacement: 手順 9、 2の画像 2
    • While slightly rotating the shutter button and data cable counter-clockwise, pull out until whole component comes out.

    • When inserting the new shutter button and data cable component, be sure it is placed properly into the camera or it will not function correctly.

終わりに

To reassemble your device, follow these instructions in reverse order.

ある他の人がこのガイドを完成しました。

作成者

3人の作成者と共同で作成されました。

Sarah Looper

メンバー登録日: 03/11/13

100 ポイント

7のガイドは作成済み

チーム

Clemson, Team 13-4, Benson Spring 2013 Clemson, Team 13-4, Benson Spring 2013人のメンバー

CLEM-BENSON-S13S13G4

2 メンバー

16のガイドは作成済み

0 件のコメント

コメントを追加

統計データ:

過去 24時間: 0

過去 7 日: 0

過去 30 日: 2

今までの合計 1,032