はじめに
The flash unit offers lighting and perspective for images taken in low-light environments. Its use is highly recommended for quality photography.
必要な工具と部品
-
-
Locate the battery hatch on the bottom side of the camera, opposite the side with the power button.
-
Using your thumb, slide the hatch away from the center of the camera.
-
Flip the hatch toward yourself to open it. The batteries are spring-loaded; once the hatch is open, they will protrude far enough to be removed by hand.
-
-
-
Locate the memory card in the long, thin slot above the battery compartment.
-
Using your thumb, push the memory card farther into the camera.
-
The memory card is spring-loaded and will pop out of the camera far enough to be removed by hand.
-
-
-
Locate the two 5.0 mm screws on the bottom of the camera and remove them using a tri-point screwdriver with a Y0 bit.
-
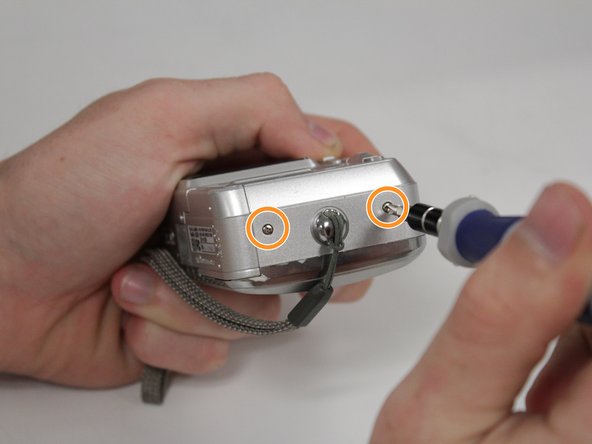
Locate the two 3.0 mm screws on the side of the camera with the wrist strap and remove them using a tri-point screwdriver with a Y0 bit.
-
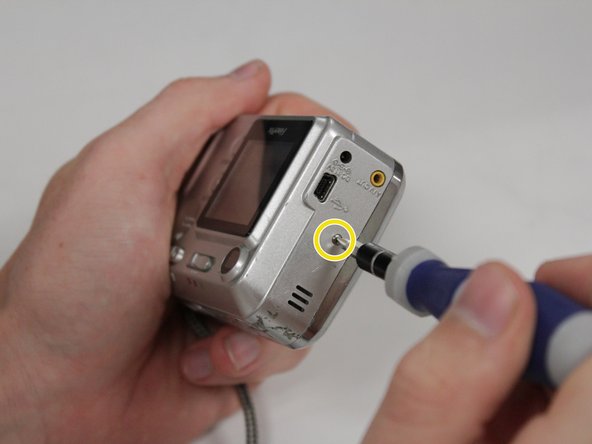
Locate the single 5.0 mm screw on the opposite side of the camera and remove it using a tri-point screwdriver with a Y0 bit.
-
-
-
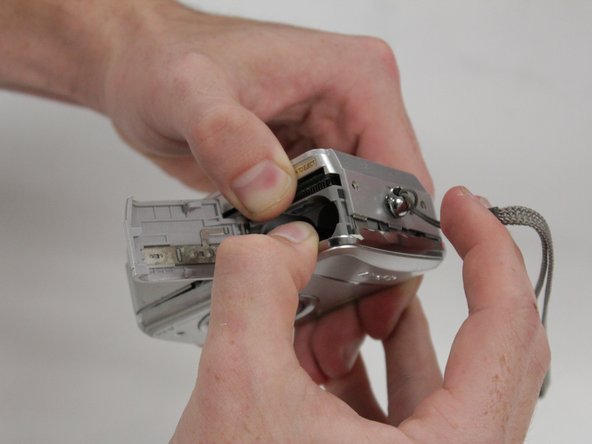
Pry the case apart. Note that the case is very tightly sealed and will be difficult to open. Use a plastic opening tool on the crease between the two halves of the case and put two fingers in the battery compartment to create leverage to pull apart. The battery compartment is attached to the half of the case that contains the lens.
-
Once the two halves of the case have begun to come apart, pull the wrist strap away from the front of the camera to remove it.
-
-
-
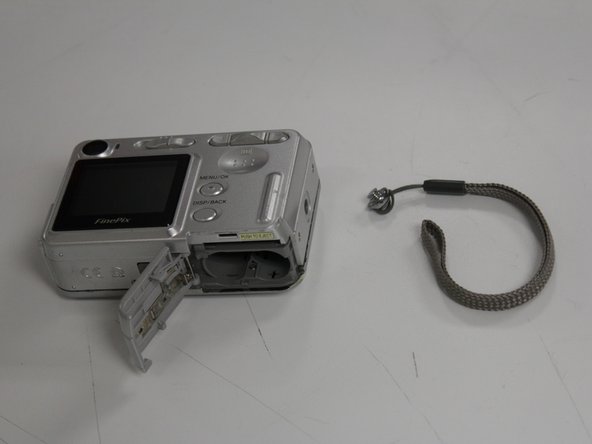
Once the wrist strap has been removed, continue to carefully pull the two halves of the case away from each other.
-
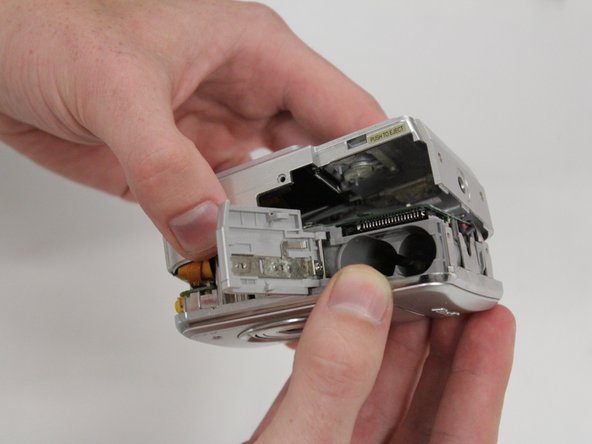
Tilt the back half of the case away from the battery compartment. Proceed slowly to avoid damage to the ribbon cable that is connected to the screen.
-
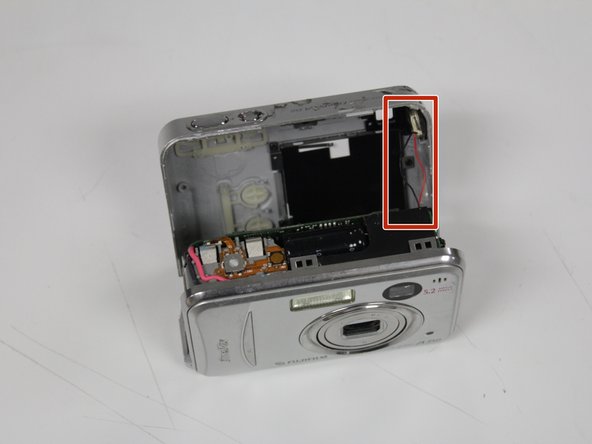
Locate the speaker at the end of the pair of red and black wires holding the halves of the case together. Take care not to pull the wires, else they may detach from the motherboard and damage the camera.
-
-
-
Slide the speaker pad away from the back half of the case and out of its holster.
-
After the speaker pad has been removed, the two halves of the case will be connected solely by a ribbon cable leading to the screen. The speaker wires will remain attached to the motherboard.
-
To completely remove the speaker, use a soldering iron to desolder the red and black wires connecting the speaker to the motherboard. Note the black wire goes to the terminal closest to the outside of the camera.
-
-
-
-
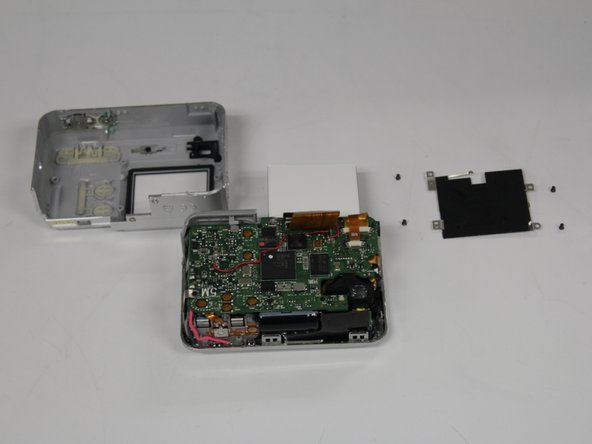
Locate the four 3.0 mm screws holding a thin, black plastic film to the back of the LCD screen. Remove them using a Phillips screwdriver with a #0 bit.
-
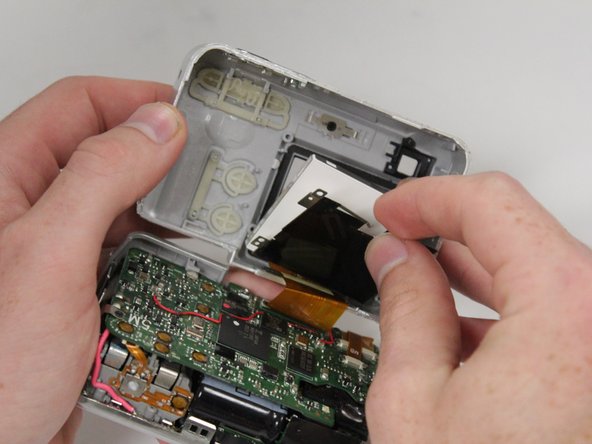
After the screws have been removed, the black plastic film and LCD screen can be removed by lifting up the end opposite the attached ribbon cable.
-
-
-
Locate the wide ribbon cable connecting the screen to the motherboard.
-
Place your thumb at the base of the ribbon cable where it connects to the motherboard. Carefully pull the ribbon cable out of its connector without pulling it up or away from the motherboard.
-
The ribbon cable should detach from the motherboard but remain connected to the screen, which can now be removed from the camera.
-
-
-
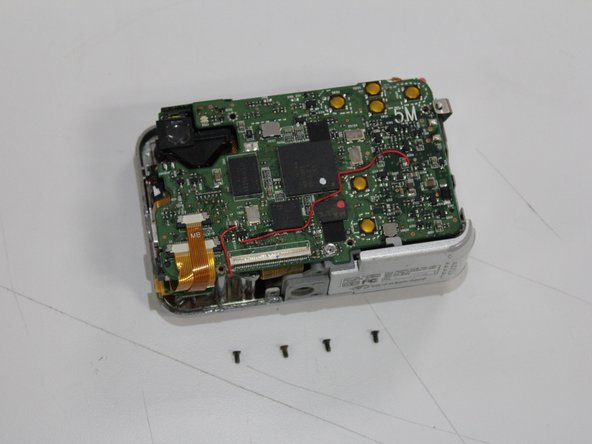
Locate four black 3.0 mm screws on the motherboard and remove them using a Phillips screwdriver with a #0 bit.
-
-
-
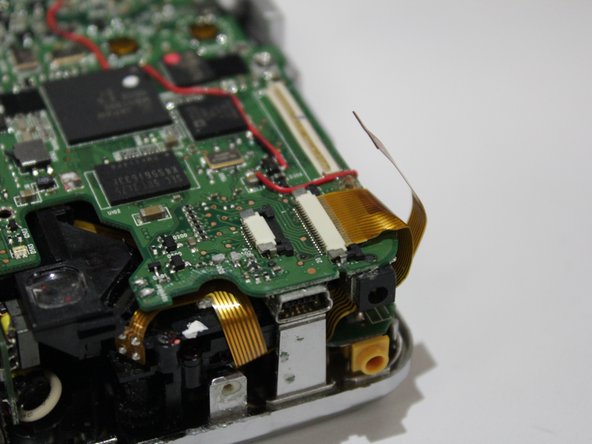
Locate the two orange ribbon cables next to the LCD screen connector. Starting with the smaller cable, use a pair of tweezers to slide the two ends of the black clamp away from the pale plastic connector.
-
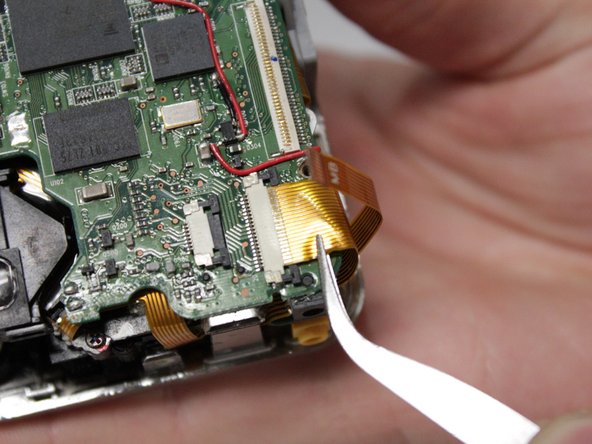
Use tweezers to carefully remove the smaller cable from its connector.
-
-
-
Locate a third ribbon cable, near the previous two, but on the underside of the motherboard.
-
Slightly raise the motherboard to access the ribbon cable with a pair of tweezers. Remove the cable from its connector, following the same procedure as above.
-
Once these three ribbon cables have been removed, the motherboard will be connected to the case only by a fourth ribbon cable and a pair of red and black wires in one corner.
-
-
-
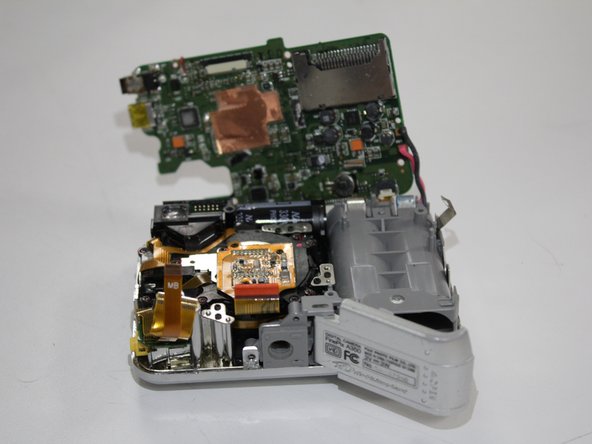
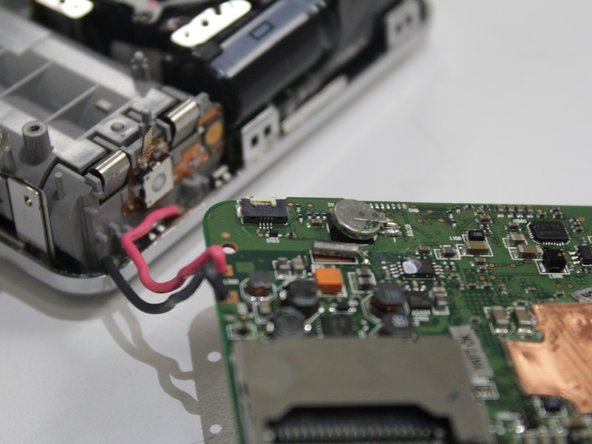
Separate the motherboard from the case by pulling directly upward. Some resistance is normal; the board is loosely held in place by plastic notches and grooves. It will still be connected via a pair of red and black wires and a fourth small ribbon cable.
-
Locate the fourth ribbon cable on the underside of the motherboard where the red and black wires connect to the battery compartment. Unlike the previous ribbon cables, the clamp is white and the connector is black. Use tweezers to loosen the white clamp before disconnecting the ribbon cable.
-
To completely remove the board, use a soldering iron to desolder the red and black wires connecting the motherboard to the battery compartment. Note the black wire goes to the terminal closest to the memory card slot.
-
-
-
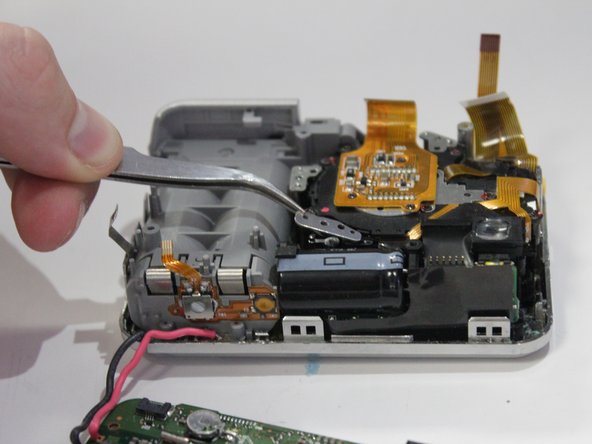
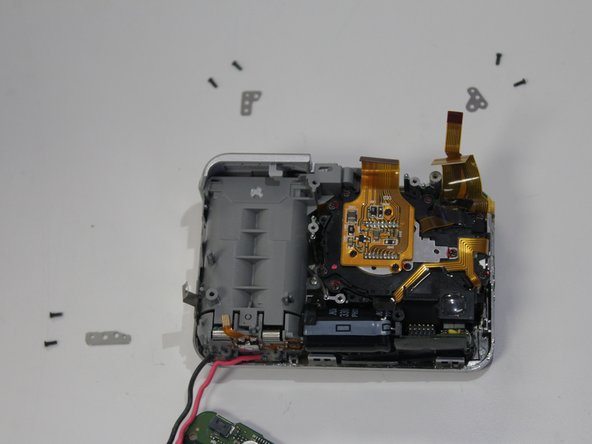
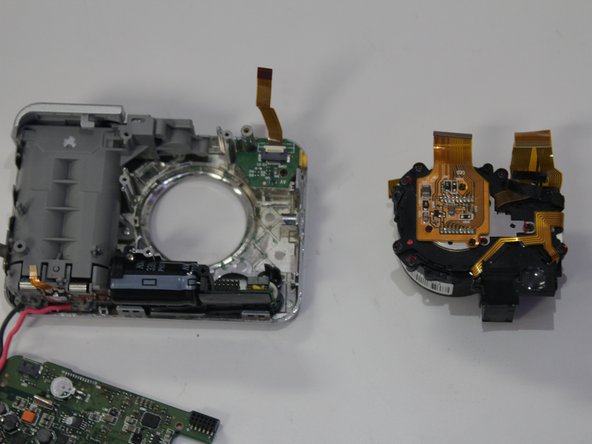
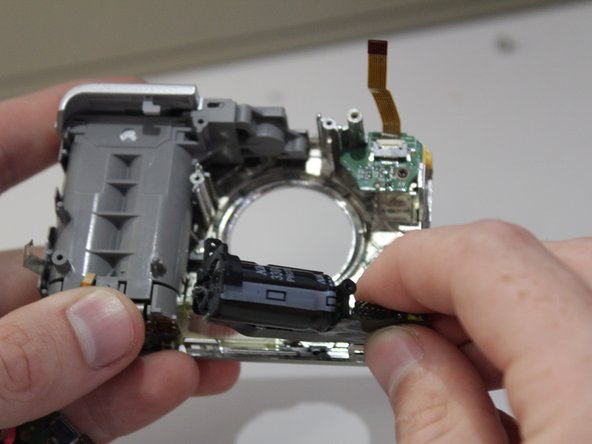
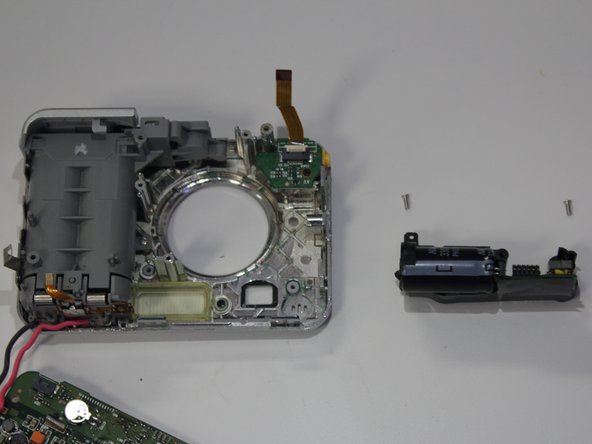
Locate the two 4.0 mm screws that hold the flash unit and remove them using a Phillips #0 screwdriver .
-
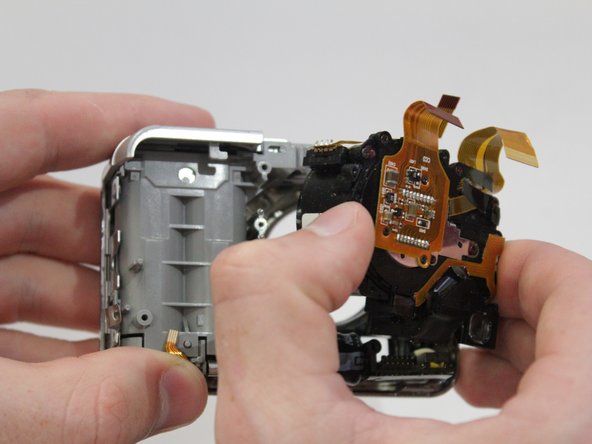
Remove the flash unit by grasping the chip (not the attached capacitor) and lifting it up from the case of the camera.
-


To reassemble your device, follow these instructions in reverse order.
To reassemble your device, follow these instructions in reverse order.
チーム

Clemson, Team 6-4, Benson Spring 2016 Clemson, Team 6-4, Benson Spring 2016人のメンバー
CLEM-BENSON-S16S6G4
4 メンバー
17のガイドは作成済み