メインコンテンツにスキップ

FujiFilm FinePix A340 Flash Unit Replacement

必要な工具と部品

  1. FujiFilm FinePix A340 Flash Unit Replacement, Outer Case: 手順 1、 1の画像 1
    • To prevent the danger of electric shock, remove the batteries before continuing to the next steps.

    • Slide the battery cover to the side to release the batteries.

  2. FujiFilm FinePix A340 Flash Unit Replacement: 手順 2、 3の画像 1 FujiFilm FinePix A340 Flash Unit Replacement: 手順 2、 3の画像 2 FujiFilm FinePix A340 Flash Unit Replacement: 手順 2、 3の画像 3
    • Remove five screws from the camera casing using a tri-point Y0 screwdriver.

  3. FujiFilm FinePix A340 Flash Unit Replacement: 手順 3、 2の画像 1 FujiFilm FinePix A340 Flash Unit Replacement: 手順 3、 2の画像 2
    • Grab the case with your hands and slowly pull back the outer casing.

  4. FujiFilm FinePix A340 Flash Unit Replacement, LCD Screen: 手順 4、 1の画像 1
    • Locate the LCD screen and anchoring screw.

    • Remove screw.

  5. FujiFilm FinePix A340 Flash Unit Replacement: 手順 5、 1の画像 1
    • Carefully pull the LCD screen away from the board it is connected to.

  6. FujiFilm FinePix A340 Flash Unit Replacement: 手順 6、 1の画像 1
    • Push both blue switches away from the holding device to unleach lcd ribbon.

    • Be careful when removing ribbon. If you damage it, you will need to replace it as well.

  7. FujiFilm FinePix A340 Flash Unit Replacement: 手順 7、 1の画像 1
    • Carefully detach the ribbon from where it was connected by the blue pins.

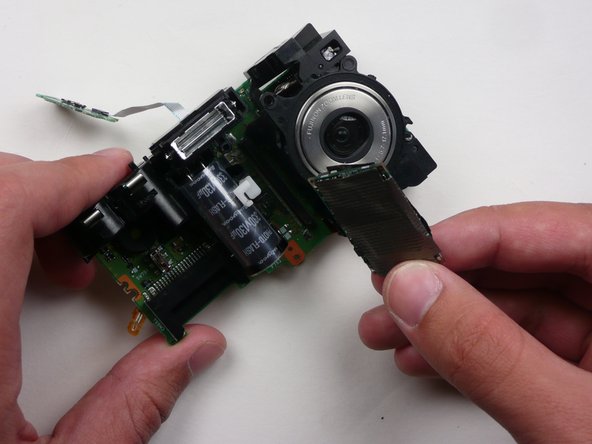
  8. FujiFilm FinePix A340 Flash Unit Replacement: 手順 8、 1の画像 1
    • Now that everything has been disconnected from the board, remove LCD screen.

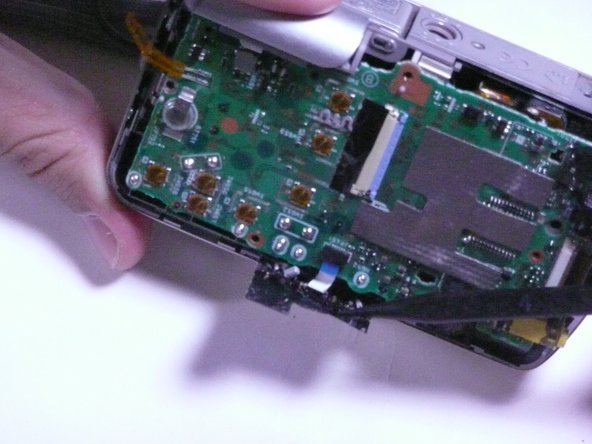
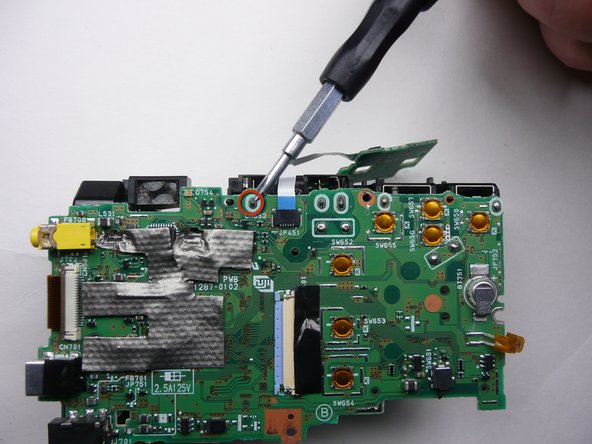
  9. FujiFilm FinePix A340 Flash Unit Replacement, Motherboard: 手順 9、 1の画像 1
    • Remove the two screws holding the circuit board down.

  10. FujiFilm FinePix A340 Flash Unit Replacement: 手順 10、 2の画像 1 FujiFilm FinePix A340 Flash Unit Replacement: 手順 10、 2の画像 2
    • Remove black sticky tape from circuit board and camera case.

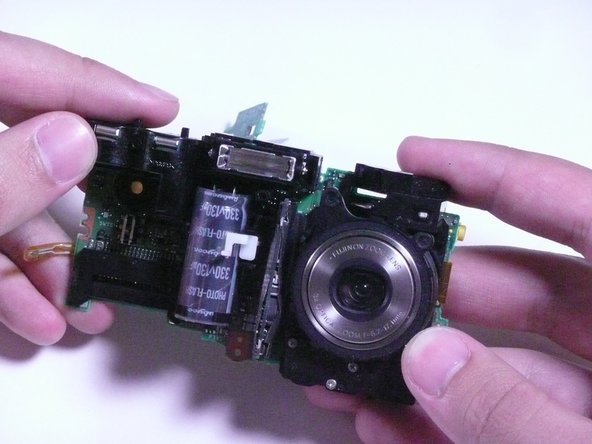
  11. FujiFilm FinePix A340 Flash Unit Replacement: 手順 11、 2の画像 1 FujiFilm FinePix A340 Flash Unit Replacement: 手順 11、 2の画像 2
    • Gently pull the circuit board away from the front side of the camera.

    • Be careful when removing assembly as to not break any solder leads or damage lens assembly.

  12. FujiFilm FinePix A340 Flash Unit Replacement: 手順 12、 2の画像 1 FujiFilm FinePix A340 Flash Unit Replacement: 手順 12、 2の画像 2
    • Remove the logic board by pulling straight away from assembly.

  13. FujiFilm FinePix A340 Flash Unit Replacement, Flash Unit: 手順 13、 1の画像 1
    • Locate the flash unit of the camera. It includes the camera's flash and a capacitor.

  14. FujiFilm FinePix A340 Flash Unit Replacement: 手順 14、 2の画像 1 FujiFilm FinePix A340 Flash Unit Replacement: 手順 14、 2の画像 2
    • Unsolder the flash unit at it's three points.

    • Be careful not to damage the circuit board or surrounding parts with the solder iron.

終わりに

To reassemble your device, follow these instructions in reverse order.

ある他の人がこのガイドを完成しました。

作成者

4人の作成者と共同で作成されました。

Cody

メンバー登録日: 04/18/10

47 ポイント

4のガイドは作成済み

チーム

Cal Poly, Team 7-11, Maness Spring 2010 Cal Poly, Team 7-11, Maness Spring 2010人のメンバー

CPSU-MANESS-S10S7G11

3 メンバー

4のガイドは作成済み

0 件のコメント

コメントを追加

統計データ:

過去 24時間: 0

過去 7 日: 1

過去 30 日: 8

今までの合計 3,892