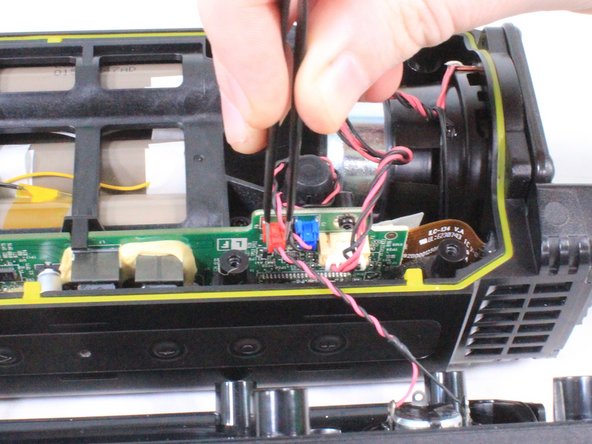
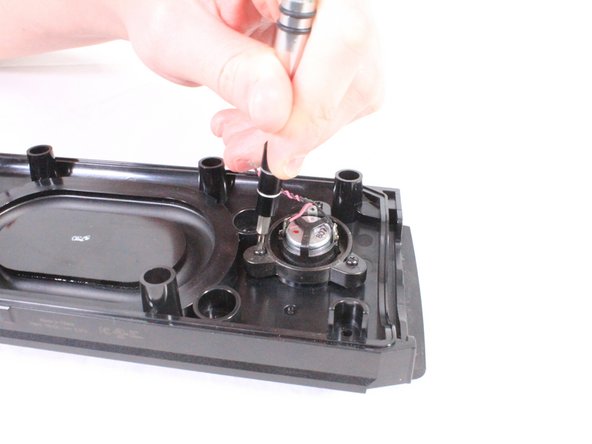
メインコンテンツにスキップ

Fugoo Style XL Speaker Replacement

必要な工具と部品

  1. Fugoo Style XL Speaker Replacement, Fabric Case: 手順 1、 2の画像 1 Fugoo Style XL Speaker Replacement, Fabric Case: 手順 1、 2の画像 2
    • Using your hand, unscrew the large screws underneath the speaker.

  2. Fugoo Style XL Speaker Replacement: 手順 2、 3の画像 1 Fugoo Style XL Speaker Replacement: 手順 2、 3の画像 2 Fugoo Style XL Speaker Replacement: 手順 2、 3の画像 3
    • Using your hand, gently lift the large plastic tab secured to the rubber holding.

    • After lifting the tab, slide the speaker out of its case.

    • Ensure the tab is lifted only slightly above the rubber holding. Bending the plastic tab too far could result in damage to the case.

  3. Fugoo Style XL Speaker Replacement, Speaker: 手順 3、 2の画像 1 Fugoo Style XL Speaker Replacement, Speaker: 手順 3、 2の画像 2
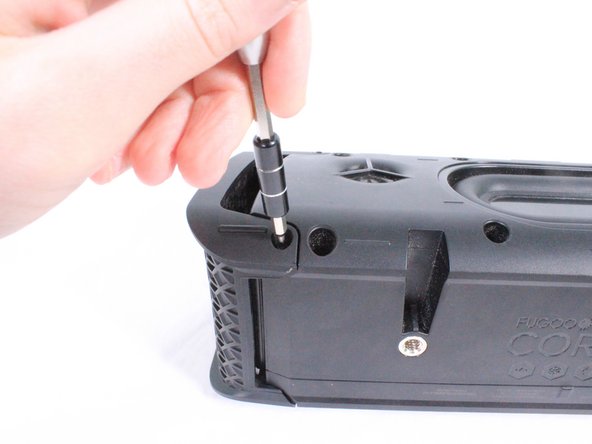
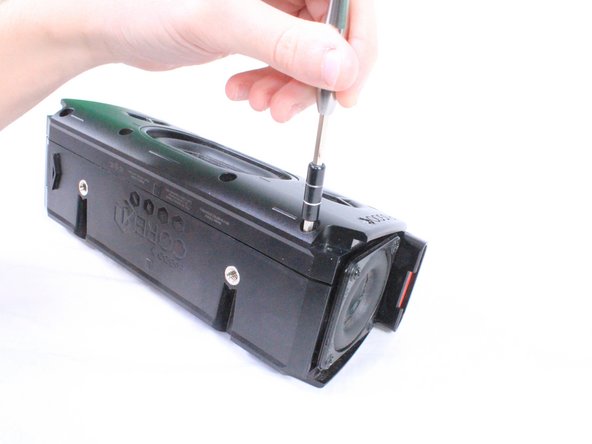
    • There are 8 screws (4 on each side) holding covers that conceal the bass speakers. Remove these 3mm screws using a #2.0 Hex screwdriver.

  4. Fugoo Style XL Speaker Replacement: 手順 4、 2の画像 1 Fugoo Style XL Speaker Replacement: 手順 4、 2の画像 2
    • Using your hand, pull the covers away from the speaker.

  5. Fugoo Style XL Speaker Replacement: 手順 5、 2の画像 1 Fugoo Style XL Speaker Replacement: 手順 5、 2の画像 2
    • Using a #2.0 Hex screwdriver to unscrew the 8 12mm screws depicted.

  6. Fugoo Style XL Speaker Replacement: 手順 6、 2の画像 1 Fugoo Style XL Speaker Replacement: 手順 6、 2の画像 2
    • Gently pull apart the front casing from the back casing.

    • Speakers on the front casing have wires directly connected to the motherboard. Pulling off the casing with force will result in damage.

  7. Fugoo Style XL Speaker Replacement: 手順 7、 2の画像 1 Fugoo Style XL Speaker Replacement: 手順 7、 2の画像 2
    • Using a pair of tweezers or your hand, carefully remove the red bundled cable connectors from the motherboard.

  8. Fugoo Style XL Speaker Replacement: 手順 8、 3の画像 1 Fugoo Style XL Speaker Replacement: 手順 8、 3の画像 2 Fugoo Style XL Speaker Replacement: 手順 8、 3の画像 3
    • Each speaker is attached to the casing with 3mm screws. Remove the screws using a #2.0 Hex screwdriver.

    • Once the screws are removed, carefully lift the speaker from the casing.

終わりに

To reassemble your device, follow these instructions in reverse order.

ある他の人がこのガイドを完成しました。

作成者

1人の作成者と共同作成されました。

James Gifford

メンバー登録日: 09/25/17

573 ポイント

5のガイドは作成済み

チーム

USF Tampa, Team S3-G4, Cannon Fall 2017 USF Tampa, Team S3-G4, Cannon Fall 2017人のメンバー

USFT-CANNON-F17S3G4

4 メンバー

5のガイドは作成済み

コメント 1 件

Hello James,

Nice work. But where can I find the replacement speaker?! Best Regards

Andre Costa - 返信

コメントを追加

統計データ:

過去 24時間: 1

過去 7 日: 3

過去 30 日: 10

今までの合計 762