メインコンテンツにスキップ

Frigidaire Side-By-Side Refrigerator Freezer Thermistor Replacement

必要な工具と部品

  1. Frigidaire Side-By-Side Refrigerator Freezer Thermistor Replacement, Unplug your refrigerator: 手順 1、 1の画像 1
    • Unplug your refrigerator before you begin your repair.

    • If you are testing or repairing the following items, you may also need to shut off and disconnect the water supply:

    • Condenser fan motor

    • Compressor motor and thermal overload device

    • Water supply valve assembly

  2. Frigidaire Side-By-Side Refrigerator Freezer Thermistor Replacement, Remove the light bulb: 手順 2、 3の画像 1 Frigidaire Side-By-Side Refrigerator Freezer Thermistor Replacement, Remove the light bulb: 手順 2、 3の画像 2 Frigidaire Side-By-Side Refrigerator Freezer Thermistor Replacement, Remove the light bulb: 手順 2、 3の画像 3
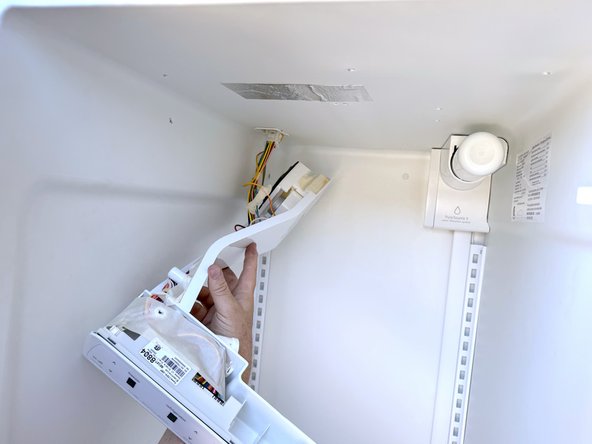
    • Open the refrigerator door.

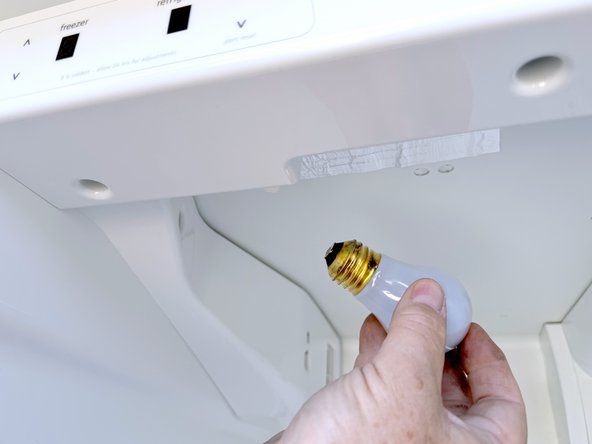
    • Unscrew the light bulb on the rear of the control housing.

  3. Frigidaire Side-By-Side Refrigerator Freezer Thermistor Replacement, Unfasten the control housing: 手順 3、 3の画像 1 Frigidaire Side-By-Side Refrigerator Freezer Thermistor Replacement, Unfasten the control housing: 手順 3、 3の画像 2 Frigidaire Side-By-Side Refrigerator Freezer Thermistor Replacement, Unfasten the control housing: 手順 3、 3の画像 3
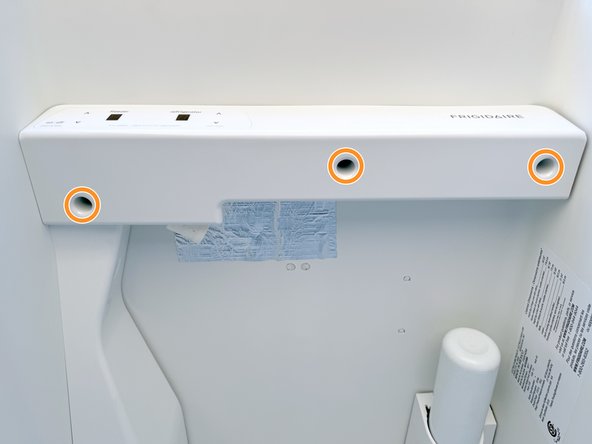
    • Use a 1/4" nut driver to remove the two 1/4" hex head fasteners, securing the control housing.

    • Use a 1/4" nut driver to remove the three additional 1/4" hex head fasteners, securing the control housing.

  4. Frigidaire Side-By-Side Refrigerator Freezer Thermistor Replacement, Reposition the control housing: 手順 4、 3の画像 1 Frigidaire Side-By-Side Refrigerator Freezer Thermistor Replacement, Reposition the control housing: 手順 4、 3の画像 2 Frigidaire Side-By-Side Refrigerator Freezer Thermistor Replacement, Reposition the control housing: 手順 4、 3の画像 3
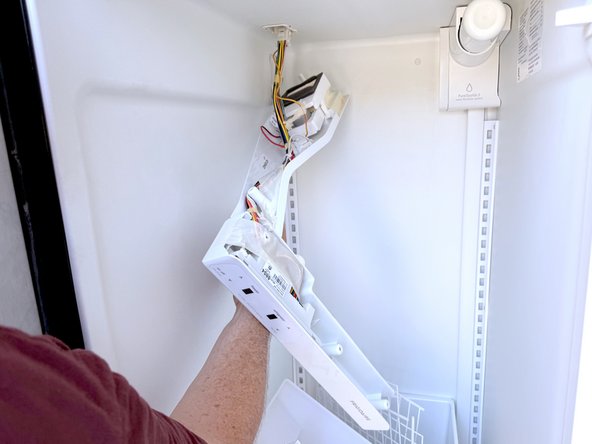
    • Lower the control housing, allowing the rear portion to stay closer to the top of the fresh food compartment.

    • Support the control housing with your hand until the right hand corner rests on one of the shelves

  5. Frigidaire Side-By-Side Refrigerator Freezer Thermistor Replacement, Disconnect the control housing: 手順 5、 2の画像 1 Frigidaire Side-By-Side Refrigerator Freezer Thermistor Replacement, Disconnect the control housing: 手順 5、 2の画像 2
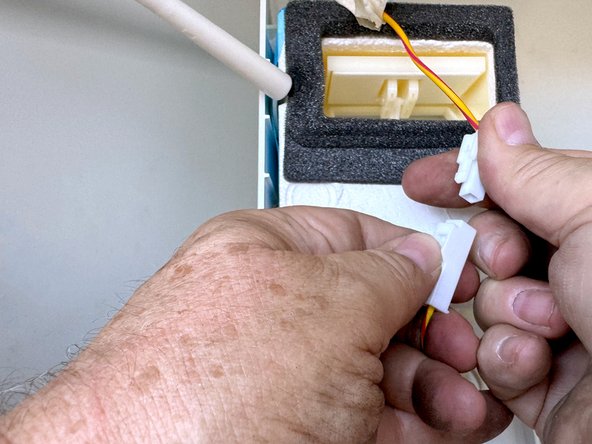
    • Disconnect the control housing by squeezing the locking tab on the connector and pulling the connector downward.

    • Support the end of control housing nearest the cable with one hand.

  6. Frigidaire Side-By-Side Refrigerator Freezer Thermistor Replacement: 手順 6、 3の画像 1 Frigidaire Side-By-Side Refrigerator Freezer Thermistor Replacement: 手順 6、 3の画像 2 Frigidaire Side-By-Side Refrigerator Freezer Thermistor Replacement: 手順 6、 3の画像 3
    • Locate the auxiliary connector and unclip it from the control housing. You may need to push the clip tabs out of the way with a finger.

    • Disconnect the auxiliary connector by squeezing the locking tab and pulling the connector halves apart.

  7. Frigidaire Side-By-Side Refrigerator Freezer Thermistor Replacement, Locate fresh food thermistor: 手順 7、 2の画像 1 Frigidaire Side-By-Side Refrigerator Freezer Thermistor Replacement, Locate fresh food thermistor: 手順 7、 2の画像 2
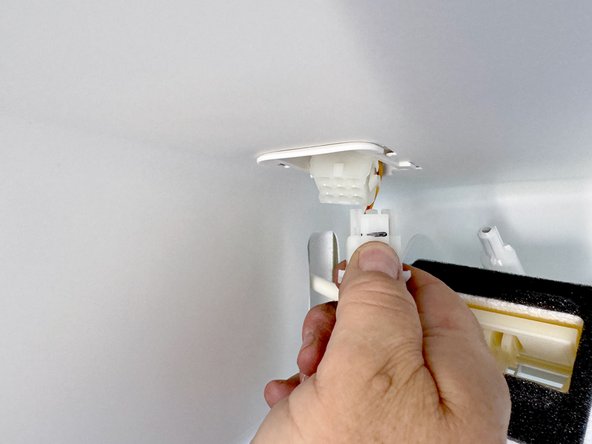
    • Locate the fresh food thermistor and peel the tape to release the wiring.

  8. Frigidaire Side-By-Side Refrigerator Freezer Thermistor Replacement, Free the fresh food thermistor: 手順 8、 3の画像 1 Frigidaire Side-By-Side Refrigerator Freezer Thermistor Replacement, Free the fresh food thermistor: 手順 8、 3の画像 2 Frigidaire Side-By-Side Refrigerator Freezer Thermistor Replacement, Free the fresh food thermistor: 手順 8、 3の画像 3
    • Use your fingers to free the thermistor by pulling it out of the bracket securing it to the control housing.

  9. Frigidaire Side-By-Side Refrigerator Freezer Thermistor Replacement, Unfasten the damper assembly: 手順 9、 3の画像 1 Frigidaire Side-By-Side Refrigerator Freezer Thermistor Replacement, Unfasten the damper assembly: 手順 9、 3の画像 2 Frigidaire Side-By-Side Refrigerator Freezer Thermistor Replacement, Unfasten the damper assembly: 手順 9、 3の画像 3
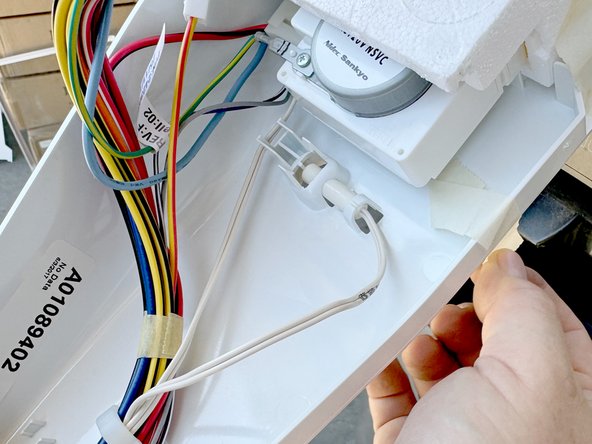
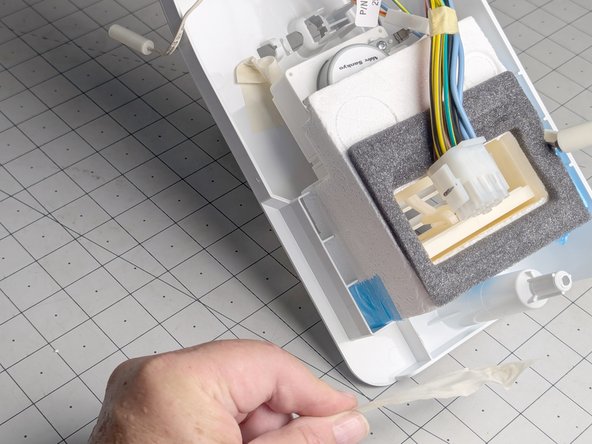
    • With your fingers, remove the tan tape securing the damper assembly to the control housing.

  10. Frigidaire Side-By-Side Refrigerator Freezer Thermistor Replacement, Lift the damper assembly: 手順 10、 2の画像 1 Frigidaire Side-By-Side Refrigerator Freezer Thermistor Replacement, Lift the damper assembly: 手順 10、 2の画像 2
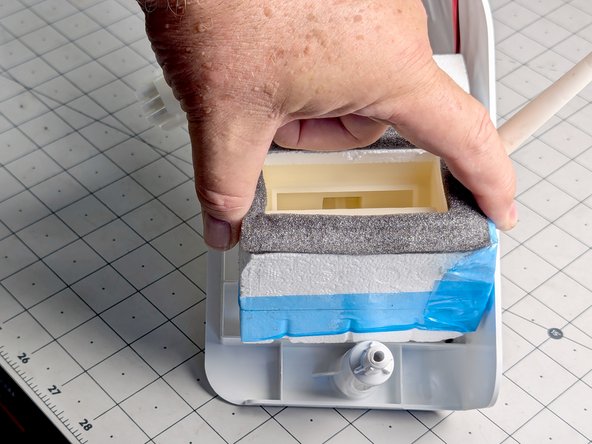
    • Lift the damper assembly upward to access the blue tape holding the freezer thermistor.

  11. Frigidaire Side-By-Side Refrigerator Freezer Thermistor Replacement, Release the freezer thermistor: 手順 11、 3の画像 1 Frigidaire Side-By-Side Refrigerator Freezer Thermistor Replacement, Release the freezer thermistor: 手順 11、 3の画像 2 Frigidaire Side-By-Side Refrigerator Freezer Thermistor Replacement, Release the freezer thermistor: 手順 11、 3の画像 3
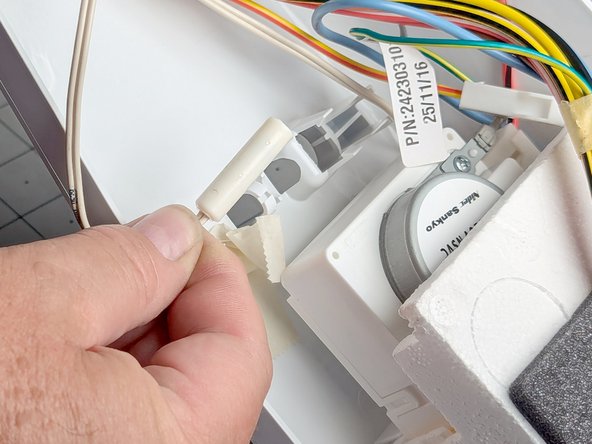
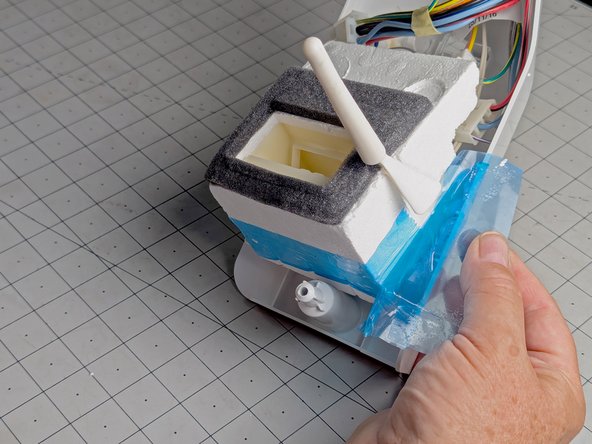
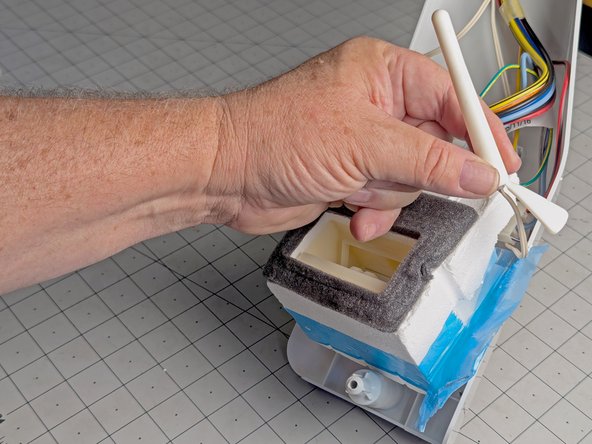
    • Use your fingers to peel the blue tape securing the freezer thermistor.

  12. Frigidaire Side-By-Side Refrigerator Freezer Thermistor Replacement, Free the freezer thermistor: 手順 12、 3の画像 1 Frigidaire Side-By-Side Refrigerator Freezer Thermistor Replacement, Free the freezer thermistor: 手順 12、 3の画像 2 Frigidaire Side-By-Side Refrigerator Freezer Thermistor Replacement, Free the freezer thermistor: 手順 12、 3の画像 3
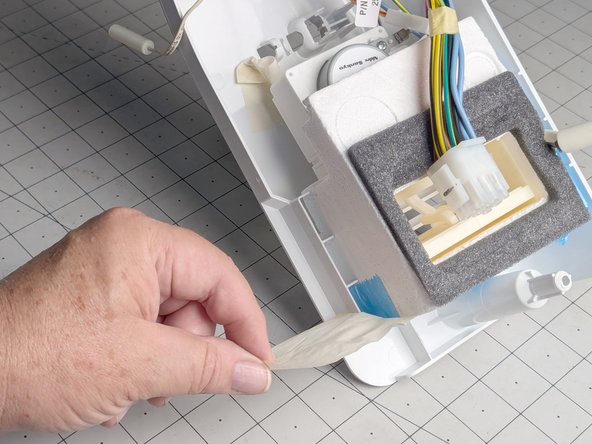
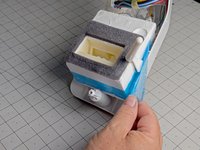
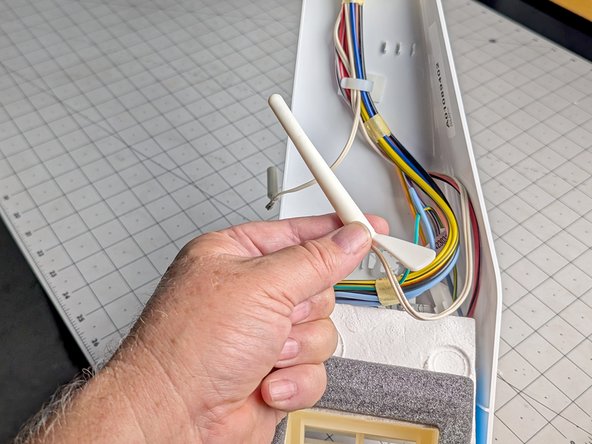
    • Grasp the freezer thermistor and pull it away from the foam damper assembly on the control housing to free the freezer thermistor from its location.

  13. Frigidaire Side-By-Side Refrigerator Freezer Thermistor Replacement, Release the thermistor leads from the harness clip: 手順 13、 2の画像 1 Frigidaire Side-By-Side Refrigerator Freezer Thermistor Replacement, Release the thermistor leads from the harness clip: 手順 13、 2の画像 2
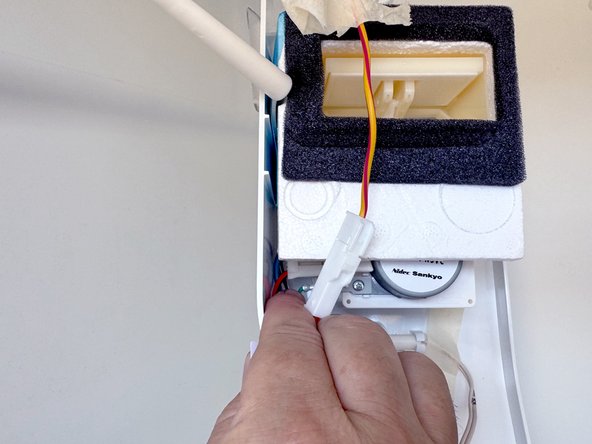
    • Unclip the thermistor leads.

    • This applies to both the fresh food and freezer thermistor leads. In both cases they are white 2-conductor cords.

  14. Frigidaire Side-By-Side Refrigerator Freezer Thermistor Replacement, Disconnect the thermistors: 手順 14、 3の画像 1 Frigidaire Side-By-Side Refrigerator Freezer Thermistor Replacement, Disconnect the thermistors: 手順 14、 3の画像 2 Frigidaire Side-By-Side Refrigerator Freezer Thermistor Replacement, Disconnect the thermistors: 手順 14、 3の画像 3
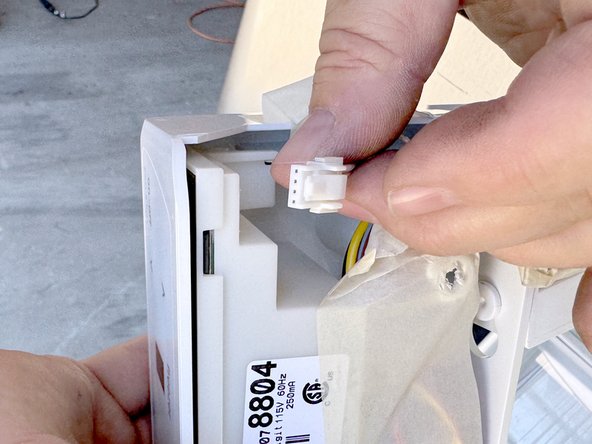
    • Disconnect the thermistors from the control board by squeezing the locking tab on the connector and pulling the connector out of the socket on the control board.

    • The thermistors share one connector on the control board, and they are not sold as individual parts but as an assembly.

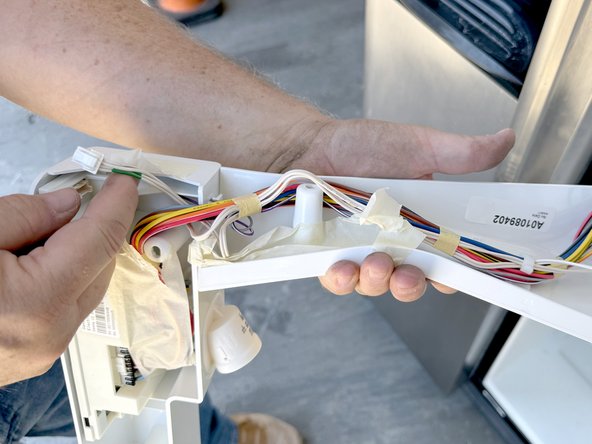
    • You can peel the tape on the harness or cut it carefully to release the thermistor wires from the harness.

    • You can use a cable tie in place of the tape to secure the harness if needed afterward.

終わりに

To reassemble your device, follow these instructions in reverse order.

Take your e-waste to an R2 or e-Stewards certified recycler.

Repair didn’t go as planned? Try some basic troubleshooting, or ask our  Answers community for help.

作成者

1人の作成者と共同作成されました。

Bill Gilbert

メンバー登録日: 06/30/22

38,497 ポイント

261のガイドは作成済み

チーム

iFixit iFixit人のメンバー

Staff

123 メンバー

23,608のガイドは作成済み

0件のガイドコメント

コメントを追加

統計データ:

過去 24時間: 3

過去 7 日: 27

過去 30 日: 138

今までの合計 1,354