メインコンテンツにスキップ

Fixed Gear Bike Chainring Replacement

必要な工具と部品

  1. Fixed Gear Bike Chainring Replacement, Chainring: 手順 1、 2の画像 1 Fixed Gear Bike Chainring Replacement, Chainring: 手順 1、 2の画像 2
    • Slightly loosen the two rear nuts with a 15 mm wrench to give the chain slack.

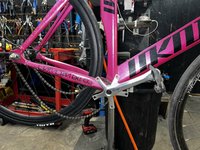
    • Remove the chain from the worn out chain ring.

  2. Fixed Gear Bike Chainring Replacement: 手順 2、 2の画像 1 Fixed Gear Bike Chainring Replacement: 手順 2、 2の画像 2
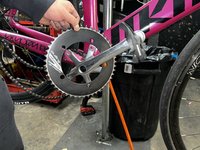
    • Undo all five bolts attached to the crank arm with a hex tool.

  3. Fixed Gear Bike Chainring Replacement: 手順 3、 2の画像 1 Fixed Gear Bike Chainring Replacement: 手順 3、 2の画像 2
    • Take the chain ring off through the crank arm of the pedal and swap the chainring of your choice.

    • Keep all five bolts in the same area to prevent losing them.

    • When bolts appear to be rusty, I recommend replacing them with a new set of bolts for the longevity of the drivetrain.

  4. Fixed Gear Bike Chainring Replacement: 手順 4、 1の画像 1
    • Line up the chainring’s hole to the crankset and tighten all five bolts to hold the chainring in place.

  5. Fixed Gear Bike Chainring Replacement: 手順 5、 1の画像 1
    • Lastly, attach the chain back to the new chainring.

    • Before tightening the two rear nuts back together, ensure the wheel is centered and not touching the rear bike frame.

ゴール

作成者

1人の作成者と共同作成されました。

aljndro__

メンバー登録日: 08/22/23

121 ポイント

1ガイドが承認済み

チーム

CSU Los Angeles, Team 1-1, Briggs Fall 2023 CSU Los Angeles, Team 1-1, Briggs Fall 2023人のメンバー

CSULA-BRIGGS-F23S1G1

6 メンバー

5のガイドは作成済み

0 件のコメント

コメントを追加

統計データ:

過去 24時間: 1

過去 7 日: 6

過去 30 日: 21

今までの合計 94