メインコンテンツにスキップ

Fix iPhone X Stuck On Apple Logo/iTunes Error 4013

必要な工具と部品

  1. Fix iPhone X Stuck On Apple Logo/iTunes Error 4013, Fix iPhone X Stuck On Apple Logo/iTunes Error 4013: 手順 1、 2の画像 1 Fix iPhone X Stuck On Apple Logo/iTunes Error 4013, Fix iPhone X Stuck On Apple Logo/iTunes Error 4013: 手順 1、 2の画像 2
    • Here it says: iPhone X Error 4013.

    • Run cosmetic inspection of the motherboard first. The motherboard is not deformed or water damaged.

  2. Fix iPhone X Stuck On Apple Logo/iTunes Error 4013: 手順 2、 2の画像 1 Fix iPhone X Stuck On Apple Logo/iTunes Error 4013: 手順 2、 2の画像 2
    • Let's get the motherboard installed and check.

    • Press the power button. The phone enters into recovery mode automatically. Judging by this, the motherboard comes with restore failure. And therefore the phone cannot enter into the system normally.

  3. Fix iPhone X Stuck On Apple Logo/iTunes Error 4013: 手順 3、 2の画像 1 Fix iPhone X Stuck On Apple Logo/iTunes Error 4013: 手順 3、 2の画像 2
    • Let's restore the phone and check whether it comes with error 4013. Connect the phone to the computer. Restore the phone with 3U Tools.

    • The phone can be restored normally. What's more, the phone can be normally activated after restore.

  4. Fix iPhone X Stuck On Apple Logo/iTunes Error 4013: 手順 4、 3の画像 1 Fix iPhone X Stuck On Apple Logo/iTunes Error 4013: 手順 4、 3の画像 2 Fix iPhone X Stuck On Apple Logo/iTunes Error 4013: 手順 4、 3の画像 3
    • Go to Settings>General>About. We can check baseband info here. We can confirm now that the motherboard is normal. The fault is probably related to other parts.

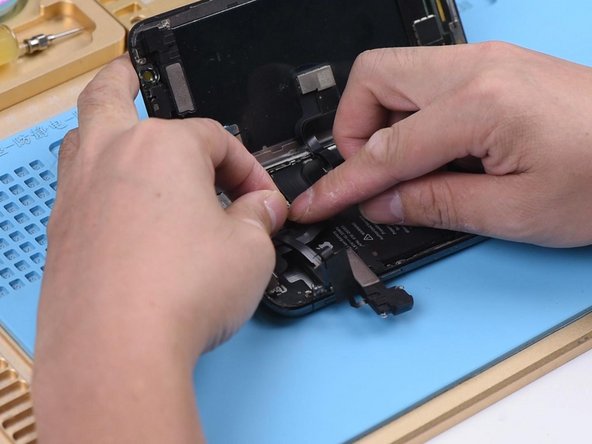
    • Get the earpiece speaker and sensor flex cable and front camera flex cable installed.

    • Turn on the phone. The phone is stuck on Apple logo and keeps restarting.

  5. Fix iPhone X Stuck On Apple Logo/iTunes Error 4013: 手順 5、 2の画像 1 Fix iPhone X Stuck On Apple Logo/iTunes Error 4013: 手順 5、 2の画像 2
    • Judging by this, the fault is related to the earpiece speaker and sensor flex cable or the front camera flex cable. Now we need to rule out one by one. Disconnect the earpiece speaker and sensor flex cable.

    • Press the power button to turn on the phone. The phone turns on normally. We can confirm now that the fault is related to the earpiece speaker and sensor flex cable.

  6. Fix iPhone X Stuck On Apple Logo/iTunes Error 4013: 手順 6、 3の画像 1 Fix iPhone X Stuck On Apple Logo/iTunes Error 4013: 手順 6、 3の画像 2 Fix iPhone X Stuck On Apple Logo/iTunes Error 4013: 手順 6、 3の画像 3
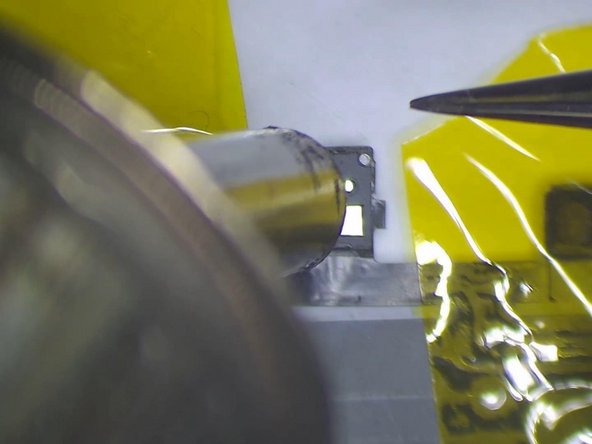
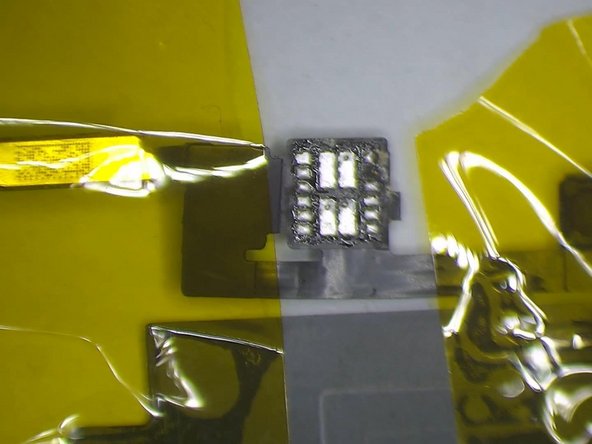
    • Check the earpiece speaker and sensor flex cable under the Microscope. The Flood illuminator module is moldy.

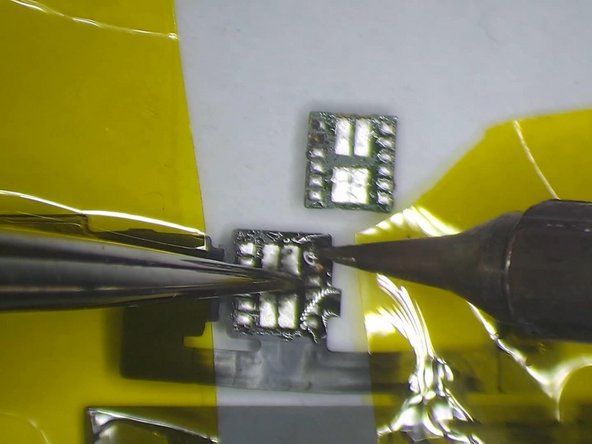
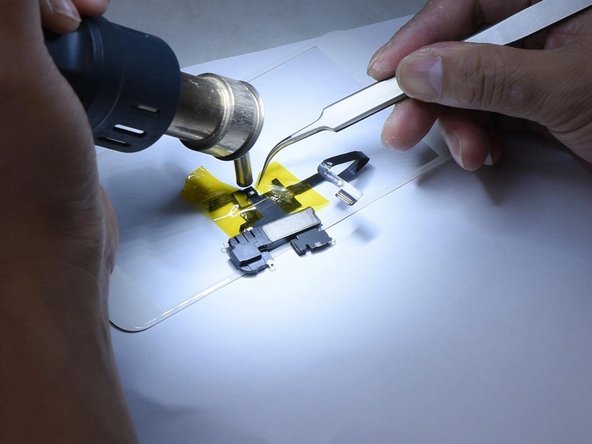
    • Fix the earpiece speaker and sensor flex cable with High-temperature tape. Heat with Hot Air Gun at 320℃, air flow 35. Remove the Flood illuminator module.

    • We can see that its bonding pad is severely corroded.

  7. Fix iPhone X Stuck On Apple Logo/iTunes Error 4013: 手順 7、 3の画像 1 Fix iPhone X Stuck On Apple Logo/iTunes Error 4013: 手順 7、 3の画像 2 Fix iPhone X Stuck On Apple Logo/iTunes Error 4013: 手順 7、 3の画像 3
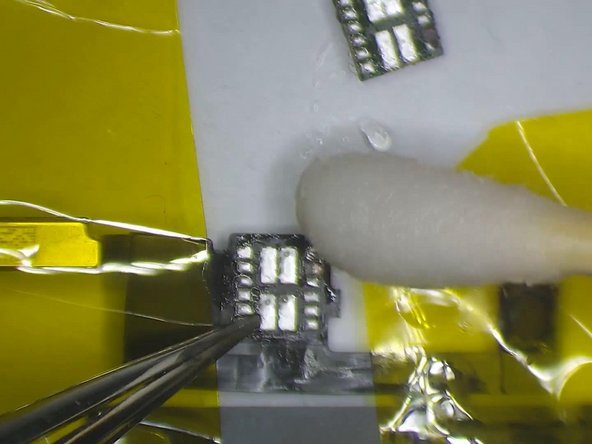
    • Apply some paste flux to the bonding pad. Clean the bonding pad with Soldering Iron at 360℃. Then continue to apply medium-temp solder paste to the severely corroded pad. Clean with PCB Cleaner afterwards.

    • Continue to apply paste flux to the Flood illuminator module. Apply medium-temp solder paste to the severely corroded pad. Clean with PCB Cleaner afterwards. Once done, apply some paste flux to the bonding pad.

  8. Fix iPhone X Stuck On Apple Logo/iTunes Error 4013: 手順 8、 2の画像 1 Fix iPhone X Stuck On Apple Logo/iTunes Error 4013: 手順 8、 2の画像 2
    • Get the Flood illuminator module in the right position. Solder with Hot Air Gun at 320℃, air flow 35. Once finished, wait for 2 minutes.

  9. Fix iPhone X Stuck On Apple Logo/iTunes Error 4013: 手順 9、 3の画像 1 Fix iPhone X Stuck On Apple Logo/iTunes Error 4013: 手順 9、 3の画像 2 Fix iPhone X Stuck On Apple Logo/iTunes Error 4013: 手順 9、 3の画像 3
    • Then get the earpiece speaker and sensor flex cable installed. Connect the battery. Press the power button. The phone turns on normally.

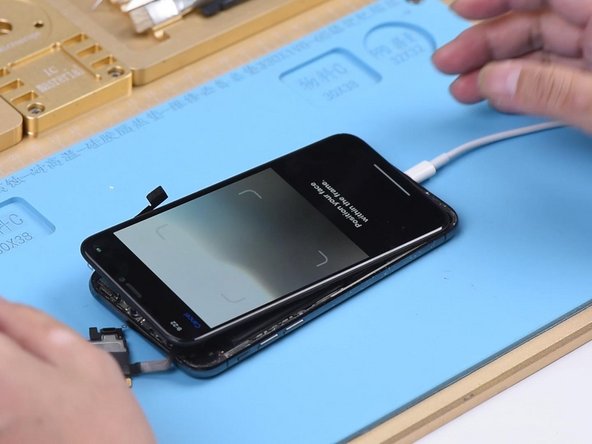
    • Since the two flex cables were not connected during previous restore, we need to restore again with the two connected. So that Face ID can work normally. Put the phone into DFU mode. Then connect the phone with the computer.

    • Restore the phone with the help of 3U Tools. The phone can be normally restored. Once completed, the phone enters into the system normally. Face ID setup is also normal.

終わりに

To reassemble your device, follow these instructions in reverse order.

3 の人々がこのガイドを完成させました。

作成者

2人の作成者と共同で作成されました。

REWA

メンバー登録日: 11/24/20

14,615 ポイント

52のガイドは作成済み

0 件のコメント

コメントを追加

統計データ:

過去 24時間: 4

過去 7 日: 19

過去 30 日: 39

今までの合計 3,452