はじめに
You may need to remove the pickguard in order to access the electronics of a guitar or change the style.
必要な工具と部品
-
-
Start by loosening the strings. This is done by turning the tuning knob until the string has lost tension.
-
Repeat this for all six strings on the guitar.
-
-
-
It may be necessary to use pliers to remove string ends from the tuning peg.
-
-
-
After removing the strings from the tuning pegs, slide the strings through the bridge and out of the back of the guitar.
-
If the twists in the string ends are in the way, use wire cutters to snip them off. This will allow the heavier strings to pass through the bridge easier.
-
-
-
-
While it is not necessary to remove the potentiometer knobs in order to remove the pickguard, it is much easier to remove them while the pickguard is attached to the guitar.
-
The knobs are removed simply by pulling up on them. Be mindful not to pry too much, as older components may feel stuck at first, and you do not want to break the pickguard, knob, or potentiometer.
-
-
-
As with the knobs, the switch cap may be removed prior to removing the pickguard.
-
Grip the cap firmly, and pull up to remove it from the switch. Be aware that the switch may move, and to be careful so that you do not break it.
-
-
-
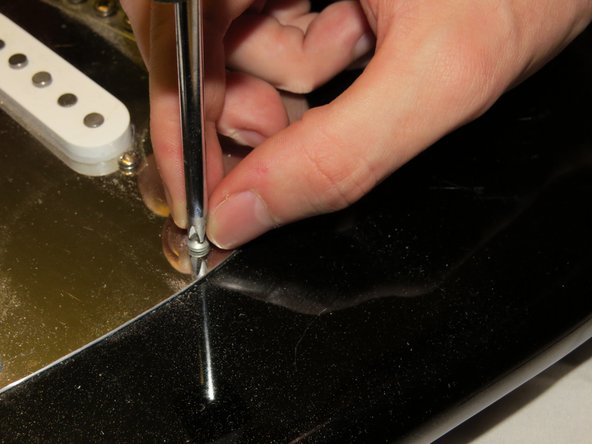
Gently lift up on the pickguard. With the screws removed, it should be loose, and easily pulled off of the guitar body.
-
Carefully rotate the pickguard away from the guitar. Notice the electronics. There is a wire that runs through the body to the output jack.
-


To reassemble your device, follow these instructions in reverse order.
To reassemble your device, follow these instructions in reverse order.

チーム

Pasco Hernando, Team 5-3, Prince Fall 2014 Pasco Hernando, Team 5-3, Prince Fall 2014人のメンバー
PHSC-PRINCE-F14S5G3
9 メンバー
10のガイドは作成済み
コメント 1 件
This process describes only how to access the internals of the guitar — how to MOVE the pick guard. NOT how to actually REMOVE it, as indicated in the title. And removing it is what is required if we were talking about 'removing the pick guard...to change the style,' as noted in the introduction.
stantondvx - 返信