メインコンテンツにスキップ

Fender Starcaster Bridge Replacement

必要な工具と部品

  1. Fender Starcaster Bridge Replacement, Loosen the Strings: 手順 1、 3の画像 1 Fender Starcaster Bridge Replacement, Loosen the Strings: 手順 1、 3の画像 2 Fender Starcaster Bridge Replacement, Loosen the Strings: 手順 1、 3の画像 3
    • Start by loosening the strings. This is done by turning the tuning knob until the string has lost tension.

    • Repeat this for all six strings on the guitar.

  2. Fender Starcaster Bridge Replacement, Remove the Strings from the Tuning Pegs: 手順 2、 2の画像 1 Fender Starcaster Bridge Replacement, Remove the Strings from the Tuning Pegs: 手順 2、 2の画像 2
    • Be mindful of the string ends. They may be sharp and could puncture your skin.

    • It may be necessary to use pliers to remove string ends from the tuning peg.

  3. Fender Starcaster Bridge Replacement, Remove the Strings from the Bridge: 手順 3、 3の画像 1 Fender Starcaster Bridge Replacement, Remove the Strings from the Bridge: 手順 3、 3の画像 2 Fender Starcaster Bridge Replacement, Remove the Strings from the Bridge: 手順 3、 3の画像 3
    • After removing the strings from the tuning pegs, slide the strings through the bridge and out of the back of the guitar.

    • If the twists in the string ends are in the way, use wire cutters to snip them off. This will allow the heavier strings to pass through the bridge easier.

  4. Fender Starcaster Bridge Replacement, Bridge: 手順 4、 2の画像 1 Fender Starcaster Bridge Replacement, Bridge: 手順 4、 2の画像 2
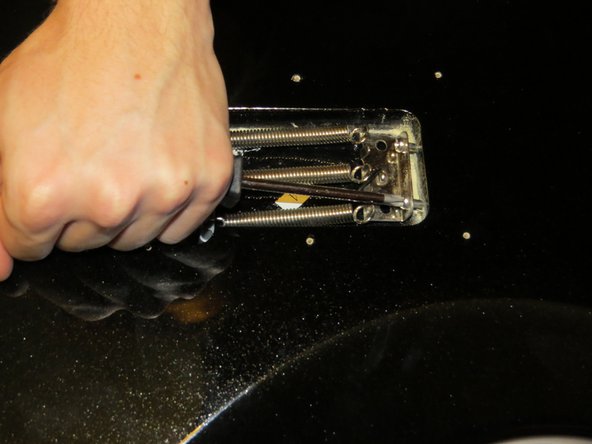
    • On the back of the guitar, remove the plate covering the spring cavity. In the spring cavity, reduce the tension on the bridge springs by first loosening the retainer screws a bit.

  5. Fender Starcaster Bridge Replacement: 手順 5、 3の画像 1 Fender Starcaster Bridge Replacement: 手順 5、 3の画像 2 Fender Starcaster Bridge Replacement: 手順 5、 3の画像 3
    • To remove the springs from the bridge, grip the end with pliers and pull up.

    • It is safe to use the body of the guitar for leverage.

  6. Fender Starcaster Bridge Replacement: 手順 6、 3の画像 1 Fender Starcaster Bridge Replacement: 手順 6、 3の画像 2 Fender Starcaster Bridge Replacement: 手順 6、 3の画像 3
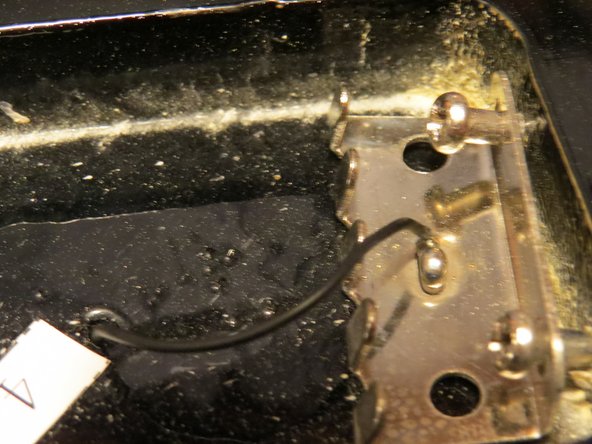
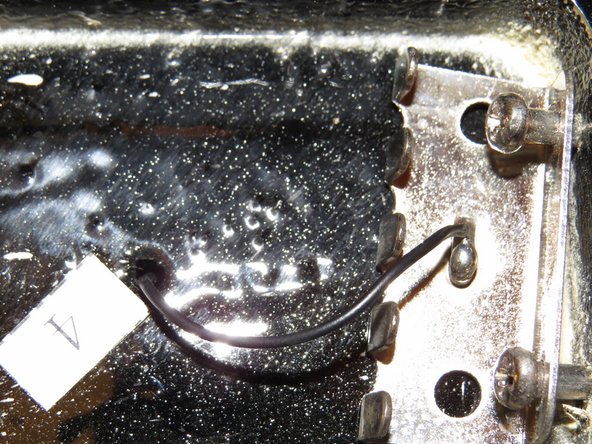
    • Be aware that the ground wire for the electronics of the guitar is routed through the body and soldered to the spring retainer.

  7. Fender Starcaster Bridge Replacement: 手順 7、 3の画像 1 Fender Starcaster Bridge Replacement: 手順 7、 3の画像 2 Fender Starcaster Bridge Replacement: 手順 7、 3の画像 3
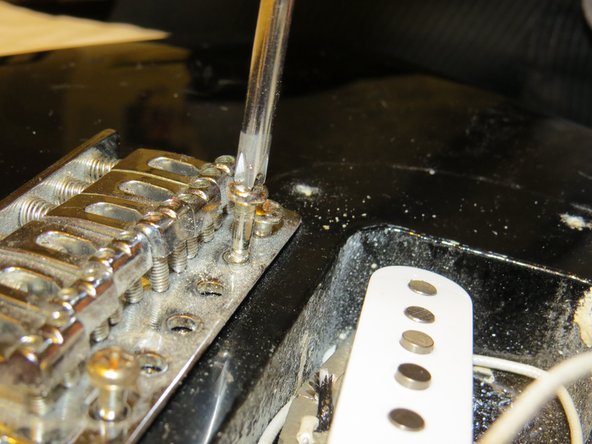
    • Remove the screws from the front of the bridge.

    • It may be helpful to only loosen the outer screws as you remove the inner screws, in order to prevent damage to the guitar.

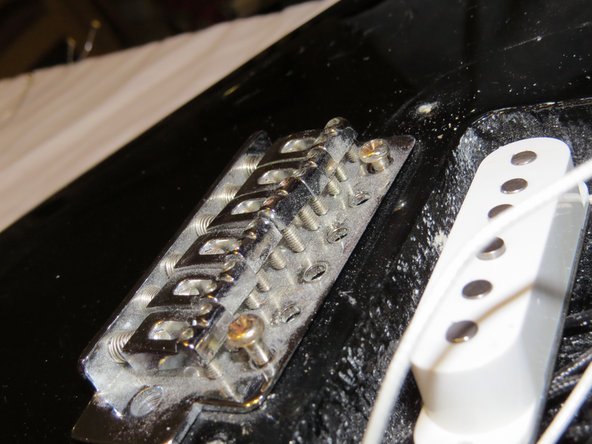
  8. Fender Starcaster Bridge Replacement: 手順 8、 1の画像 1
    • With all six screws removed, lift up on the bridge to remove it from the body.

終わりに

To reassemble your device, follow these instructions in reverse order.

2 の人々がこのガイドを完成させました。

作成者

4人の作成者と共同で作成されました。

Christopher Hartigan

メンバー登録日: 09/10/14

164 ポイント

5のガイドは作成済み

チーム

Pasco Hernando, Team 5-3, Prince Fall 2014 Pasco Hernando, Team 5-3, Prince Fall 2014人のメンバー

PHSC-PRINCE-F14S5G3

9 メンバー

10のガイドは作成済み

0 件のコメント

コメントを追加

統計データ:

過去 24時間: 0

過去 7 日: 5

過去 30 日: 14

今までの合計 2,398