メインコンテンツにスキップ

Fender Frontman 15r Speaker Replacement

必要な工具と部品

  1. Fender Frontman 15r Speaker Replacement, Back panel: 手順 1、 1の画像 1
    • Be sure to unplug the device before proceeding.

    • Use a Phillips #0 screwdriver to remove the four 21.7mm screws holding the back panel to the frame.

  2. Fender Frontman 15r Speaker Replacement: 手順 2、 1の画像 1
    • Once the screws are out, use a plastic opening tool or spudger to pry the top of the back panel open. There may be some resistance, but it will eventually pry loose.

  3. Fender Frontman 15r Speaker Replacement: 手順 3、 1の画像 1
    • Once the top is separated, use your hand to remove the back panel from the unit.

  4. Fender Frontman 15r Speaker Replacement, Speaker: 手順 4、 1の画像 1
    • Using tape or a post-it, label the input and output wires on the reverb. Remove these wires from the box.

  5. Fender Frontman 15r Speaker Replacement: 手順 5、 1の画像 1
    • Remove the two female connection terminals from the speaker terminals.

  6. Fender Frontman 15r Speaker Replacement: 手順 6、 1の画像 1
    • Use a Philips #1 screwdriver to remove the four 21.9 mm Phillips screws from the perimeter of the speaker.

  7. Fender Frontman 15r Speaker Replacement: 手順 7、 2の画像 1 Fender Frontman 15r Speaker Replacement: 手順 7、 2の画像 2
    • Gently remove the speaker.

終わりに

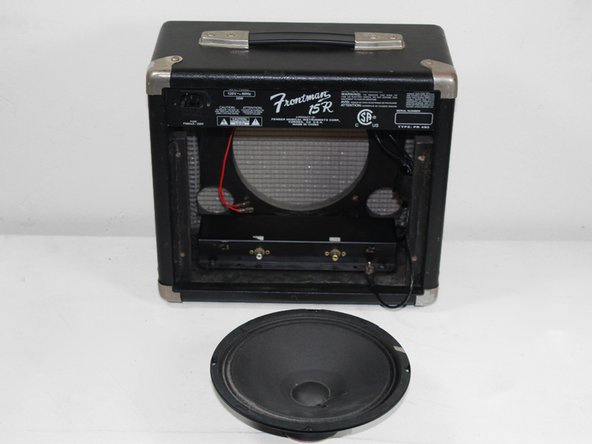
To install the new speaker, follow the instructions given in reverse.

ある他の人がこのガイドを完成しました。

作成者

5人の作成者と共同で作成されました。

Stephen Figueira

メンバー登録日: 10/04/12

140 ポイント

3のガイドは作成済み

チーム

Cal Poly, Team 24-30, Regan Fall 2012 Cal Poly, Team 24-30, Regan Fall 2012人のメンバー

CPSU-REGAN-F12S24G30

5 メンバー

7のガイドは作成済み

0 件のコメント

コメントを追加

統計データ:

過去 24時間: 1

過去 7 日: 5

過去 30 日: 27

今までの合計 8,405