-
-
There is a small indentation in the side of the phone near the bottom of the back cover.
-
With the indentation as leverage, use your fingernail to pry the bottom portion of the back cover from the phone.
-
-
-
-
There is a small indentation in the back of the phone just below the battery.
-
Use a fingernail in this indentation to push the battery toward the top of the phone
-
Pull the battery out away from the phone.
-
-
-
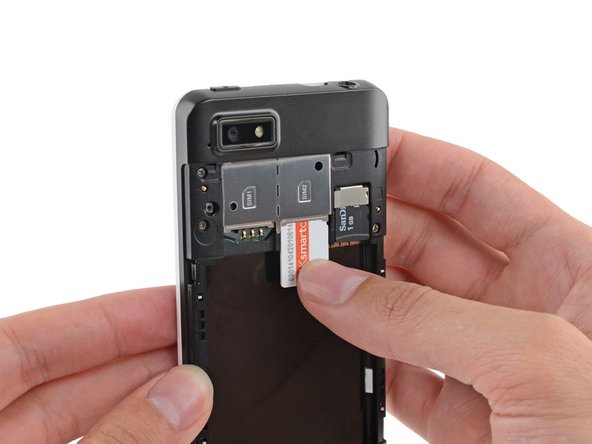
Use your finger to slide the SIM card straight down out of its tray.
-
Remove the SIM card from your Fairphone.
-
Repeat this procedure if you have a second SIM card.
-
Be sure to remove all SIM cards before servicing your phone.
-
-
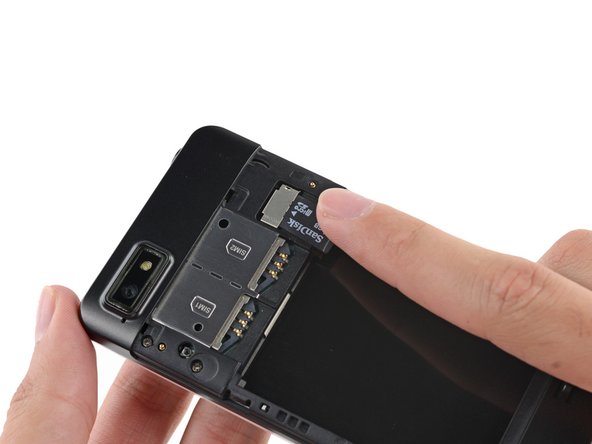
If you have a microSD card, use your finger to slide it straight out of its slot.
-
Remove the microSD card from your phone.
このガイドを埋め込む
サイズを選択し、以下のコードをコピーして、このガイドを小さなウィジェットとしてサイト/フォーラムに埋め込みます。
プレビュー