メインコンテンツにスキップ

Epson Stylus NX305 Scanner Motor Replacement

必要な工具と部品

  1. Epson Stylus NX305 Scanner Motor Replacement, Scanner Motor: 手順 1、 1の画像 1
    • Make sure that the printer is not plugged in before working on it.

    • Orient the printer so that the back of it is facing you.

  2. Epson Stylus NX305 Scanner Motor Replacement: 手順 2、 1の画像 1
    • Locate the 3mm Phillips #0 screw that is on the right-hand side of the printer.

    • Using a Phillips head screwdriver, remove the screw.

  3. Epson Stylus NX305 Scanner Motor Replacement: 手順 3、 2の画像 1 Epson Stylus NX305 Scanner Motor Replacement: 手順 3、 2の画像 2
    • Open up the lid of the printer.

    • With the printer facing away from you, lift up on the right hand side of the lid of the printer and slide it to the left to remove it.

    • Be careful not to remove the white ribbon and wires that are connected.

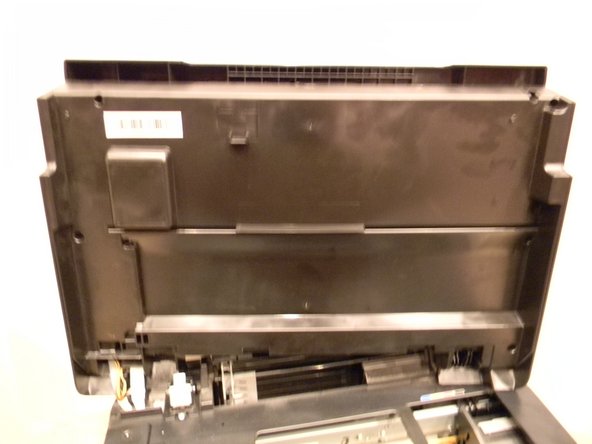
  4. Epson Stylus NX305 Scanner Motor Replacement: 手順 4、 1の画像 1
    • With the printer facing you, open the lid of the scanner to expose the 3mm Phillips #0 screw at the top left of the scanner.

    • Using a Phillips head screwdriver, remove the screw.

  5. Epson Stylus NX305 Scanner Motor Replacement: 手順 5、 1の画像 1
    • Locate the six 3mm Phillips #2 screws under the lid of the printer and remove them.

  6. Epson Stylus NX305 Scanner Motor Replacement: 手順 6、 1の画像 1
    • Locate the three clips on the front side of the printer lid.

    • Use the plastic opening tool to release the clips and carefully pry open the lid.

  7. Epson Stylus NX305 Scanner Motor Replacement: 手順 7、 1の画像 1
    • Locate the belt that is attached to the scanner motor and remove it by carefully stretching off of the gear.

  8. Epson Stylus NX305 Scanner Motor Replacement: 手順 8、 1の画像 1
    • Remove the two 3mm Phillips #2 screws from the scanner motor assembly.

    • Carefully lift the scanner motor assembly out of the housing making sure not to damage the wiring.

  9. Epson Stylus NX305 Scanner Motor Replacement: 手順 9、 1の画像 1
    • Flip over the scanner motor assembly to expose the scanner motor.

    • Remove the two 3mm Phillips #2 screws from the assembly and remove the motor.

終わりに

To reassemble your device, follow these instructions in reverse order.

作成者

1人の作成者と共同作成されました。

Jeffrey Barnett

メンバー登録日: 09/21/14

101 ポイント

1ガイドが承認済み

チーム

USF Tampa, Team 1-2, Donnelly Fall 2014 USF Tampa, Team 1-2, Donnelly Fall 2014人のメンバー

USFT-DONNELLY-F14S1G2

1 メンバー

2のガイドは作成済み

0 件のコメント

コメントを追加

統計データ:

過去 24時間: 0

過去 7 日: 0

過去 30 日: 3

今までの合計 459