はじめに
Hi, I created this guide because I honestly haven’t found anything online for it.
- There are plenty of YouTube videos on how to “unclog” the ink cartridge. For this guide, I glossed over the first few steps because these are the same as what you’ll find in these unclogging videos.
- It wasn’t until I’ve successfully dismantled the contraption that I decided to create a guide for this. In your situation, you will find that the cables are all attached (and you’ll have to move them around). DON’T pull out the cables until you reach the print head!
- In the end, I didn’t “repair” my printer because I found out the problem was worse than replacing the print head :(
Tools required:
- Screwdrivers for spectacles (you’ll need both the Phillips head/”plus” sign, and the flat head)
- Tweezers. Or a small pair of long-nose pliers.
Mr. Choong
-
-
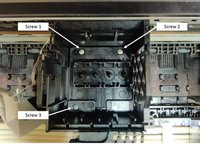
This step is fairly straight-forward. Remove the screw, then gently lift both catches and pull to the right.
-
The ink cartridges are held in place with a catch at the top (picture 2). You can release the catch with your finger.
-
I'm not sure if this is universal, but my ink cartridges come with plastic sheets attached to them (picture 3). I just pulled the sheet (gently) and the ink cartridge slides out.
-
-
-
This step is to orientate you to the parts involved.
-
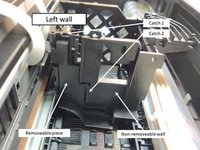
Picture 1 shows the labels I've used in this guide. And yes, that plastic holder gave me a lot of grief. I had to rip out the cables in order to figure out how to remove it. DO NOT unplug your cables at this point!
-
Picture 2 shows how the dismantled cage will look like.
-
Picture 3 shows the print head. To be clear, the print head is actually just that metal bit. For this Epson L6170 Eco-tank printer, the print head has the nozzles attached to it.
-
If you're buying a replacement print head, you might want to take note that some sellers only sell the print head (which means you need to unscrew the nozzle attachment and use it for the new print head).
-
-
-
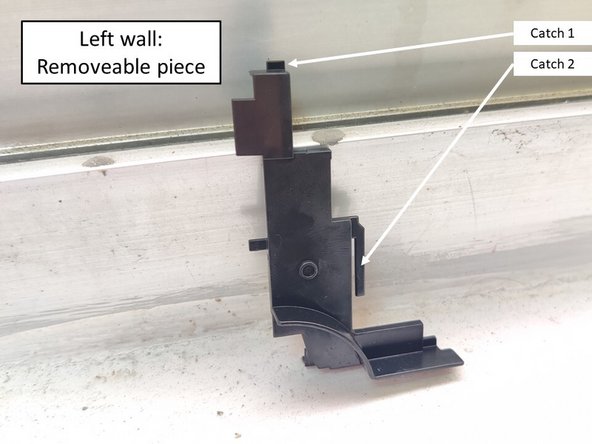
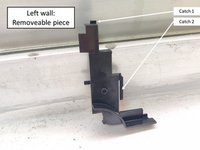
First, to remove the "removeable piece", use a flat-head screwdriver to depress catch 1.
-
Then, using the same screwdriver, wedge it gently in the small gap and pull out catch 2.
-
The removeable piece will pop out fairly easy.
-
In your situation, there will be cables all over. DON'T pull them out of the connector; just shift them aside.
-
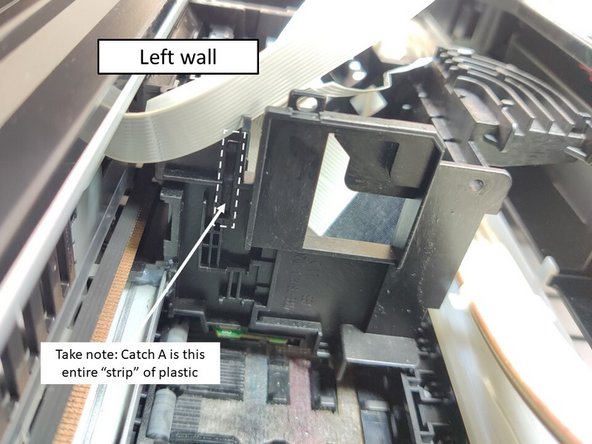
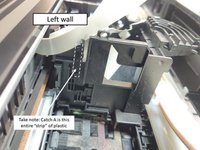
Picture 3 shows the left wall without the removeable piece. Take note of the position of Catch A.
-
-
-
-
The tricky bit is the left wall because that's where all the cables are. But you now know exactly where to press :) See Step 3 Picture 3
-
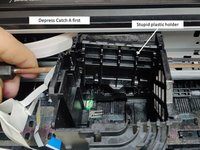
(Picture 1) Using a flat-head screwdriver, push in Catch A and poke it upwards. The plastic holder will not completely be free, but you want it to move slightly upwards.
-
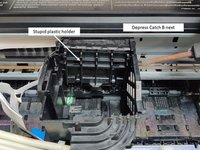
(Picture 2) Same thing, using a flat-head screwdriver, push in Catch B and poke it upwards. Use your free hand to gently pull the plastic holder (so that it does not fall back in place inside Catch A).
-
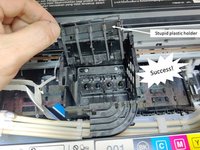
If you've done it correctly, you can just jiggle out that stupid plastic holder from here.
-
-
この手順で使用する道具:Tweezers$4.99
-
After removing the stupid plastic holder, you'll see that the print head is secured with 3 screws (picture 1).
-
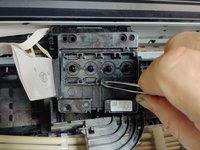
When the screws are removed, you can use a pair of tweezers to jiggle out the print head (picture 2).
-
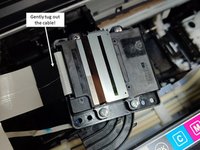
If you intend to replace the print head, you can remove the cable connector at this stage.
-
-
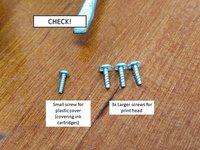
-
1x small/skinny screw (for the white plastic cover on top of the ink cartridges)
-
3x slightly larger/fatter screws (to secure the printhead to the cage)
-
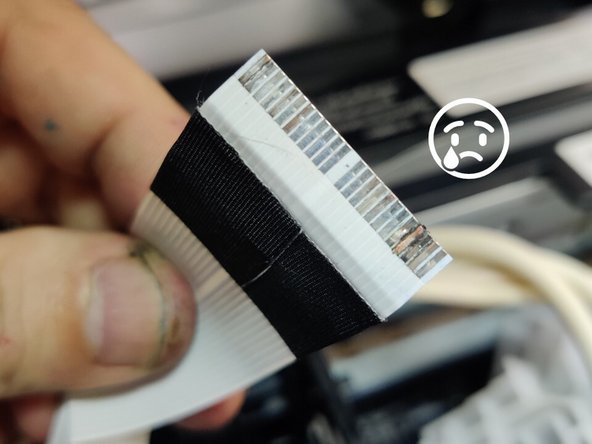
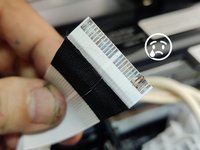
Not really a "check", but Picture 2 was the condition of my print head cable :( Turns out the constant leakage resulted in the cable being damaged/corroded. Whatever the case, replacing this cable will take a lot more effort and time. Sigh.
-


“To reassemble your device, follow these instructions in reverse order.”
In theory. I traced the problem (for my printer) to a corroded print cable connector… which will be far more complicated to replace than just the print head. Long story short, I’ve decided to write off the printer.
5 の人々がこのガイドを完成させました。
5件のガイドコメント
I broke Latch A on the stupid plastic thingy, do you think it would be a problem? It seems to be working fine.
The stupid plastic thingy seems to seve as a retaining wall for the cartridges. I'm not sure how "broken" your latch A is, but maybe you can try to glue the parts back with a few drops of cyanoacrylate glue. Or just leave it be since the printer is still working.
@mrchoong Thanks for the great, detailed instructions. I have the exactly the same broken PIN on the header cable connector. Did replacing the cable solve your problem or did you have to replace/repair the print head or motherboard as well? I would be greateful for your reply...
Hi Marek, unfortunately I was unable to find a replacement cable readily. And to be honest, I wasn't looking very hard then because we needed to replace the printer urgently. From what I saw of the internal wiring, replacing the cable would require me to further disassemble the printer. If you decide to do it, you should take photos and create a guide for it :)