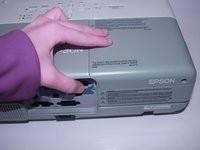
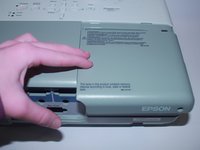
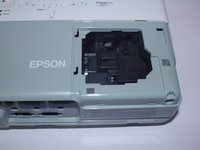
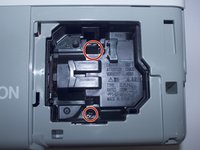
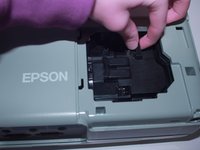
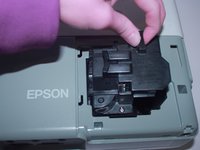
メインコンテンツにスキップ

Epson PowerLite 822 Plus Lamp Replacement

必要な工具と部品

  1. Epson PowerLite 822 Plus Lamp Replacement, Lamp: 手順 1、 1の画像 1
    • If you just used the projector you will want to let it sit for about an hour to cool off.

    • If you have not used the projector within the past few hours you are ready to get to work.

  2. Epson PowerLite 822 Plus Lamp Replacement: 手順 2、 2の画像 1 Epson PowerLite 822 Plus Lamp Replacement: 手順 2、 2の画像 2
    • Use a Phillips #2 screwdriver to remove the 6 mm screw that holds the lamp cover in place.

  3. Epson PowerLite 822 Plus Lamp Replacement: 手順 3、 3の画像 1 Epson PowerLite 822 Plus Lamp Replacement: 手順 3、 3の画像 2 Epson PowerLite 822 Plus Lamp Replacement: 手順 3、 3の画像 3
    • Apply pressure to the lamp cover, pulling it towards the end of the projector.

    • Pop the lamp cover off, exposing the lamp.

  4. Epson PowerLite 822 Plus Lamp Replacement: 手順 4、 3の画像 1 Epson PowerLite 822 Plus Lamp Replacement: 手順 4、 3の画像 2 Epson PowerLite 822 Plus Lamp Replacement: 手順 4、 3の画像 3
    • There are two 9mm screws which have already been loosened. These screws do not come all the way out.

    • Grip the finger hold and pull it straight out of the projector.

  5. Epson PowerLite 822 Plus Lamp Replacement: 手順 5、 1の画像 1
    • After pulling it straight up by the finger hold the lamp will be revealed and ready to be replaced.

終わりに

To reassemble your device, follow these instructions in reverse order.

作成者

2人の作成者と共同で作成されました。

Emma Richey

メンバー登録日: 03/21/22

915 ポイント

5のガイドは作成済み

チーム

University of Alabama, Team 1-3, Bedsole Spring 2022 University of Alabama, Team 1-3, Bedsole Spring 2022人のメンバー

UA-BEDSOLE-S22S1G3

4 メンバー

5のガイドは作成済み

0 件のコメント

コメントを追加

統計データ:

過去 24時間: 0

過去 7 日: 2

過去 30 日: 4

今までの合計 110