メインコンテンツにスキップ

Emson Star Wars R2-D2 Humidifier LED Replacement

必要な工具と部品

  1. Emson Star Wars R2-D2 Humidifier LED Replacement, Blue LED: 手順 1、 1の画像 1
    • Remove the top cover by pulling upwards on R2's head.

  2. Emson Star Wars R2-D2 Humidifier LED Replacement: 手順 2、 1の画像 1
    • Remove the dial in the front of the device by pulling the dial outwards.

  3. Emson Star Wars R2-D2 Humidifier LED Replacement: 手順 3、 1の画像 1
    • Remove the water tank by lifting the tank upwards.

  4. Emson Star Wars R2-D2 Humidifier LED Replacement: 手順 4、 2の画像 1 Emson Star Wars R2-D2 Humidifier LED Replacement: 手順 4、 2の画像 2
    この手順で使用する道具:
    Mako Driver Kit - 64 Precision Bits
    $39.95
    購入する
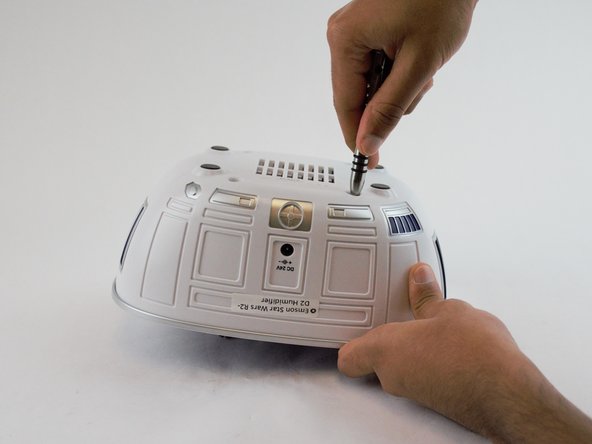
    • Lay the bottom part of the device upside down on a table.

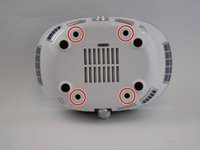
    • Locate the four PH1 screw heads on the underside.

    • We used the driver and 150mm driver extension with a PH1 screwdriver bit (from 64 Bit Driver Kit) to elongate the driver. (See note below and second image)

    • NOTE: The PH1 screw heads are located 5cm into the device. Make sure to use a PH1 Driver that is at most 1cm in diameter and at least 5cm in depth.

  5. Emson Star Wars R2-D2 Humidifier LED Replacement: 手順 5、 2の画像 1 Emson Star Wars R2-D2 Humidifier LED Replacement: 手順 5、 2の画像 2
    • Remove the blue reservoir cover by pulling up the extended plastic.

  6. Emson Star Wars R2-D2 Humidifier LED Replacement: 手順 6、 1の画像 1
    • On the underside of the blue top, you should be able to see the LED exposed under the dial.

  7. Emson Star Wars R2-D2 Humidifier LED Replacement: 手順 7、 1の画像 1
    • To remove the blue LED, carefully pull the LED through the holes on the connector.

    • To add the new LED, make sure to connect the longer metal side (positive end) to the red side on the connector (positive end). The shorter end (negative side) should be connected to the black wire (negative side).

    • Once the LED is in and to make sure the LED stays connected, bend the metal ends at least 90 degrees to prevent it from sliding out of the connector.

終わりに

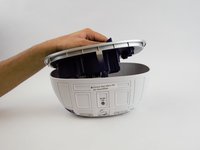
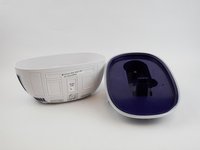
To reassemble your device, follow these instructions in reverse order.

2 の人々がこのガイドを完成させました。

作成者

4人の作成者と共同で作成されました。

Mani Jaishanker

メンバー登録日: 02/15/17

228 ポイント

2のガイドは作成済み

チーム

USF Tampa, Team 8-5, Eyestone Spring 2017 USF Tampa, Team 8-5, Eyestone Spring 2017人のメンバー

USFT-EYESTONE-S17S8G5

4 メンバー

5のガイドは作成済み

0 件のコメント

コメントを追加

統計データ:

過去 24時間: 0

過去 7 日: 3

過去 30 日: 4

今までの合計 136