はじめに
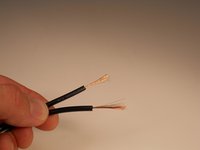
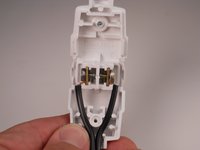
A common issue with electronic devices is a severed or damaged wire. Whether a dog chews through a wire, a child playing with scissors cuts a wire, or a large appliance slices through a wire, many have encountered this problem. This guide teaches how to remove a damaged plug and replace it with a new plug. The wiring in the lamp plug must be done correctly in order for the lamp to turn on after the repair is finished. This guide shows how to properly locate the "hot" and "neutral" connections.
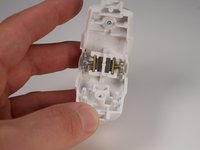
必要な工具と部品
-
-
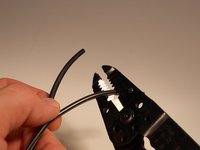
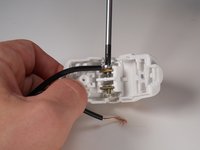
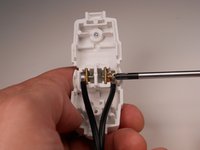
Locate the damaged portion of wire.
-
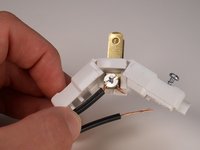
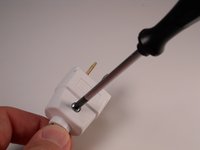
Cut the damaged plug from the lamp cord one inch below the damaged area
-
-


If the lamp the does not work after replacing the plug, the issue may be located in the bulb housing or in the connections.
19 の人々がこのガイドを完成させました。
チーム

Texas Tech, Team 3-2, Rauch SU 2015 Texas Tech, Team 3-2, Rauch SU 2015人のメンバー
TTU-RAUCH-SU15S3G2
3 メンバー
4のガイドは作成済み
7件のガイドコメント
Passt - gute Anleitung
A version for 3 prong (North American) would be great
https://www.noveltylights.com/coaxial-6-...
How would you repair a coaxial cord wire right where it enters the screw on part?
what do you do if the replacement plug has no screws to open it?
Kristin Ladd - 返信 共有
Buy a plug that can be opened with a screw