メインコンテンツにスキップ

Edwin the Duck Rubber Gasket Seal Replacement

必要な工具と部品

  1. Edwin the Duck Rubber Gasket Seal Replacement, Rubber Gasket Seal: 手順 1、 2の画像 1 Edwin the Duck Rubber Gasket Seal Replacement, Rubber Gasket Seal: 手順 1、 2の画像 2
    • Unscrew the four 9mm screws with aT8 bit

    • Take the back plate off

  2. Edwin the Duck Rubber Gasket Seal Replacement: 手順 2、 2の画像 1 Edwin the Duck Rubber Gasket Seal Replacement: 手順 2、 2の画像 2
    • Carefully take off the rubber skin.

    • Be patient and don't rush. You don't want to rip or damage the rubber skin otherwise you will lose the waterproof cover.

  3. Edwin the Duck Rubber Gasket Seal Replacement: 手順 3、 1の画像 1
    • Using the J1 bit, unscrew all six 9 mm screws around the border.

  4. Edwin the Duck Rubber Gasket Seal Replacement: 手順 4、 2の画像 1 Edwin the Duck Rubber Gasket Seal Replacement: 手順 4、 2の画像 2
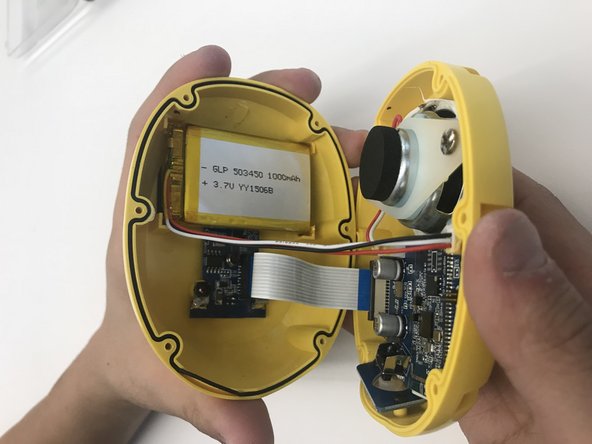
    • Use the plastic opening tool to open the inside of the duck.

    • Be very careful when splitting the two halves apart. There are wires connecting to both sides. So open it very slowly.

  5. Edwin the Duck Rubber Gasket Seal Replacement: 手順 5、 2の画像 1 Edwin the Duck Rubber Gasket Seal Replacement: 手順 5、 2の画像 2
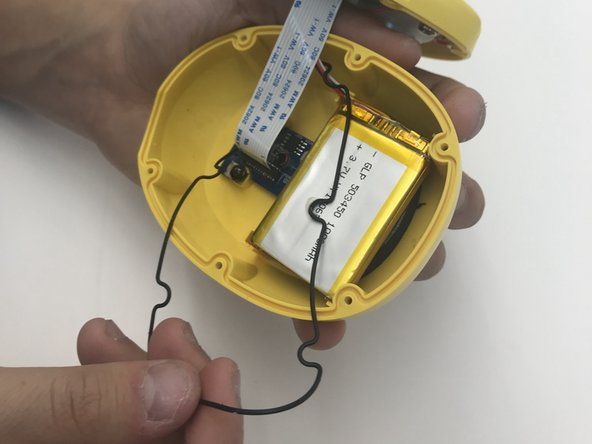
    • Remove the rubber gasket

  6. Edwin the Duck Rubber Gasket Seal Replacement: 手順 6、 1の画像 1
    • Insert your new rubber gasket in and use the plastic opening tool to push the rubber gasket into it's slot

終わりに

To reassemble your device, follow these instructions in reverse order.

作成者

3人の作成者と共同で作成されました。

Nadia Dobrogorskaya

メンバー登録日: 10/18/17

131 ポイント

1ガイドが承認済み

チーム

UW Tacoma, Team S1-G4, Rose Fall 2017 UW Tacoma, Team S1-G4, Rose Fall 2017人のメンバー

UWT-ROSE-F17S1G4

4 メンバー

8のガイドは作成済み

0 件のコメント

コメントを追加

統計データ:

過去 24時間: 0

過去 7 日: 0

過去 30 日: 3

今までの合計 317