メインコンテンツにスキップ

Echo Chain Saw CS590 2019 Front Hand Guard Replacement

必要な工具と部品

  1. Echo Chain Saw CS590 2019 Front Hand Guard Replacement, Turn off the chainsaw: 手順 1、 2の画像 1 Echo Chain Saw CS590 2019 Front Hand Guard Replacement, Turn off the chainsaw: 手順 1、 2の画像 2
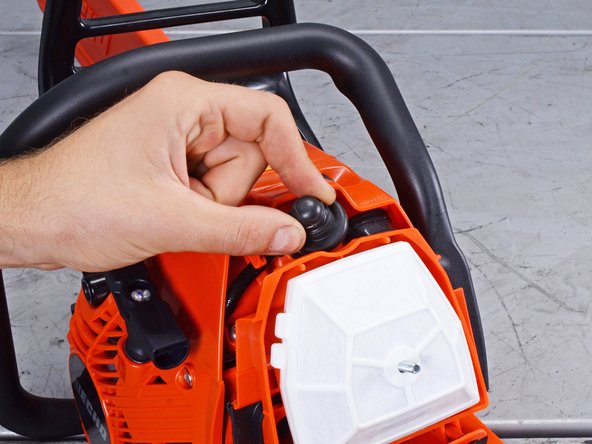
    • Make sure you have the ignition switch turned off before starting your repair.

    • The chainsaw should be cool to the touch before continuing.

  2. Echo Chain Saw CS590 2019 Front Hand Guard Replacement, Loosen the air filter cover: 手順 2、 2の画像 1 Echo Chain Saw CS590 2019 Front Hand Guard Replacement, Loosen the air filter cover: 手順 2、 2の画像 2
    • Use your fingers to loosen the air filter cover knob.

  3. Echo Chain Saw CS590 2019 Front Hand Guard Replacement: 手順 3、 3の画像 1 Echo Chain Saw CS590 2019 Front Hand Guard Replacement: 手順 3、 3の画像 2 Echo Chain Saw CS590 2019 Front Hand Guard Replacement: 手順 3、 3の画像 3
    • Remove the air filter cover.

  4. Echo Chain Saw CS590 2019 Front Hand Guard Replacement, Disconnect the spark plug: 手順 4、 3の画像 1 Echo Chain Saw CS590 2019 Front Hand Guard Replacement, Disconnect the spark plug: 手順 4、 3の画像 2 Echo Chain Saw CS590 2019 Front Hand Guard Replacement, Disconnect the spark plug: 手順 4、 3の画像 3
    • Use your fingers to pull up and disconnect the spark plug boot.

  5. Echo Chain Saw CS590 2019 Front Hand Guard Replacement, Remove the air filter: 手順 5、 3の画像 1 Echo Chain Saw CS590 2019 Front Hand Guard Replacement, Remove the air filter: 手順 5、 3の画像 2 Echo Chain Saw CS590 2019 Front Hand Guard Replacement, Remove the air filter: 手順 5、 3の画像 3
    • To minimize debris entering the intake, pull the choke shut before continuing.

    • Remove the air filter

    • During reassembly, clean the air filter with compressed air or with light brushing before reinstalling it.

  6. Echo Chain Saw CS590 2019 Front Hand Guard Replacement, Unfasten the front handle: 手順 6、 2の画像 1 Echo Chain Saw CS590 2019 Front Hand Guard Replacement, Unfasten the front handle: 手順 6、 2の画像 2
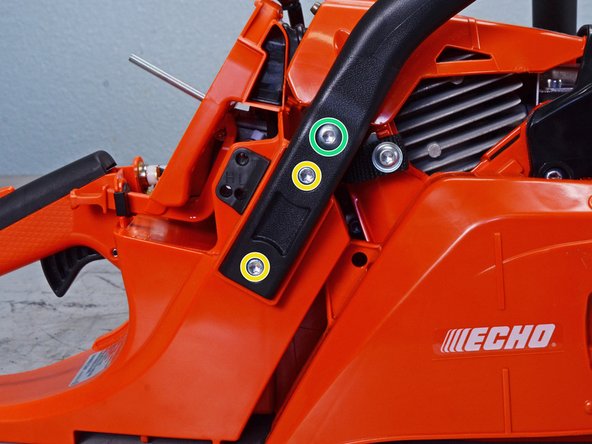
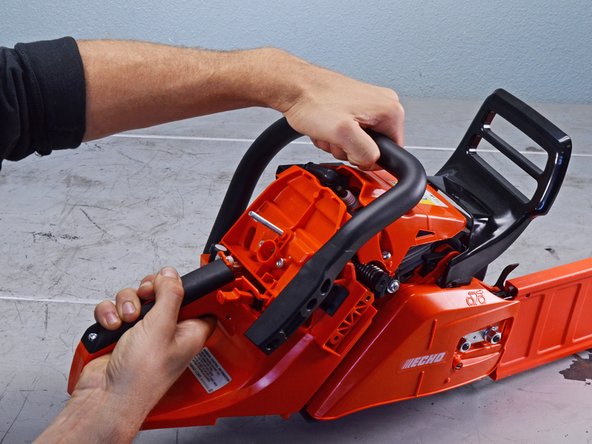
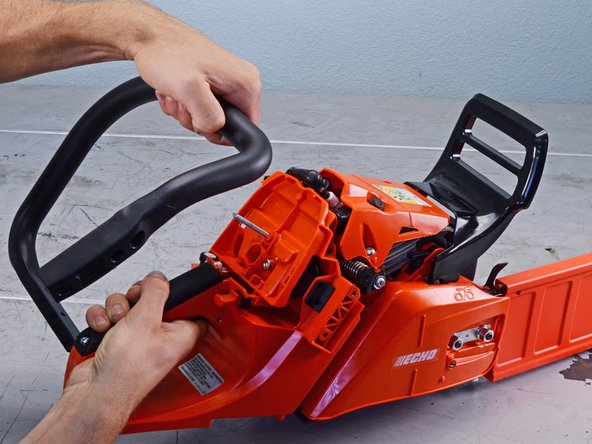
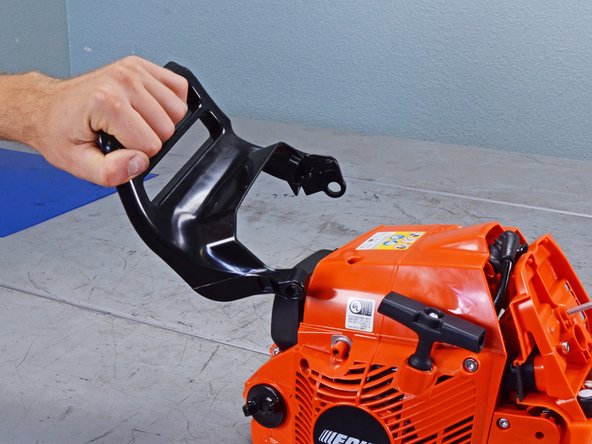
    • Use a T25 Torx screwdriver to remove the five screws securing the front handle to the bottom and right side of the device:

    • Four 24 mm-long screws

    • One 25 mm-long screw

  7. Echo Chain Saw CS590 2019 Front Hand Guard Replacement, Remove the front handle: 手順 7、 3の画像 1 Echo Chain Saw CS590 2019 Front Hand Guard Replacement, Remove the front handle: 手順 7、 3の画像 2 Echo Chain Saw CS590 2019 Front Hand Guard Replacement, Remove the front handle: 手順 7、 3の画像 3
    • Pull the handle toward the rear of the device to remove it.

  8. Echo Chain Saw CS590 2019 Front Hand Guard Replacement, Remove the sprocket guard: 手順 8、 2の画像 1 Echo Chain Saw CS590 2019 Front Hand Guard Replacement, Remove the sprocket guard: 手順 8、 2の画像 2
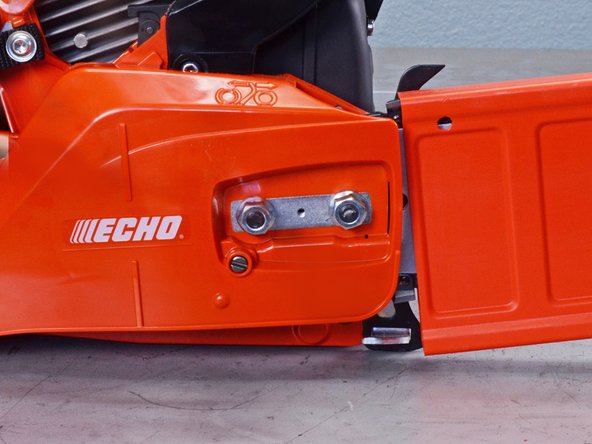
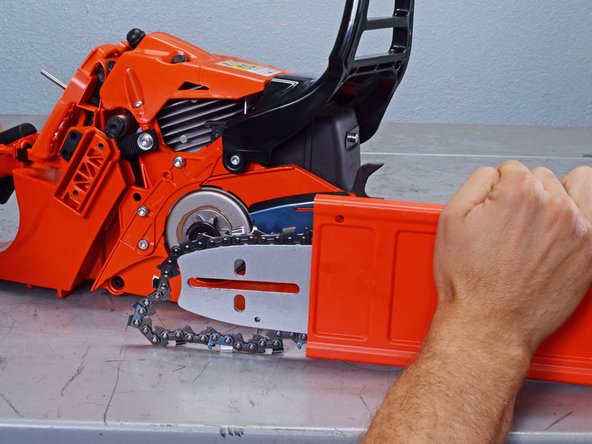
    • Use a 13 mm wrench to remove the two nuts securing the sprocket guard.

  9. Echo Chain Saw CS590 2019 Front Hand Guard Replacement: 手順 9、 3の画像 1 Echo Chain Saw CS590 2019 Front Hand Guard Replacement: 手順 9、 3の画像 2 Echo Chain Saw CS590 2019 Front Hand Guard Replacement: 手順 9、 3の画像 3
    • Remove the sprocket guard.

  10. Echo Chain Saw CS590 2019 Front Hand Guard Replacement, Remove the guide bar: 手順 10、 3の画像 1 Echo Chain Saw CS590 2019 Front Hand Guard Replacement, Remove the guide bar: 手順 10、 3の画像 2 Echo Chain Saw CS590 2019 Front Hand Guard Replacement, Remove the guide bar: 手順 10、 3の画像 3
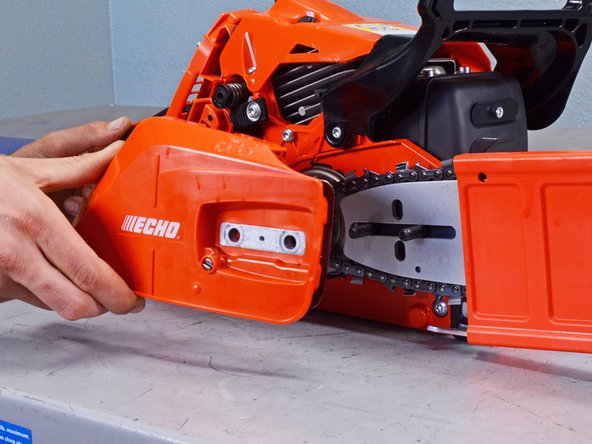
    • Push the guide bar towards the back of the device to create slack in the saw chain.

    • Pull the guide bar away from the device to separate the saw chain from the clutch drum.

    • Remove the guide bar.

  11. Echo Chain Saw CS590 2019 Front Hand Guard Replacement, Unfasten the front hand guard: 手順 11、 2の画像 1 Echo Chain Saw CS590 2019 Front Hand Guard Replacement, Unfasten the front hand guard: 手順 11、 2の画像 2
    • Make sure the front hand guard is in the unlocked position before continuing.

    • Use a T25 Torx screwdriver to remove the two 20 mm screws securing the front hand guard.

  12. Echo Chain Saw CS590 2019 Front Hand Guard Replacement, Remove the front hand guard: 手順 12、 2の画像 1 Echo Chain Saw CS590 2019 Front Hand Guard Replacement, Remove the front hand guard: 手順 12、 2の画像 2
    • Pull the front hand guard toward the rear of the device to remove it.

終わりに

To reassemble your device, follow these instructions in reverse order.

2 の人々がこのガイドを完成させました。

Alex Diaz-Kokaisl

メンバー登録日: 01/16/22

126,540 ポイント

592のガイドは作成済み

チーム

iFixit iFixit人のメンバー

Staff

139 メンバー

17,676のガイドは作成済み

0 件のコメント

コメントを追加

統計データ:

過去 24時間: 3

過去 7 日: 16

過去 30 日: 47

今までの合計 678