メインコンテンツにスキップ

Echo Brushcutter SRM2620U 2017 Clutch Assembly Replacement

必要な工具と部品

  1. Echo Brushcutter SRM2620U 2017 Clutch Assembly Replacement, Disconnect the spark plug wire: 手順 1、 3の画像 1 Echo Brushcutter SRM2620U 2017 Clutch Assembly Replacement, Disconnect the spark plug wire: 手順 1、 3の画像 2 Echo Brushcutter SRM2620U 2017 Clutch Assembly Replacement, Disconnect the spark plug wire: 手順 1、 3の画像 3
    • Before you begin, ensure that the engine is powered down and cool to the touch.

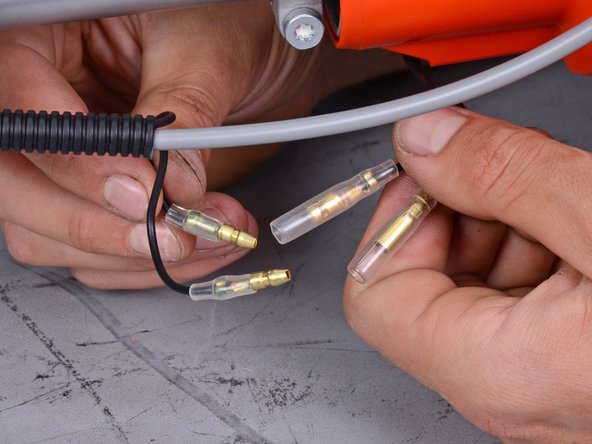
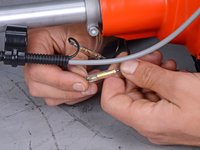
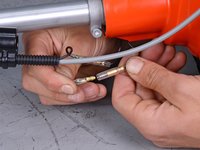
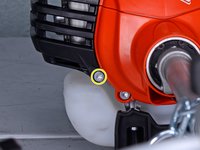
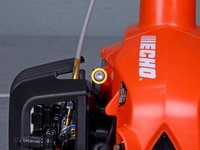
    • Grip the plastic housing at the end of the spark plug wire and pull firmly to disconnect it.

  2. Echo Brushcutter SRM2620U 2017 Clutch Assembly Replacement, Disconnect the control cables: 手順 2、 2の画像 1 Echo Brushcutter SRM2620U 2017 Clutch Assembly Replacement, Disconnect the control cables: 手順 2、 2の画像 2
    • Unclip the throttle cable routing clip from the main shaft.

  3. Echo Brushcutter SRM2620U 2017 Clutch Assembly Replacement: 手順 3、 3の画像 1 Echo Brushcutter SRM2620U 2017 Clutch Assembly Replacement: 手順 3、 3の画像 2 Echo Brushcutter SRM2620U 2017 Clutch Assembly Replacement: 手順 3、 3の画像 3
    • Grip both ends of one of the control cable bullet connectors and pull to disconnect it.

    • Repeat to disconnect the second control cable connector.

    • These connectors are interchangeable.

  4. Echo Brushcutter SRM2620U 2017 Clutch Assembly Replacement, Remove the muffler cover: 手順 4、 2の画像 1 Echo Brushcutter SRM2620U 2017 Clutch Assembly Replacement, Remove the muffler cover: 手順 4、 2の画像 2
    • This Echo device has an included multi-tool with a T30 Torx screwdriver, but any T30 Torx driver is compatible.

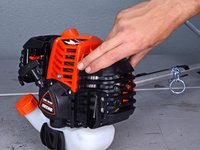
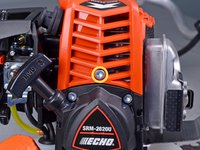
    • Use a T30 Torx driver to remove the two screws securing the muffler cover.

  5. Echo Brushcutter SRM2620U 2017 Clutch Assembly Replacement: 手順 5、 3の画像 1 Echo Brushcutter SRM2620U 2017 Clutch Assembly Replacement: 手順 5、 3の画像 2 Echo Brushcutter SRM2620U 2017 Clutch Assembly Replacement: 手順 5、 3の画像 3
    • Lift the muffler cover up and pivot it on its top edge to unlatch it from the engine cover.

    • Remove the muffler cover.

  6. Echo Brushcutter SRM2620U 2017 Clutch Assembly Replacement, Remove the engine cover: 手順 6、 2の画像 1 Echo Brushcutter SRM2620U 2017 Clutch Assembly Replacement, Remove the engine cover: 手順 6、 2の画像 2
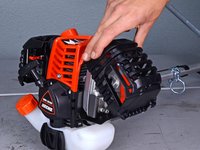
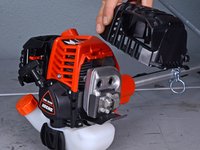
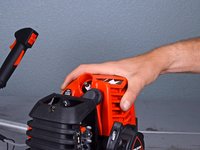
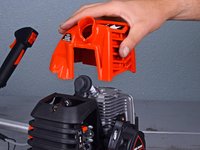
    • Use a T30 Torx driver to remove the two screws securing the engine cover.

  7. Echo Brushcutter SRM2620U 2017 Clutch Assembly Replacement: 手順 7、 2の画像 1 Echo Brushcutter SRM2620U 2017 Clutch Assembly Replacement: 手順 7、 2の画像 2
    • Lift the engine cover straight up to remove it.

  8. Echo Brushcutter SRM2620U 2017 Clutch Assembly Replacement, Remove the fan cover: 手順 8、 1の画像 1
    • Use a T30 Torx driver to remove the two screws securing the fan cover.

  9. Echo Brushcutter SRM2620U 2017 Clutch Assembly Replacement: 手順 9、 2の画像 1 Echo Brushcutter SRM2620U 2017 Clutch Assembly Replacement: 手順 9、 2の画像 2
    • Pull the fan cover away from the motor assembly.

  10. Echo Brushcutter SRM2620U 2017 Clutch Assembly Replacement, Reassembly tip: 手順 10、 2の画像 1 Echo Brushcutter SRM2620U 2017 Clutch Assembly Replacement, Reassembly tip: 手順 10、 2の画像 2
    • During reassembly:

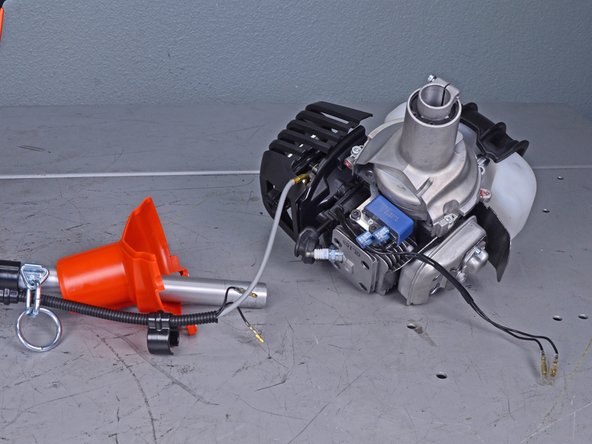
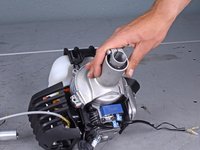
    • Reroute the two control cables through the opening on the fan cover.

    • Lay the cables into their slot on the clutch cover.

  11. Echo Brushcutter SRM2620U 2017 Clutch Assembly Replacement, Separate the shaft from the engine assembly: 手順 11、 1の画像 1
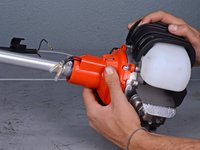
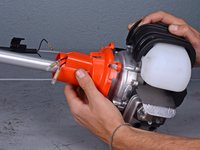
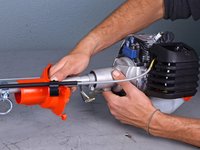
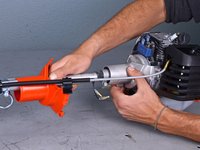
    • Use a T30 Torx driver to loosen, but not remove, the collar bolt securing the main shaft to the engine assembly.

  12. Echo Brushcutter SRM2620U 2017 Clutch Assembly Replacement: 手順 12、 3の画像 1 Echo Brushcutter SRM2620U 2017 Clutch Assembly Replacement: 手順 12、 3の画像 2 Echo Brushcutter SRM2620U 2017 Clutch Assembly Replacement: 手順 12、 3の画像 3
    • Grip the engine assembly and pull to remove it from the main shaft.

    • With the engine assembly removed, take care to not put any strain on the still-connected throttle cable.

  13. Echo Brushcutter SRM2620U 2017 Clutch Assembly Replacement, Remove the clutch cover: 手順 13、 1の画像 1
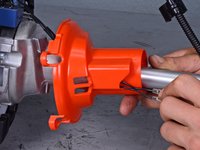
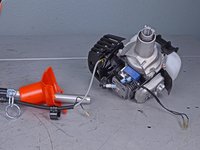
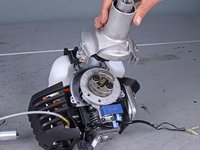
    • Use a T30 Torx driver to remove the two screws securing the clutch cover.

  14. Echo Brushcutter SRM2620U 2017 Clutch Assembly Replacement: 手順 14、 2の画像 1 Echo Brushcutter SRM2620U 2017 Clutch Assembly Replacement: 手順 14、 2の画像 2
    • Remove the clutch cover.

  15. Echo Brushcutter SRM2620U 2017 Clutch Assembly Replacement, Remove the clutch assembly: 手順 15、 1の画像 1
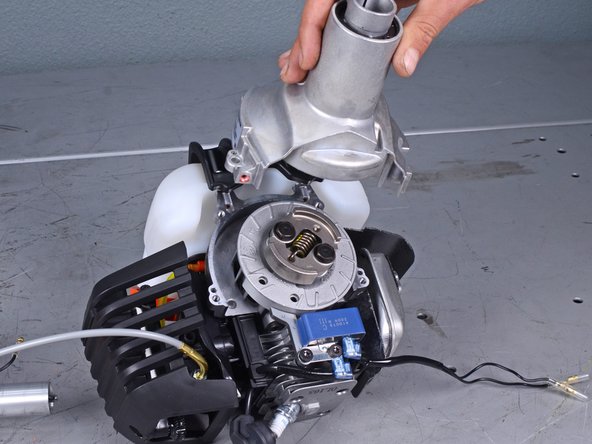
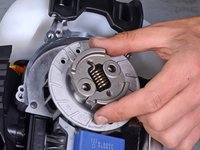
    • Use a 1/2 inch socket to remove the two 12 mm-long bolts and four accompanying washers securing the clutch assembly.

    • During reassembly:

    • Note that the larger washer goes underneath the clutch assembly and the small washer goes above.

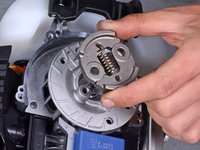
    • Ensure that the clutch assembly is reinstalled arrow side up.

  16. Echo Brushcutter SRM2620U 2017 Clutch Assembly Replacement: 手順 16、 2の画像 1 Echo Brushcutter SRM2620U 2017 Clutch Assembly Replacement: 手順 16、 2の画像 2
    • Remove the clutch assembly.

終わりに

To reassemble your device, follow these instructions in reverse order.

Carsten Frauenheim

メンバー登録日: 03/10/20

135,992 ポイント

371のガイドは作成済み

チーム

iFixit iFixit人のメンバー

Staff

118 メンバー

19,465のガイドは作成済み

0 件のコメント

コメントを追加

統計データ:

過去 24時間: 1

過去 7 日: 9

過去 30 日: 23

今までの合計 1,087