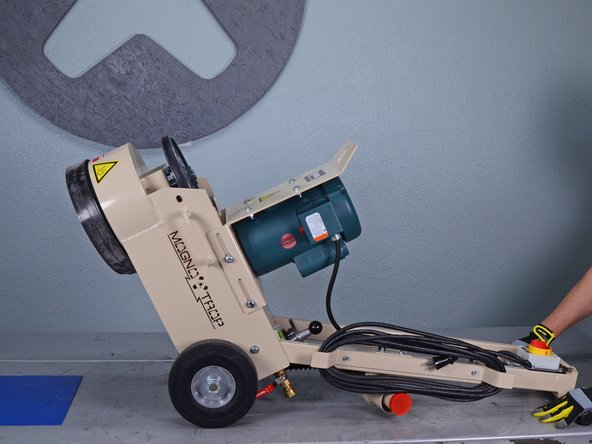
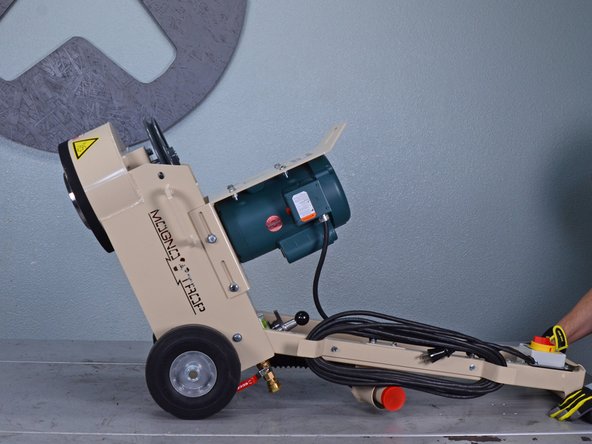
メインコンテンツにスキップ

EDCO Disk Grinder 50200-HD Head Assembly Replacement

必要な工具と部品

  1. EDCO Disk Grinder 50200-HD Head Assembly Replacement, Safety precautions: 手順 1、 1の画像 1
    • Before you begin, ensure the device is powered down and cool to the touch.

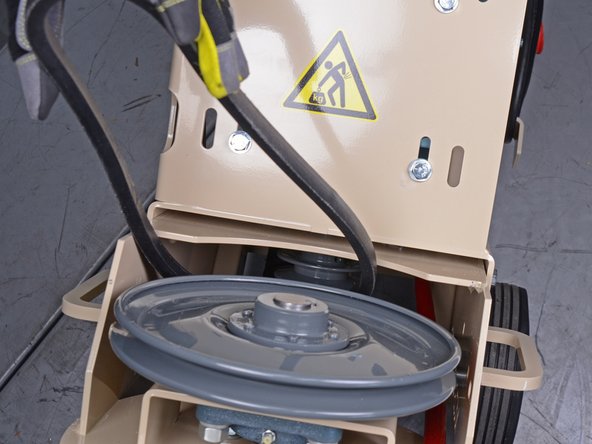
    • Ensure the machine is unplugged.

    • Turn the power switch counterclockwise into the OFF position.

  2. EDCO Disk Grinder 50200-HD Head Assembly Replacement, Remove the weighted hood: 手順 2、 3の画像 1 EDCO Disk Grinder 50200-HD Head Assembly Replacement, Remove the weighted hood: 手順 2、 3の画像 2 EDCO Disk Grinder 50200-HD Head Assembly Replacement, Remove the weighted hood: 手順 2、 3の画像 3
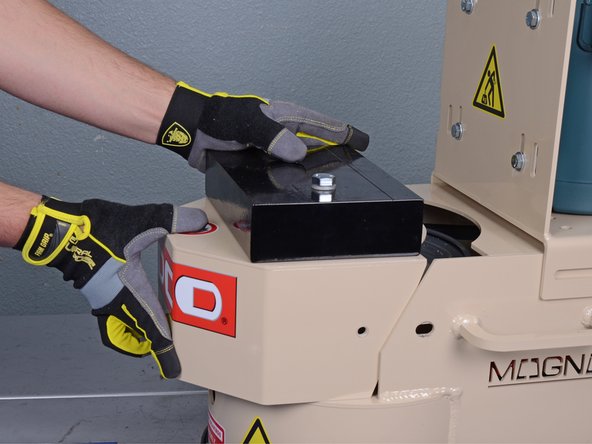
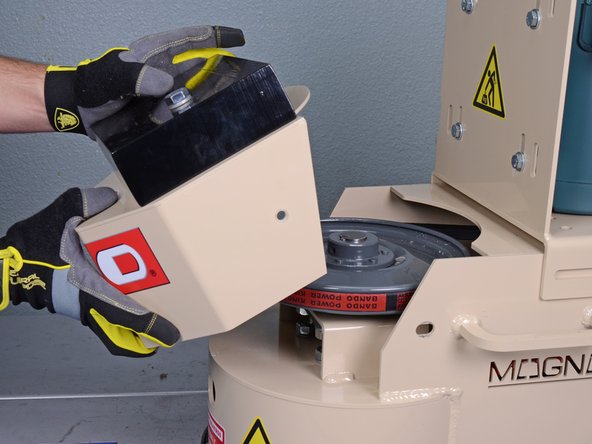
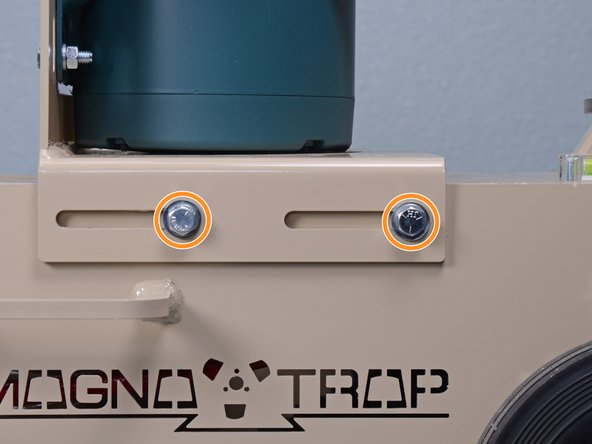
    • Use a 9/16 inch socket to remove the two bolts securing the weighted hood.

    • During reassembly, ensure the bolts are reinstalled with the washers and lock washers in the correct order.

  3. EDCO Disk Grinder 50200-HD Head Assembly Replacement: 手順 3、 3の画像 1 EDCO Disk Grinder 50200-HD Head Assembly Replacement: 手順 3、 3の画像 2 EDCO Disk Grinder 50200-HD Head Assembly Replacement: 手順 3、 3の画像 3
    • Remove the weighted hood.

    • The weighted hood weighs 37 pounds. Wear gloves and handle with caution.

  4. EDCO Disk Grinder 50200-HD Head Assembly Replacement, Remove the belt: 手順 4、 2の画像 1 EDCO Disk Grinder 50200-HD Head Assembly Replacement, Remove the belt: 手順 4、 2の画像 2
    • Use a 9/16 inch socket to loosen the bolts securing the motor mount.

    • Do not completely remove the bolts.

  5. EDCO Disk Grinder 50200-HD Head Assembly Replacement: 手順 5、 2の画像 1 EDCO Disk Grinder 50200-HD Head Assembly Replacement: 手順 5、 2の画像 2
    • Slide the motor towards the front of the machine as far as it will go to loosen the belt tension.

    • Use a 9/16 inch socket to tighten the four bolts back down to lock the motor in a position where there's the least belt tension.

    • During reassembly, have one person slide the motor mount towards the rear of the machine to tension the belt while the other person tightens the bolts.

  6. EDCO Disk Grinder 50200-HD Head Assembly Replacement: 手順 6、 3の画像 1 EDCO Disk Grinder 50200-HD Head Assembly Replacement: 手順 6、 3の画像 2 EDCO Disk Grinder 50200-HD Head Assembly Replacement: 手順 6、 3の画像 3
    • Tilt the front of the machine up and rest the handlebars on the ground.

    • Have someone hold down the handlebars to prevent tipping while working on the belt.

  7. EDCO Disk Grinder 50200-HD Head Assembly Replacement: 手順 7、 3の画像 1 EDCO Disk Grinder 50200-HD Head Assembly Replacement: 手順 7、 3の画像 2 EDCO Disk Grinder 50200-HD Head Assembly Replacement: 手順 7、 3の画像 3
    • Pinch a flathead screwdriver between the belt and sheave.

    • Rotate the sheave and pivot the belt up and away from its groove.

  8. EDCO Disk Grinder 50200-HD Head Assembly Replacement: 手順 8、 2の画像 1 EDCO Disk Grinder 50200-HD Head Assembly Replacement: 手順 8、 2の画像 2
    • Continue to rotate the sheave with once hand while holding the flathead screwdriver with the other to fully dislodge the belt from the groove.

  9. EDCO Disk Grinder 50200-HD Head Assembly Replacement: 手順 9、 3の画像 1 EDCO Disk Grinder 50200-HD Head Assembly Replacement: 手順 9、 3の画像 2 EDCO Disk Grinder 50200-HD Head Assembly Replacement: 手順 9、 3の画像 3
    • Remove the belt from the motor pulley, then fully remove it from the machine.

    • Reassembly tip: loop the belt around the motor pulley before placing it on the sheave.

  10. EDCO Disk Grinder 50200-HD Head Assembly Replacement, Reassembly tip: 手順 10、 3の画像 1 EDCO Disk Grinder 50200-HD Head Assembly Replacement, Reassembly tip: 手順 10、 3の画像 2 EDCO Disk Grinder 50200-HD Head Assembly Replacement, Reassembly tip: 手順 10、 3の画像 3
    • Reassembly tip: place the belt over the rim and rotate the sheave to guide the belt into the groove.

  11. EDCO Disk Grinder 50200-HD Head Assembly Replacement, Rubber Skirt Removal: 手順 11、 3の画像 1 EDCO Disk Grinder 50200-HD Head Assembly Replacement, Rubber Skirt Removal: 手順 11、 3の画像 2 EDCO Disk Grinder 50200-HD Head Assembly Replacement, Rubber Skirt Removal: 手順 11、 3の画像 3
    • Remove the rubber skirt surrounding the disk head.

  12. EDCO Disk Grinder 50200-HD Head Assembly Replacement, Tilt the machine: 手順 12、 3の画像 1 EDCO Disk Grinder 50200-HD Head Assembly Replacement, Tilt the machine: 手順 12、 3の画像 2 EDCO Disk Grinder 50200-HD Head Assembly Replacement, Tilt the machine: 手順 12、 3の画像 3
    • Tilt the machine back into working position.

  13. EDCO Disk Grinder 50200-HD Head Assembly Replacement, Remove the sheave: 手順 13、 1の画像 1
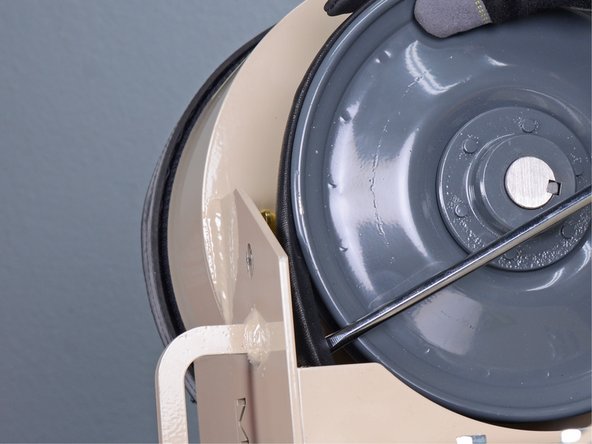
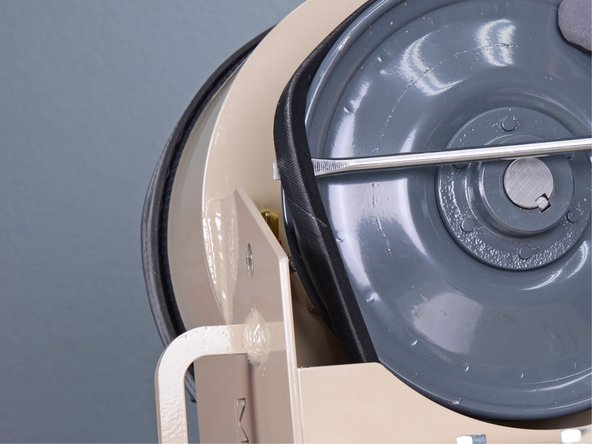
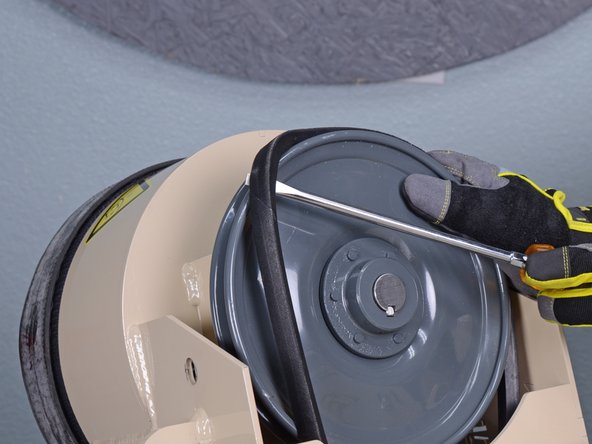
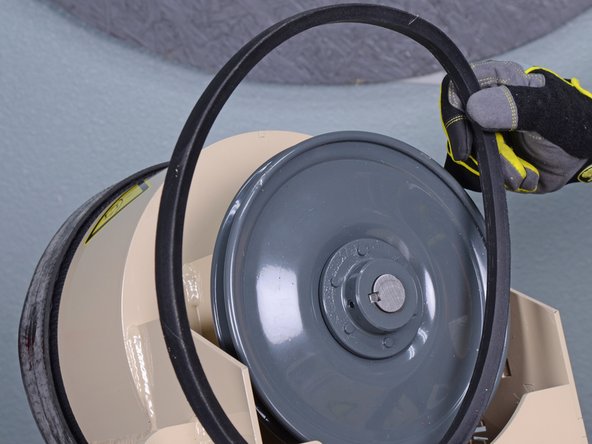
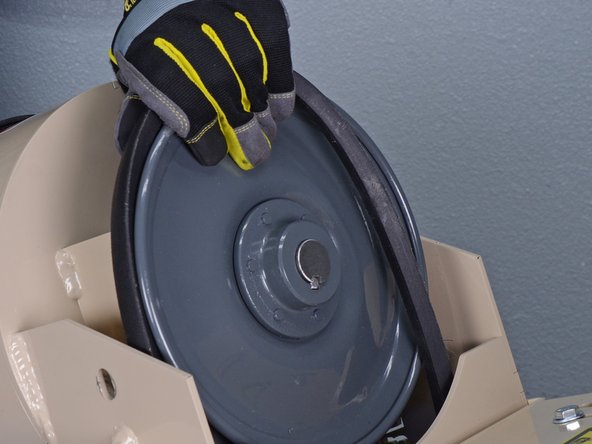
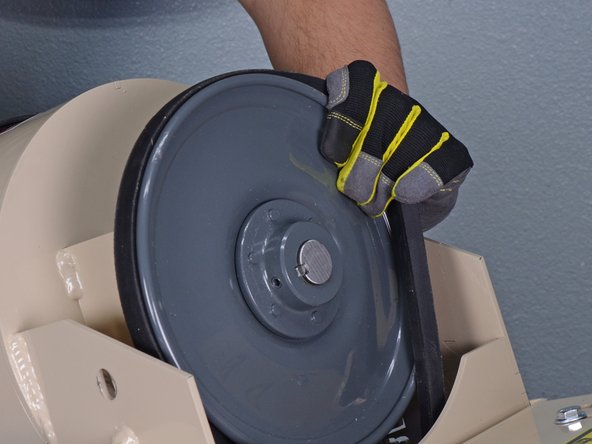
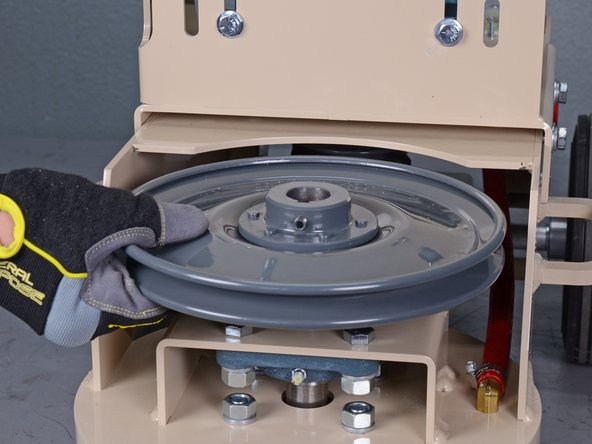
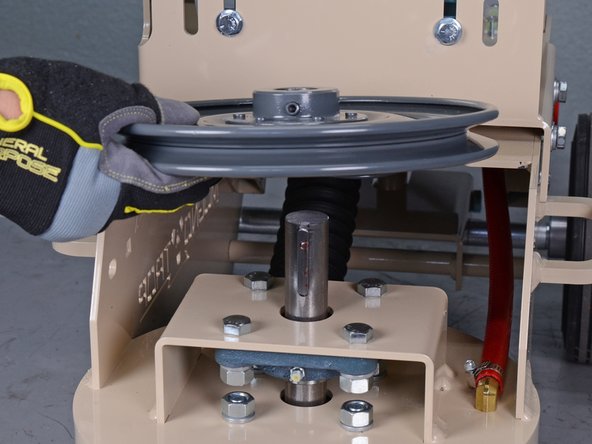
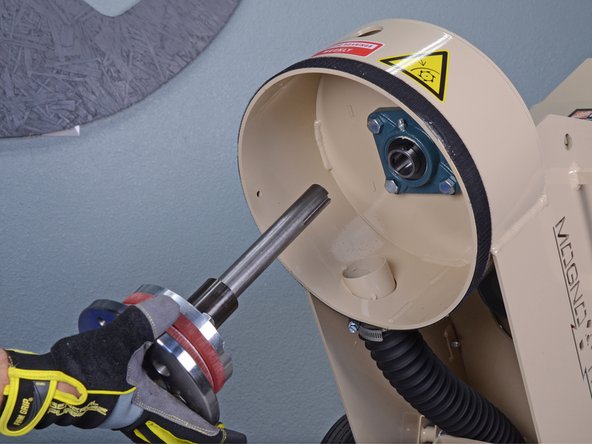
    • Use a 5/32 inch hex wrench to loosen the set screw securing the sheave to the head assembly shaft.

    • If the set screw is seized, use an impact driver with a 5/32 inch hex socket to loosen it.

  14. EDCO Disk Grinder 50200-HD Head Assembly Replacement: 手順 14、 3の画像 1 EDCO Disk Grinder 50200-HD Head Assembly Replacement: 手順 14、 3の画像 2 EDCO Disk Grinder 50200-HD Head Assembly Replacement: 手順 14、 3の画像 3
    • Lift the sheave straight up off of the head assembly shaft.

  15. EDCO Disk Grinder 50200-HD Head Assembly Replacement, Remove the head assembly: 手順 15、 1の画像 1
    • Remove the key from the head assembly shaft.

  16. EDCO Disk Grinder 50200-HD Head Assembly Replacement: 手順 16、 2の画像 1 EDCO Disk Grinder 50200-HD Head Assembly Replacement: 手順 16、 2の画像 2
    • Use a 5/32 inch hex bit with an extension to loosen the two set screws securing the head assembly shaft to the upper bearing.

  17. EDCO Disk Grinder 50200-HD Head Assembly Replacement: 手順 17、 2の画像 1 EDCO Disk Grinder 50200-HD Head Assembly Replacement: 手順 17、 2の画像 2
    • Use a 5/32 inch hex bit with an extension to loosen the two set screws securing the head assembly shaft to the lower bearing.

    • The set screws can be accessed through the opening in the shroud on the front of the machine.

  18. EDCO Disk Grinder 50200-HD Head Assembly Replacement, Tilt the machine: 手順 18、 3の画像 1 EDCO Disk Grinder 50200-HD Head Assembly Replacement, Tilt the machine: 手順 18、 3の画像 2 EDCO Disk Grinder 50200-HD Head Assembly Replacement, Tilt the machine: 手順 18、 3の画像 3
    • Tilt the front of the machine up off the ground.

    • Have someone hold down the handlebars to prevent tipping while working on the head assembly.

  19. EDCO Disk Grinder 50200-HD Head Assembly Replacement, Remove the disk: 手順 19、 1の画像 1
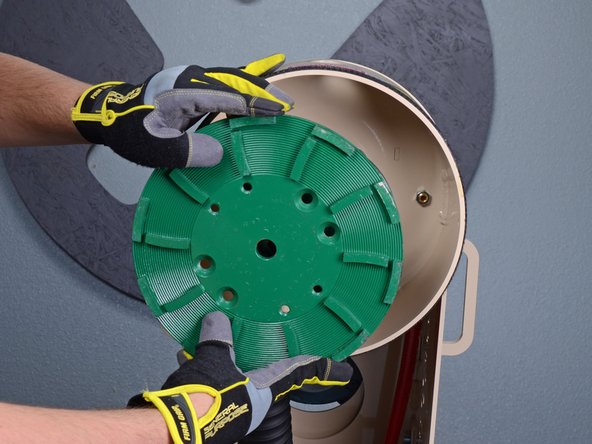
    • Use a 7/32 inch hex key to remove the four flat screws securing the disk to the head assembly.

  20. EDCO Disk Grinder 50200-HD Head Assembly Replacement: 手順 20、 2の画像 1 EDCO Disk Grinder 50200-HD Head Assembly Replacement: 手順 20、 2の画像 2
    • Wear gloves. The edges of the disk can be sharp.

    • Remove the disk.

  21. EDCO Disk Grinder 50200-HD Head Assembly Replacement, Hammer the head assembly shaft: 手順 21、 3の画像 1 EDCO Disk Grinder 50200-HD Head Assembly Replacement, Hammer the head assembly shaft: 手順 21、 3の画像 2 EDCO Disk Grinder 50200-HD Head Assembly Replacement, Hammer the head assembly shaft: 手順 21、 3の画像 3
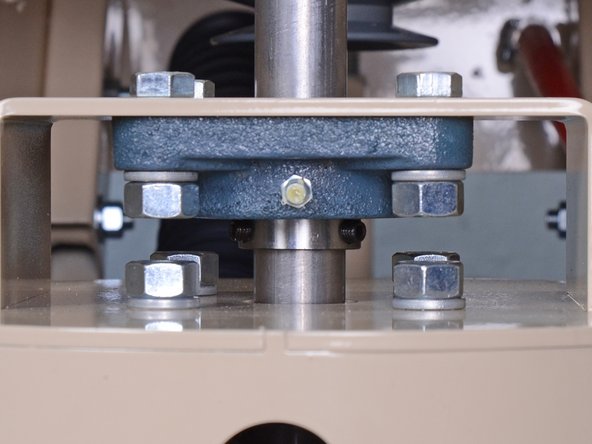
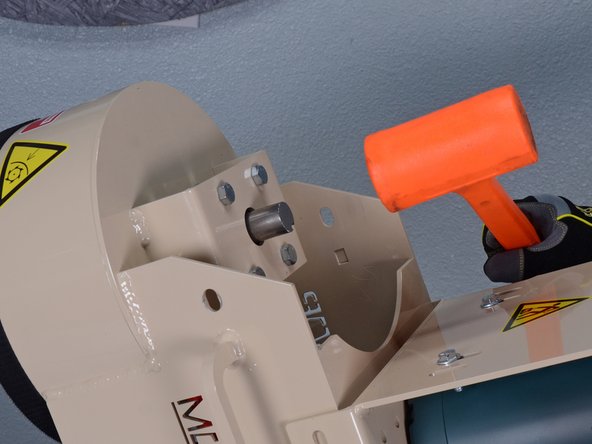
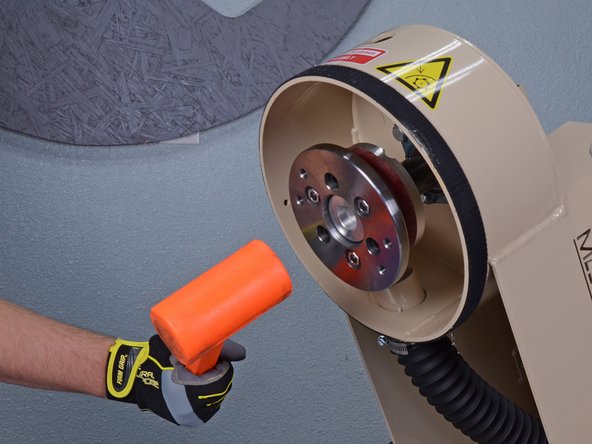
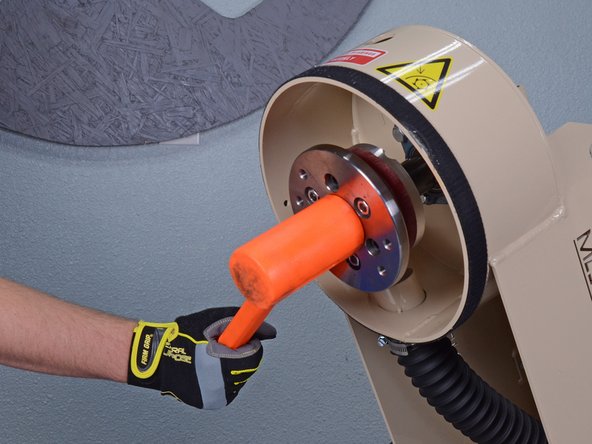
    • Use a dead blow hammer to hit the head assembly shaft straight down until it is flush with the upper bearing bracket, or as far as it will go.

  22. EDCO Disk Grinder 50200-HD Head Assembly Replacement: 手順 22、 2の画像 1 EDCO Disk Grinder 50200-HD Head Assembly Replacement: 手順 22、 2の画像 2
    • Use an appropriately-sized punch to knock the head assembly the rest of the way out.

    • Once the head assembly shaft clears the last bearing, it will fall out. If necessary, have someone hold it to prevent it from hitting the ground.

  23. EDCO Disk Grinder 50200-HD Head Assembly Replacement: 手順 23、 2の画像 1 EDCO Disk Grinder 50200-HD Head Assembly Replacement: 手順 23、 2の画像 2
    • Remove the head assembly.

  24. EDCO Disk Grinder 50200-HD Head Assembly Replacement, Reassembly tip: 手順 24、 3の画像 1 EDCO Disk Grinder 50200-HD Head Assembly Replacement, Reassembly tip: 手順 24、 3の画像 2 EDCO Disk Grinder 50200-HD Head Assembly Replacement, Reassembly tip: 手順 24、 3の画像 3
    • During reassembly:

    • Insert the new head assembly up into the bearing as far as you can by hand.

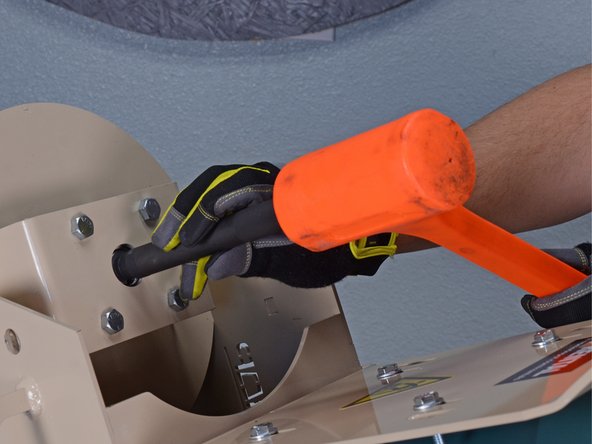
    • Use a dead blow hammer to knock the head assembly up into the machine until there is no play in the shaft spacer.

    • Ensure there is no play in the shaft spacer before tightening the set screws onto the new head assembly.

終わりに

To reassemble your device, follow these instructions in reverse order.

5 の人々がこのガイドを完成させました。

Sam Omiotek

メンバー登録日: 02/25/19

72,622 ポイント

288のガイドは作成済み

コメント 1 件

i have a leveler nob that feels seized. any advise would help

DUSTIN - 返信

コメントを追加

統計データ:

過去 24時間: 5

過去 7 日: 9

過去 30 日: 45

今までの合計 1,826