はじめに
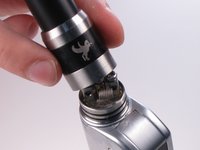
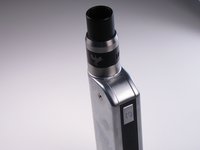
The 70 watt IPV Mini II has grown in popularity among those who vape regularly. The slim design makes the IPV Mini II easy to hold while still having plenty of power with the 70 watt capacity. However, when the IPV Mini II breaks, there is a limited amount of information available on how to repair the unit. Until now, most users would just throw the IPV Mini II away or pay someone to fix it for them. This guide provides the reader with the information to repair their IPV Mini II on their own.
必要な工具と部品


To reverse the process, simply follow the instructions in reverse.
For more information visit https://bevapehappy.com/
To reverse the process, simply follow the instructions in reverse.
For more information visit https://bevapehappy.com/
12 の人々がこのガイドを完成させました。
チーム

Texas Tech, Team 3-4, Rauch SU 2015 Texas Tech, Team 3-4, Rauch SU 2015人のメンバー
TTU-RAUCH-SU15S3G4
3 メンバー
2のガイドは作成済み